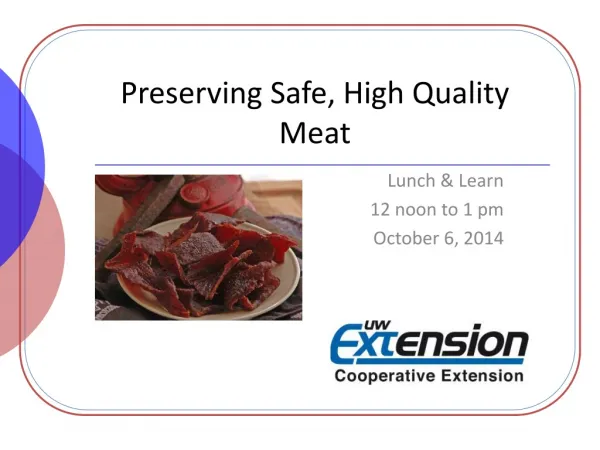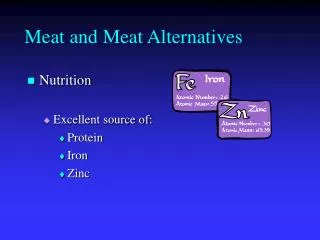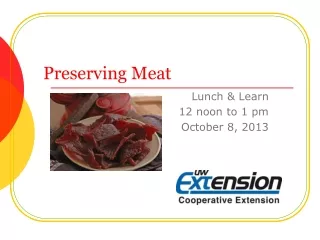
Preserving Meat
Preserving Meat. Lunch & Learn 12 noon to 1 pm October 8, 2013. Audio Setup. Computer (VoIP) Audio. Phone Audio. 1. 1. Click on the Audio Setup Wizard button in the Audio & Video Panel. Click on the blue telephone icon in the Audio & Video Panel. 2. 2.

Preserving Meat
E N D
Presentation Transcript
Preserving Meat Lunch & Learn 12 noon to 1 pm October 8, 2013
Audio Setup Computer (VoIP) Audio Phone Audio 1 1 Click on the Audio Setup Wizard button in the Audio & Video Panel. Click on the blue telephone icon in the Audio & Video Panel. 2 2 Dial the telephone number and PIN provided. Click to talk. 3 A icon by your name means your mic is on.
Need Help with Today’s Program? • Help Desk: 800-442-4614 • Phone in to today’s program • Toll: 630-424-2356 • Toll Free: 855-947-8255 • Passcode: 6774570# • Program will be archived: www.foodsafety.wisc.edu/preservation.html
Safe & Healthy: Preserving Food at Home There’s a new blog to help you stay up-to-date on food preservation information all year long. Subscribe via email to stay informed. http://fyi.uwex.edu/safepreserving/
Resources • How Do I... www.uga.edu/nchfp • Can Poultry, Red Meats and Seafoods • Dry Jerky • Freeze Fish, Meat, Poultry • UWEX Food Safety: A-Z index J=Jerky www.foodsafety.wisc.edu • Instructions for Making Safe Jerky at Home • Making Safe Jerky in a Home Dehydrator • Preparing Safer Jerky • UWEX: Canning Meat, Wild Game, Poultry and Fish Safely (B3345)
Start with Quality Meats • Preserve only those meats that have been handled under sanitary conditions • So You Got a Deer www.uwex.edu/ces/ag/issues/fmd/So_you_got_a_deer-G1598.pdf • Safe Deer Processing (videos) http://www.cwd-info.org/index.php/fuseaction/about.video • Handling Venison Safely • Wisconsin’s Wild Game – Enjoying the Harvest • Best quality will be achieved with lean meat, poultry, and fish • Handle meat, poultry and fish to avoid contamination with pathogens….and avoid contaminating other foods with meat juices!
Preserving Beef and Venison • Handle venison safely to prevent contamination • Consult DNR resources for current information on Chronic Wasting Disease (CWD) • dnr.wi.gov/topic/wildlifehabitat/regulations.html • Choose lean meat that is fresh and has been kept cold • Meat may be frozen, canned, or dried • Avoid freezing meat in grocery store tray-pack • Repackage using packaging suitable for the freezer: freezer paper, aluminum foil, freezer bags • Debone meat for easier freezing and thawing • Freeze lean meats for up to 12 months, cured meats or fatty cuts of meat for up to 3 months
Canning Meat Cells and spores of C. botulinum • Meat and other low-acid foods must be canned in a pressure canner to avoid botulism poisoning • Spores of Clostridium botulinumcan germinate, grow, and produce toxin when the conditions are right • Botulism toxin is one of the deadliest toxins known • Meat and other low-acid foods may contain the toxin without looking spoiled • A pressure canner uses high temperature to destroy botulinum spores • Oven canning and dishwasher canning are very unsafe practices!
Pressure Canning Weighted Gauge Dial Gauge • High temperatures (240°F and above) • Dial gauge measures incremental changes in pressure • Weighted gauge measures pressure at 5,10, or 15 pounds (psi) The pressure in these canners raises the temperature above the boiling point of water and allows safe processing of low-acid foods.
Steps for Pressure Canning • Place filled jars on a rack in a pressure canner filled with ~2 quarts of water • Seal canner by tightening lid, turn heat on high and vent for 10 minutes • After venting, close vent port and bring canner to pressure • 11 psi dial gauge • 10 or 15 psi weighted gauge • Process for the required time • Turn heat off and allow to canner to cool naturally • NEVER force cool a canner
Canning Meat • Safe canning times for meat: • Allow heat to penetrate to the cold spot in the jar and throughout the food • Reach temperatures needed to destroy harmful bacteria and spores • Trim meat of fat, bruises and heavy gristle • Use only the jar size and packing style listed • Consider canning venison in tomato-juice • Process for the time listed; adjust for elevation The darker areas of the state indicate elevations above 1,000 feet. Increase processing pressure from 10 psi to 15 psi for a weighted gauge canner. Process in a dial gauge canner at 11 psi.
Hot Pack or Raw Pack? (same processing time) Hot Pack • Meat roasted or browned • More meat in jars • Good color • Added flavor Left: Beef hot packed Right: Beef raw packed NOTE: the long processing times for meat ALLOW you to add a bit of onion, garlic or seasoning and still have a safe recipe Raw Pack Raw meat loosely packed in jars – no added liquid Quick & easy to do Image courtesy of Chris Kniep, Winnebago County
Poultry, Rabbit & Small Game • Carefully skin and dress wild game and game birds. • Remove fat, especially excess fat, on poultry and game – it quickly becomes rancid on freezing and interferes with canning. • Do not stuff poultry or game birds prior to freezing. • For best flavor, soak small game in brine prior to canning. • Can poultry and small game with or without bones.
Hot Pack or Raw Pack? (same processing time for pack method; longer processing time for bone-in poultry) Hot Pack • Bake until 2/3 done • Added flavor from browning and broth Left: Chicken hot packed Right: Chicken raw packed Raw Pack Raw chicken loosely packed in jars Quick & easy to do Image courtesy of Chris Kniep, Winnebago County
Canning Meat Mixtures Because of the long processing times for meat and poultry, many meat mixtures may be safely canned, using the processing times for meats. • Follow a hot-pack procedure • Mix meat with vegetables which require similar processing times • Do not thicken or add pasta, rice, or fat. An unsafe product may result!
Freezing Fish • Fish is highly perishable; store no more than 2 days. • Fish caught should be kept on ice or in cold water. Clean and gut fish within 24 hours. • Pre-treat prior to freezing to improve quality- • Dip fatty fish for 20 sec in ascorbic acid solution • Dip lean fish in salt brine • Packaging • Lemon-gelatin glaze: dip cold fish in lemon juice/ water/gelatin dip • Ice glaze: dip frozen fish in near-freezing ice water • Water: create a fish ‘popsicle’
Freezing Fish Freeze and store fish at 0°F or colder. • Up to 3 months for fatty fish. • Salmon, smelt, lake trout. The fat in these fish can oxidize and they can loose flavor if stored too long. • Up to 6 months for lean fish. • Perch, walleye, pan fish. Lean fish are better preserved frozen than canned.
Canning Fish Species of fish suitable for canning include catfish, Northern pike, salmon, smelt and trout. • Fish is usually canned in pint jars; extra care must be taken when canning in quart jars (smoked fish can only be canned in pints). • Process ½-pints for the time listed for pints. • Fish is a low-acid food and must be canned in a pressure canner. • Fish are raw-packed prior to canning. • The types of C. botulinum spores in aquatic environments are hard to destroy. Fish is processed for 100 min (pints) or more!
Making Safe Jerky Jerky can be made from beef, venison, pork or poultry. • Pork or wild game for jerky should be treated to kill the trichinella parasite prior to jerky making: • Freeze at 0°F (or colder) for at least 30 days • Partially freeze meat for easier slicing • Slice no more than ¼” thick • Trim and discard all fat • Marinade as desired • Ground meat can be used to make jerky. • Use only lean/very lean meat of 10% fat or less. • Prepare strips no more than ¼” thick. • Add dry spices to meat for flavor.
Drying Jerky • Blot marinated strips dry, and arrange on dehydrator racks or trays. • Dry in a dehydrator, or oven, preheated to 145°F or higher. • Begin checking at 3 hours. Dried meat is firm but flexible. Meat should reach an internal temperature of 160°F or higher. • Blot off any beads of oil with a clean paper towel. • Cool and package. Store 2 weeks at room temperature, up to 3 months in the freezer. • A safety-assured product is made by adding a post-drying oven heating step: 10 min in a preheated 275°F oven
Next Lunch & Learn November 5 – Food Safety & the Thanksgiving Meal Thanksgiving is a time for families to gather together. Join us for the latest food safety guidelines and tips for a successful meal. All slides and audio files are archived: www.foodsafety.wisc.edu/preservation.html