Canning- Is It Worth It?
180 likes | 319 Vues
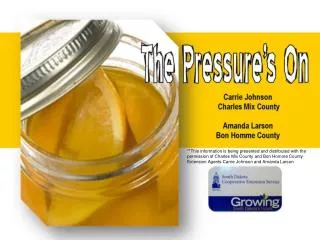
**This information is being presented and distributed with the permission of Charles Mix County and Bon Homme County Extension Agents Carrie Johnson and Amanda Larson. Canning- Is It Worth It?. Saves money, especially if you have your own garden Personal satisfaction

Canning- Is It Worth It?
E N D
Presentation Transcript
**This information is being presented and distributed with the permission of Charles Mix County and Bon Homme County Extension Agents Carrie Johnson and Amanda Larson
Canning- Is It Worth It? • Saves money, especially if you have your own garden • Personal satisfaction • Control sugar & sodium content There is a 20-fold increase in the value of produce grown compared to material costs! Colorado State University
Which Method Do I Use? • The canning method that is approved for a food depends on certain characteristics of the food. Foods are divided into two main categories, acid foods and low acid foods, for the purpose of canning. The term, “pH,” is a measurement of the acid level in a food. pH is measured on a scale from 1 to 14. The closer the pH value is to one, the more acid the food contains. A pH of 7 is neutral.
Which Method Do I Use? Depends on the type of food • High acid- water bath • pH of 4.6 or lower • Foods that contain enough acid to prevent the growth of the bacteria that causes botulism poisoning • Fruits, tomatoes, pickles • Low acid- pressure can • pH higher than 4.6 • Vegetables, meats, soups, combination foods Heat inactivates enzymes that cause changes in color, flavor & texture. It also destroys microorganisms.
Why Pressure Can Low Acids? Clostridium Botulinum • Bacteria that causes botulism • Forms protective, heat resistant spores • Requires higher temperatures for destruction • Pressure canning removes favorable growing conditions Food can contain toxin without showing signs with symptoms typically appearing within 12-72 hours!
Canning “Musts” • Canner functions properly • Consider headspace • Wash and sterilize jars • Correct processing times • Reputable recipes or sources Check dial gauges & canner parts every year if pressure canning!
Canning Supplies • Pressure Canner • Jars, Lids, Rings • Water Bath Canner • Jar Lifter, Lid lifter, funnel, head space guide
Boiling Water Bath Method • 6 inches hot or simmering water • Place jars on rack in canner • 1-2 inches of water over jars Do NOT use towels in place of a canner rack!
Boiling Water Bath Method • Begin processing time when full boil is reached • Adjust for altitude • When processing is complete, wait 5 minutes Cool 12-24 hours undisturbed
Pressure Canning • 2-3 inches hot or simmering water • Place jars on rack in canner • Put lid on canner with weight or petcock open Do NOT use towels in place of a canner rack!
Pressure Canning • Exhaust 10 minutes • Close vent or petcock • Processing time starts when pressure is reached • Adjust for altitude Altitude map is also located on the SDCES food safety site
Pressure Canning • When processing is complete, turn off heat • Remove weight or open petcock, wait 10 minutes Do NOT quick cool the pressure canner!
Sources • National Center for Home Food Preservation • Putting Food By – 2009 presentation Questions?
Helpful Websites Georgia www.uga.edu/nchfp/index.html South Dakota http://extfcs.sdstate.edu/foodsafetysite North Dakota www.ag.ndsu.nodak.edu/storage.htm Ball www.homecanning.com Presto www.presto-net.com Mirro http://wearever.com
Recipe- Peach Jam (reduced sugar) Ingredients 12 fresh peaches, pitted and chopped 2-4.5 cups white sugar (use 2 cups for reduced sugar) 1 (2 ounce) package dry pectin **When making preserves and jams, choose slightly under ripe, firm fruit. This recipe gives a jam with good color and consistency. Healthier, since skins are left on. Start with 2 cups of sugar, taste and add more sugar in ½ cup increments until you get desired sweetness. Directions 1. Crush 1 cup chopped peaches in bottom of large saucepan. Add remaining peaches, and set pan over medium-low heat. Bring to low boil, cook for 20 mins or until peaches become liquid. 2. Pour peaches into bowl, measure 6 cups back into pan. Add sugar, and bring to boil over medium heat. Gradually stir in dry pectin, and boil for 1 min. 3. Remove from heat after 1 min, and transfer to sterilized jars. Process in hot water bath canner for 10 mins. Let cool, and place on shelf.
Recipe- Hamburger Pickles Ingredients (Yield: ~7 pints) 4 lbs cucumbers 6 tbsp canning salt 4 ½ cups water 4 cups vinegar (white or apple cider, 5% acidity 14 heads fresh dill 3 ½ tsp mustard seed 14 peppercorns 1 clove garlic for each jar 1 small dried red pepper per jar Directions Wash cucumbers. Cut into ¼ inch slices. Combine salt, vinegar, and water in saucepan; bring to boil (this is the brine). Pack cucumbers into jars, leaving ¼ in headspace. Remove air bubbles. Add 2 heads of dill, ½ tsp mustard seed, 2 peppercorns, 1 clove garlic, 1 dried red pepper to each jar. Ladle hot brine over cucumbers, leaving ¼ in headspace. Remove air bubbles. Adjust two-piece caps. Process 15 mins in boiling water canner. Let cool, and place on shelf. **All pickles should stand 4-6 weeks after processing to cure and develop satisfactory flavor.
Recipe- Canned Stew Meat Ingredients beef or other meat suitable for stewing salt Broth: remove meat from cooking pan. Add 1 cup boiling water or broth for each 1-2 tbsp fat in the pan. Boil 2-3 mins. Do not add a thickening agent such as flour or cornstarch before canning. Directions cut into 1 ½-2 in cubes. Remove fat and gristle. Simmer meat in water to cover until hot throughout. Add ½ tsp salt to each pint jar, 1 stp salt to each quart jar, if desired. Pack hot meat into hot jars, leaving 1 inch headspace. Ladle hot cooking broth over meat, leaving 1 inch headspace. Remove air bubbles. Adjust two-piece caps. Process pints 1 hour and 15 mins, quarts 1 hour and 20 mins, at 10 pounds pressure in a steam-pressure canner. **When using a dial-gauge canner or processing at altitudes higher than 1000 feet above sea level, an adjustment in the pounds pressure must be made, please refer to an Altitude Chart
Recipe- Salsa Ingredients (Yield ~ 6 pints) 10 cups chopped, seeded, peeled, cored tomatoes (about 6 lbs) 5 cups chopped and seeded long green peppers (about 2 lbs) 5 cups chopped onions (about 1.5 lbs) 2.5 cups chopped and seeded hot peppers (about 1 lb) 3 cloves garlic, minced 2 tbsp cilantro, minced 3 tsp salt 1 ¼ cup cider vinegar Directions Combine all ingredients in a large saucepot, adding hot pepper sauce, if desired. Bring mixture to a boil. Reduce heat and simmer 10 mins. Ladle hot salsa into hot jars, leaving ¼ inch headspace. Adjust two-piece caps. Process 15 minutes in a boiling water canner. **Note: VERY IMPORTANT- When cutting or seeding hot peppers, wear rubber gloves to prevent hands from being burned