Download
1 / 3
30 likes | 58 Vues
Do you want want to proudly display your favorite bands on your jacket sleeve, or boast the talents you learned at camp on your backpack? Iron on patches for caps are an excellent thanks to express your individuality

E N D
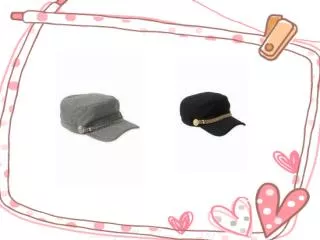
How to Iron on a How to Iron on a patch patch for caps for caps Do you want want to proudly display your favorite bands on your jacket sleeve, or boast the talents you learned at camp on your backpack? Iron on patches for caps are an excellent thanks to express your individuality - and they are also useful for hiding damaged or torn spots on your clothes and accessories. find out how to organize fabric for a patch, iron it on, and confirm it stays in situ after washing. Preparing to Iron on a Patch Preparing to Iron on a Patch Find out what sort of patch you've got. Some patches accompany glue on the rear, et al. simply have a cloth backing. Take an in depth check out your patch and choose whether you'll need additional materials. •Decorative embroidered fabric patches are usually thick, stiff, and have what seems like plastic glue on one side. These are often wont to cover ripped or discolored fabric. •Transfer paper patches are prints on one side of special paper, with a non-glossy paper side. These can't hold ripped fabric together and typically the material underneath will show through if it isn't applied to something white. •Patches that have a simple cloth backing can be attached using. •Patches that are meant to hide up holes or stains and are designed to blend in with fabric often accompany a paper backing that's achieved before the patch is applied. •Consider custom designing your own patch if you can't find one you like. Examine the material of your clothing or accessory. Fabrics like denim and cotton provide the simplest base for iron-on patches. As a general rule the material you select should be a minimum of as heavy because the patch. •Look at the material care label to ascertain whether it are often ironed (if not, there'll be a crossed-out icon of an iron). If there is no label, attempt to find out what material it's made from. •Be very careful with polyester fabrics, since applying the high heat necessary for ironing on patches can burn the fabric or cause it to get discolored. •Silk and other delicate fabrics are not good candidates for patches. Think about design and placement. Before your warmth up the iron, lay out your jacket, sash or backpack and choose where exactly you would like the patch to be placed. •If this is often the sole patch you plan to iron on this piece, put it during a tastefully prominent position. Make the location look intentional. •If you're planning on ironing on more patches, such as you would for a woman scout's sash or the other sort of collection, plan ahead to form sure there'll be room for extra patches.
•If you're employing a printable paper patch, remember that letters and other asymmetrical items will appear reversed. Ironing on the Patch Ironing on the Patch Lay the bottom item on a flat, heat-resistant surface. A board is beneficial, but if you do not have one, you'll also lay your item across a doubled-up towel on a sturdy table. •To ensure the item will provide an honest surface for the patch, iron it first. If it is a backpack or another item that's difficult to iron, do your best to rearrange it in order that a part of the material which will be receiving the patch is flat against a tough surface. Place the patch within the position you chose. The adhesive side should be flat against the bottom fabric. confirm that the patch isn't crooked. •On embroidered patches, the adhesive side is the underside. •On paper patches, the adhesive side is that the side where the image is printed. Place the image face down on the material. The paper backing are going to be peeled once the patch is ironed on. •If you're employing a fusible webbing, the fusible web backing should be against the material. •If you're employing a patch meant to blend in with fabric, you'll got to apply it to the reverse side of the article of clothing. Follow the instructions that came with the packaging. Heat up an iron. Turn it to the most well liked setting your fabric can tolerate. confirm the "steam" option is turned off, which your iron isn't filled with water. Place a skinny towel over the patch. lookout to not disturb the position of the patch. The towel will protect the patch itself and therefore the surrounding fabric. Position the heated iron over the patch and depress. Hold the iron there for about 15 seconds. Apply the maximum amount pressure as you'll by pressing down firmly. Remove the iron and permit the patch to to chill. Lift the towel and check to ascertain whether the patch is fixed on securely by gently rubbing at the sting with a finger, trying to lift it. If it lifts up a touch, replace the towel and press it with the iron again for 10 seconds. •If you're working with a paper transfer patch, wait until it's fully cool (leave it for 10 minutes), then carefully peel off the paper. Caring for Your Patch Caring for Your Patch Consider sewing round the edges. For a totally secure patch, use a stitching machine or a needle and thread to secure the patch to the material. This greatly reduces the probabilities that the patch will fall off. •Choose a thread that matches the patch.
•Don't attempt to sew around the edge of printable paper patches. Don't wash the quite necessary. Iron-on patches are meant to be permanent, but they are doing become loosened over time. lookout to not let the article get too dirty, since washing it's going to cause the patch to start out coming off. •If you are doing got to wash the item, hand wash it using cold water. Allow it to air dry.