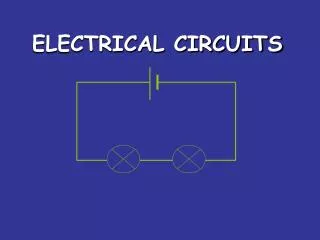
Electrical Circuits
Reinforce understanding of electric circuits with hands-on activities like Energy Stick, circuit-building, and circuit measurement techniques. Learn about series and parallel circuits. Engage students in interactive experiments for better comprehension.

Electrical Circuits
E N D
Presentation Transcript
Vanderbilt Student Volunteers for Science Training Presentation Fall 2017 Electrical Circuits
Important! • Please use this resource to reinforce your understanding of the lesson! Make sure you have read and understand the entire lesson prior to picking up the kit! • We recommend that you work through the kit with your team prior to going into the classroom. • This presentation does not contain the entire lesson—only selected experiments that may be difficult to visualize and/or understand.
I. Introduction • Wait to hand out materials until you have described the background information. • Write the following vocabulary words on the board and their corresponding symbols as dictated in the lesson manual • Electricity, Current, Simple Circuit, Series Circuit, Parallel Circuit • Explain the difference betweenstatic electricity and current electricity: static is a build-up of electrical charges that do not flow (e.g. lightning), and current is a moving electrical charge through a completed circuit • Divide the students so that there are seven groups (preferably in groups of 4).
Energy Stick • Show students one of the Energy sticks. • Put a hand on each of the foil ends of the Energy Stick. The stick will flash lights and buzz. • Tell students that the stick is activated only when an electrical circuit has been completed. Remove one hand to show the students note that the stick no longer flashes or buzzes. See lesson for explanation • Now have 2 or more VSVS members form a connected circle (by holding hands). Have 2 VSVSers each hold the foil at the opposite ends of the stick to complete a human chain of electricity. • Show them a “human switch” by having one member drop a hand and break the circle, and then rejoin. • .
Energy Stick contd. • Tell students to look at their Observation sheet and ask them if they can name some energy conversions when the stick is activated. Tell them to circle the correct answers – chemical to electrical (battery to electrical) and the electrical to sound and light. • If time permits at the end of the lesson, see how many students can form a circle and activate the Energy stick. Or do this with smaller groups and a VSVS member
IIa. Making a Simple Circuit • Hand out one bag containing circuit materials to each pair. • Tell students to look at the grids and its components. • Compare it with Diagram #1 on the instruction sheet. • Tell them to remove a #3 snap connector and look at its underside. Point out the flattened wire connecting the two snaps. Diagram #1 Continued on next page
IIa. Making a Simple Circuit (Con't) • Have pairs of students build simple circuits by following Diagram #2. • Tell them not to connect one of the #3 snaps until told to do so. • Ask them if circuit is complete (No, because the light bulb is not on) • Have them connect the last snap as in Diagram #2 (note that the bulb now glows) Diagram #2
III. Activity: Using a Switch • Tell students to replace one of the #3 snaps with a switch (Diagram #3). • Have them turn the switch to the on position and see how it completes the circuit (the light bulb glows). Diagram #3
IV. Measuring Current • Show the students the meter and tell them it can measure voltage and current. • Show them the 3 positions • Add the meter to the circuit (Diagram #4) and move the switch to the 1A setting • Turn the switch on and measure the current. • Record the measurement in amps (A). Diagram #4
V. Series and Parallel Circuits • Explain what a series and parallel circuit looks like. • Tell the groups to split into pairs. Tell one group to build a series circuit (Diagram #5) and have the other group build a parallel circuit (Diagram #6). • Measure the current flowing and record the data. Diagram #5 SERIES CIRCUIT Diagram #6 PARALLEL CIRCUIT
V. Series and Parallel Circuits (Con't) • While the students are assembling their circuits, have a VSVS member connect the simple circuit design and set it aside for the VSVS team • After the students have completed their circuits, have the two pairs within each group show each other what happens to the brightness of the second bulb when one bulb is unscrewed. • Go around the room and show them the bulb brightness in the simple circuit so they can compare brightness to that as well. • Have the students record their observations on their observation sheets
V. Series and Parallel Circuits (Con't) • Have the pair with the parallel circuit rearrange the meter as in Diagram #7. • Ask the students to measure and record the current in the new position. It should be about double the previous measurement. • The first setup measures current through both bulbs, while the second measures only through the second bulb. Diagram # 7
V. Series and Parallel Circuit Discussion and Review • A series circuit only has one pathway for the electric current – a break in the circuit stops the flow of electric current. • A parallel circuit has multiple pathways for electric current to travel – if one pathway is broken current will still flow through the other pathway.
Vb. Electrical Energy Conversions • Ask the students what energy conversions are taking place in their circuits. Answer should include: • Electrical to light • Electrical to thermal (feel the light build while the circuit is closed) • Ask the students what other electrical energy conversions could be possible? Answers should include: • Electrical to mechanical • Electrical to sound • Electrical to chemical • Show students the hand generator. Rotate the handle to activate it. Ask students what energy conversions are taking place in this device. • Have them circle all the conversions on their observation sheet.
Clean Up • Have the students reassemble the circuit components according to diagram # 1 and place the light bulbs in small Ziploc bags. • Make sure all grids are packaged properly. • Place the grids between the sheets of bubble wrap.