Download

1 / 79
790 likes | 916 Vues
This guide provides an introduction to the Dreamweaver environment and basic PHP coding. Learn how to create a web page that incorporates simple HTML and PHP, comparing server-side PHP with client-side JavaScript. The guide covers workspace preferences, file extensions (.php vs .html), and the essential concepts of HTML tags and color coding. By the end, you'll have the foundational skills to begin designing and coding dynamic websites using Dreamweaver and PHP.

E N D
Goals • Our goals are • To become familiar with the Dreamweaver environment • To introduce some basic HTML • To introduce some simple PHP • To compare simple PHP (server-side) code with simple JavaScript (client-side) code • We will do so by designing a page that looks like the following.
Possible Preliminary step 1: After a fresh install, Dreamweaver may ask if you want to work in the Designer or Coder version of its environment.
You can change your workspace preference by going to Edit/Preferences on the menubar and clicking on the Change Workspace button
Use the radiobutton to choose the desired workspace preference. Click OK and OK.
Possible Preliminary Step 2: After a fresh install, Dreamweaver may ask you for a serial number.
Starting the page: Next you can choose whether to open an existing page or create a new one. When creating a new page, you must select the type of page.
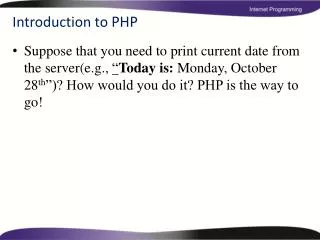
PHP versus HTML: The php extension • PHP code is embedded within HTML code. • However, a page with PHP code must have the php extension and not the htm or html extension. • Because the PHP is embedded within HTML, we will still often refer to the file as an HTML document. • Why the php extension?
Why the php extension: a note about clients and servers • There are two main actors involved in viewing a webpage. • The viewer’s computer acts as a client. When surfing or navigating to a page, the client machine requests a page be sent. • With the webpage is associated a web server, which handles the request and delivers a response (the page) to the client. • The php extension informs the server that it must do more than just send the file. Moreover, there must be an associated PHP server to perform this extra work.
Result of starting: The code view of the new page. Though we are making a php file, thus far we have a simple HTML file.
HTML • HTML stands for Hypertext Markup Language. • Hypertext refers to the presence of links in a page. The links allow a viewer to move directly to another document that may have a different location. • Markup Language refers to a coding system that indicates how a document is structured or how it should be rendered (using ordinary printable characters rather than special control characters).
HTML Tags • To distinguish between text and the marking up thereof, HTML uses tags. • HTML tags are keywords placed within angle brackets <>. • Many HTML tags work in pairs. There is an opening tag and a closing tag which impose their effect on the hypertext enclosed between them. • The closing tag has the same keyword as the opening tag but the keyword is preceded by a slash.
The example above shows some HTML tag pairs. • The <html> and </html> pair surround the HTML document. • The <head> and </head> pair enclose some explanatory information regarding the document. • The <title> and </title> pair contain the document’s title. • The <body> and </body> pair house the information that is to be rendered on the page. • Note the hierarchical structure of tag pairs within tag pairs (also called nesting).
To change the page’s title, edit either textbox on the document toolbar or the text between the <title> tags.
To add a comment, place the cursor where you want the comment and go to Insert/Comment on the menubar. A traditional comment has no effect on either the structure or rendering of the document. It is seen only when the code is viewed and is used to describe the page or some feature thereof.
To change some of the page’s features such as the font or the background, go to Modify/Page Properties on the menubar.
The resulting dialog box allows one to set various properties.
Click on the palette button next to Text color to choose a font color.
Color Codes • One could also enter the color code for one’s choice in the corresponding textbox. • In HTML color codes use the RGB scheme in which one determines the amount of red, green and blue that will be combined to make the color by choosing a number between 0 and 255. • The numbers are expressed as hexadecimal numbers (base 16) and concatenated (placed one after another) and preceded by a pound sign #.
La Salle logo blue color code calculation Here we have used Adobe Photoshop to determine that Red=3, Green=45, and Blue= 87.
La Salle logo blue color code calculation 2 To convert from decimal numbers to hexadecimal numbers, you can use the calculation under Start/Programs/ Accessories/Calculator. Put it in Scientific view and enter the decimal number to be converted. And the click on the Hex radio button. The result should have two hexadecimal digits (0-9 or A-F). If the result has only one digit, a “0” should be placed in front of it. Putting the Red, Green and Blue results together yields La Salle logo blue: #032D57 La Salle logo yellow: #FFD100
Use the Browse button and the resulting dialog box to locate an image file to use as a background.
Embedded versus referred to • When one inserts an image in a Word document, the image is embedded into the Word document. As a result if you want someone to view the document, you only need to send one file. • When one inserts an image in an HTML document, the image is referred to by the HTML document. As a result if you want someone to view the document, you must send two (or more) files.
Relative versus Absolute Path • When the HTML document refers to the image file, it provides a path so that the image file can be located. • A file’s path may be absolute (a complete (full) path or an explicit, full URL, e.g. http://www.lasalle.edu/index.htm) or relative (a shorter path that starts with the same location as the file doing the referring). • Image files are generally referred to by a relative address. • The previous warning message occurred because we had not saved the HTML file. Since the HTML file had no location, a relative address could not be provided for the image file.
Note the address given refers to the computer’s C drive. This address may be useless when the file retrieved from the server.
Style tags • The new additions were placed in a style tag in the head portion of the document. • The actual style code was then placed inside a comment within the style tags. • This approach is used to deal with various versions of browsers. • If the browser understands the style tag, it knows to look in the comment for the style code. • If the browser does not understand the style tag, then it will ignore the style code since it is placed in a comment.
Cascading Style Sheet • If one is making a website consisting of many web pages which will have the same style, then a better approach is to place this style code in a separate file called a cascading style sheet and have all of the individual pages link to it. • This way we only have to change one file to update the style of all of the pages.
Next use the File/Save As option on the menubar and the resulting dialog box to save the file. Recall it should have a php extension. (do not have spaces in the file name)
In this case, Dreamweaver automatically updated the path to a relative path.
One can see what the page will look like in Design view or see code and design simultaneously in Split view.
Use Insert/Table on the menubar and the resulting dialog box to make a table with 4 rows and 2 columns.
Highlight the table and click on the arrow next to Properties at the bottom to expand the Property inspector
Use the Property inspector to alter width, background color and alignment.
Click in the top cell and drag across to highlight both cells in the top row, then go to Modify/Table/Merge Cells
Table with merged cells in Design and in Code View (merging is achieved by colspan attribute in code)
Table Tags • The main tags involved in rendering a table are • The <table> </table> tags which “delimit the table” – that is, indicate where the table code begins and ends. • The <tr> </tr> (table row) tags which delimit a row within the table. • The <td> </td> (table data) tags which delimit a cell within a row.
Tag Attributes • Note that the merged cells were achieved using the keyword colspan as follows <td colspan="2"> </td> • The above code is an example of a tag with an attribute. • In the newer (more compliant) rules for HTML code attributes are set using a equal sign and the value in quotation marks.
Place the cursor in the top row, go to Insert/Image on the menubar, and use the dialog box to locate the La Salle logo image file Note that the image preview tells one the size of the image.
Logo added to first row There is a web site navigation convention that the logo is a link to the home page. So let’s do that next.
Right click on the image, go to Make link on the context sensitive menu, enter La Salle’s homepage in the URL textbox.
Code for hyperlinked logo • The resulting code is <a href="http://www.lasalle.edu"> <img src="La-Salle-Logo-2003-540-7406.gif" width="558" height="144" border="0"> </a> • Where <a> is the anchor tag and its href attribute is set to the destination URL. • And where <img> is the image tag with its src attribute set to the image file name (a relative path). • Note that the image tag is not a paired tag.
Aspect Ratio • If one were to change the image size attributes, width and height, they should be changed proportionately to maintain the image’s aspect ratio. • Both numbers should be multiplied (or divided) by the same amount. • Alternatively, if one attribute is left unspecified, then the other will be set to maintain aspect ratio.
Entering Text • In the remaining rows we will display the date using HTML, PHP and JavaScript. • In the first column, enter the terms “HTML”, “PHP” and “JavaScript” respectively. • In design place the cursor in the appropriate cell and type. • In code, identify the appropriate <td></td> pair and type code between the tags.
Place the cursor in the second column, second row and go to Insert/Date on the menubar and use the dialog box to select the desired format.
HTML Date Code Version: just text. The file would have to be updated each day to display the correct date.
With the cursor in the second column of the third row, go to Insert/PHP Object/Code Block on the menubar.