Hillside Elementary Software/Robotics Projects
This guide walks you through the essential phases of starting a software-based project in robotics. You'll learn about the critical components of planning, requirements gathering, design, development, testing, and demonstration. Each phase is broken down into specific actions, ensuring you understand the purpose, objectives, and necessary tools. You'll also see examples of how to document your design, write pseudo-code, and incorporate peer reviews to enhance your work. Perfect for students at Hillside Elementary looking to embark on exciting robotics projects!

Hillside Elementary Software/Robotics Projects
E N D
Presentation Transcript
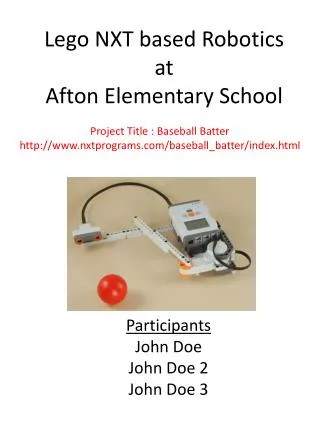
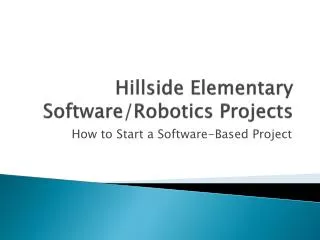
Hillside ElementarySoftware/Robotics Projects How to Start a Software-Based Project
Project Phases: PLANNING REQUIREMENTS DESIGN TEST DEMONSTRATE DEVELOPMENT
Project Phases: Planning • Purpose: Why are you doing the project? • Customer: • Who are you doing the project for? • Who determines if your project meets the purpose & goals? • Goals & Objectives: What are you trying to accomplish? • Tools: • What type of software, if any? • What kinds of building materials are needed? • Team Members: Who will help you with the project? • Budget: What will it cost to accomplish your project? • Schedule: When does the project need to be completed?
Project Phases: Requirements • What is your “creation” required to do? • Be specific(Talk through examples.) • Define Assumptions(Talk through examples.) • Discuss requirements with your customer. • Are there any safety concerns? • Document Requirements: Be able to write requirements and assumption down. • Have peers review and give suggestions. • Customer should be able to agree to your ‘requirements document’.
Project Phases: Design • Software • Write pseudo-code. • Break project down into single-action steps. • Be able to write these down. • Peer review: submit your review to someone else to review for mistakes and/or suggestions. • Hardware • Document Design: Make a drawing or draft a document explaining design. • Verify measurements. • Define materials to be used • Re-design: Update design based on new requirements or software/hardware limitations.
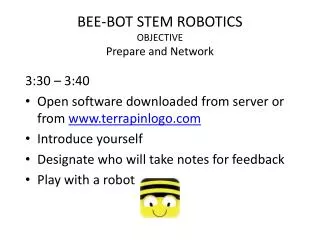
Project Phases: Development • Software • Write Source Code • Translate pseudo-code into software programming language. • We are using Lego’s NXT software. • Simulate Code: some software tools allow this • Integrate software (code) with hardware interface (Lego computer) • Hardware • Gather Materials. • Start building! • Update drawings to make them match your hardware creation. • Re-Design: Update design based on new requirements or software/hardware limitations.
Project Phases: Test • Peer Review: Have someone else review your “creation” to make sure it meets requirements. • Try out your “creation.” • Grade your “creation” • What does work? • What does not work? • What works, but could be better? • Re-Design: Update design based on test notes.
Project Phases: Demonstrate • Present design to customer. • Demonstrate your “creation” in action. • Use Presentation Tools • Microsoft PowerPoint Slides • Poster Boards • Microsoft Word report booklets • Others? • Highlight strengths. • Discuss Shortcomings honestly. • Why your project may not meet original requirements. • Stay positive. • Provide Support Materials • Drawings • User Manuals • Test Data • Have fun with it. • Let the customer take you out for Ice Cream!
Project Phases: PLANNING REQUIREMENTS DESIGN TEST DEMONSTRATE DEVELOPMENT
DESIGN PHASE: SOFTWARE • Pseudo-Code • Break project down into smaller tasks. • Break smaller tasks down into single-action steps. • Assign a value (assign sound file). • Detect a sensor. • Make a decision (if-then-else) • Repeat an action or sequence (do-while loop) • Be able to write these down. • Example: • Project: Robot drives straight and turns right to avoid object.
DESIGN PHASE: HARDWARE • Drawings • Take measurements. • Define materials to be used. • Determine quantities for materials based on size of design. • Sketch design with pencil and paper. • Can list all materials & quantities on drawing. • Can list any notes on drawing. • Can refine drawing with computer tools. • Drawings can be more than 1 page. • Example Drawing:
DESIGN PHASE: HARDWARE 8 INCH NOTES: Do not glue Legos together. Color can be different. 8 INCH MATERIAL LIST: (LOTS) LEGOS (4) WHEELS MOTOR (2) SENSORS 2 INCH 2 INCH RADIUS 12 INCH
RUBBLE TROUBLE INITIAL CHALLENGE: • Choose 1 of the 2 challenges. • A 3-dimensional picture of the game board has been provided to give you an idea about what it will look like in real life. • ROBO refers to the robot, for the sake of these challenges. • Your design should include an explanation or drawing that includes the following: • Which sensors you are using to navigate ROBO. • The attachments you would build to complete the challenge that you choose. • Your pseudo-code can be either hand-written or typed. • BE SURE TO INCLUDE YOUR NAME AND GRADE ON YOUR DESIGN PACKET. • Your design packet is due on Tuesday, October 29 to Mrs. Garland.
RUBBLE TROUBLE, CHALLENGE #1: Navigate ROBO from its starting location to the bottom-left corner of the game board by following the red arrows. Once ROBO is in front of the red box, hang an object of your design on the wall of the game board at the location designated by the red box. (The object MUST hang on the wall, i.e. be fully supported by the wall.) This is to simulate a robot hanging a portable antenna in a high location above a rescue sight to improve communication links. ROBO
RUBBLE TROUBLE, CHALLENGE #2: Navigate ROBO from its starting location to the bottom-left corner of the game board by following the red arrows. Once ROBO has reached the yellow box, ROBO is to move up the game board relocating all red and black game-pieces into a pile located inside the purple box. This is to simulate a robot clearing rubble from a damaged building. The student should include a drawing of the device the robot uses to collect/move the game pieces. ROBO