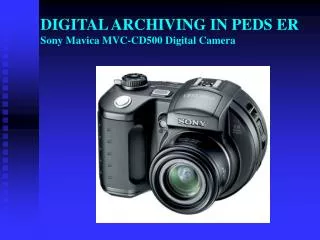
The Sony Mavica FD85 Digital Camera
540 likes | 713 Vues
The Sony Mavica FD85 Digital Camera. Presented by the Klein ISD Instructional Technology Team Linda Davis – Revised November, 2002. Thank You!. Originally Presented by the Center for Teaching and Learning Central Missouri State University

The Sony Mavica FD85 Digital Camera
E N D
Presentation Transcript
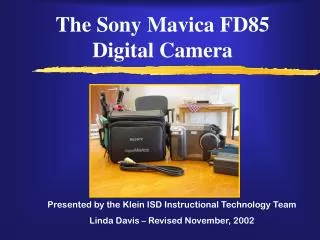
The Sony Mavica FD85 Digital Camera Presented by the Klein ISD Instructional Technology Team Linda Davis – Revised November, 2002
Thank You! Originally Presented by the Center for Teaching and Learning Central Missouri State University Used and revised with permission by Klein ISD Instructional Technology Team
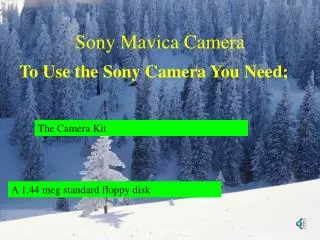
Introduction: • This tutorial is designed to introduce you to the basic features and operation of the Sony Mavica FD85 digital camera.
Introduction: • An instruction booklet is included with each camera
Capabilities: • This camera can take still images, moving images and play them back for you.
Capabilities: • A number of special effects are available for still images including: • Black and white • Sepia • Negative art • Solarize
Capabilities: • Images are stored on a regular computer floppy disk • Images can be inserted into documents, web pages presentations or attached to email messages
Capabilities: • The ease of using this camera makes it a very effective academic tool. Use it to: • Create step by step tutorials • Demonstrate a procedure • Project images for large classes
Capabilities: • Depending on the battery a full charge can operate: • 150 minutes-- NP-F330 • 210 minutes-- NP-F550
Capabilities: • A charger is included with each camera
The number of still images on a floppy disk is determined by the image size… • 6 images--1280 x 960 • 10 images--1024 x 768 • 30 images--640 x 480 • The camera is set at 640 x 480 by default.
The time limit of movie images is determined by the image size • 15 seconds--320 x 240 • 60 seconds--160 x 112 • Camera is set at 160 x 112
Prepare the Camera for Use: • Pull the gray tab to the right for installation Load the Battery
Prepare the Camera for Use: • Insert the disk as shown here by pushing gently until it clicks.
Prepare the Camera for Use: • Turn the power on by pushing down on the green button while sliding the switch right
Note: Power automatic cuts off after 3 minutes of non-use.
Prepare the Camera for Use: • Each of the choices on the slide bar on the left - Play, Still and Movie - have a different menu applicable to that option
Using the Menus … • Menu choices are made by moving the round menu button
Click on the left/right or up/down sides of the menu button until a menu item is highlighted in yellow • Click on the center of the menu button to select.
Prepare the Camera for Use: • Continue pressing up until Disk Tool is highlighted, center click.
Prepare the camera for use: • Press right on the menu button (note the arrows show when there are more options available.) • Press up on the menu button until Format is highlighted, center click
Prepare the camera for use: • Press up to highlight OK, center click. • You are now ready to take pictures.
Prepare the camera for use: • Menu button will be the same for using all of the other options
Taking pictures: • Slide the option bar to Still
Remember to remove the lens cap by squeezing on the buttons on the side of the lens cover • Keep the cover on when not in use to protect the lens!
Focus the camera by sliding the focus button left to right. • View what the image will look like on the LCD screen.
Taking pictures: • To freeze the image - hold the shutter button down slightly • Completely press the shutter button to save the image
Taking Movies: • To record a movie, move the option bar to movie • Hold the shutter button down to record • Release to end
To Review Your Pictures: • To see what you have recorded, move the option bar to Play.
To Review Your Pictures: • Press up on the Menu Button to highlight the left/right button • You may scroll through all of your images by clicking the left/right button
To Review Your Movies: • For Movies, a play button is available above the left/right button
To Delete Pictures: • Find an image you don’t want to keep?
To Delete Pictures: • In the Play mode, use the Menu Button to highlight delete, center click. • Highlight OK, center click
To Use Special Effects: • While in the Still or Movie option, use the Menu Button to choose Effect
Scroll up to P. Effect • Choose your option • Turn the effect off the same way
To Set the Timer: • On the menu bar select the icon on the farthest left. • Center click
The image will be recorded in 10 seconds. • The Self-timer light will flash until the picture is taken.
To Charge the Battery: • The time remaining on the battery will be shown in the upper left corner of the LCD screen.
When the battery needs charging, connect the DC connection plug into the camera with triangle mark facing up.
Connect the power cord to the adapter and then into the wall outlet • An orange light next to the power on/off switch will be lit while it is recharging
View Images on a Television: • Set the mode on the TV to VIDEO (input or AV1,2) • Turn off the TV
Connect the A/V connecting cable to the camera and the TV • Turn the TV on and start playing images
To Remove Floppy Disk: • Push left on the disk eject bar while pulling down