Download
1 / 53
530 likes | 635 Vues
Student Employment Student Training . Note: This is a template that can be utilized to create your own institutional specific Student Employment Student Training presentation.

E N D
Student Employment Student Training Note: This is a template that can be utilized to create your own institutional specific Student Employment Student Training presentation. We strongly recommend that you walk thru this documented step-by-step training documentation and customize to fit your specific processes and needs.
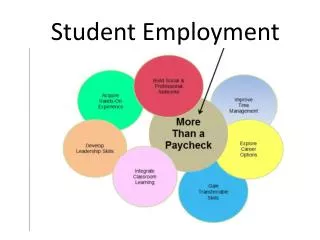
Nelnet Student Employment • Jobs + Timesheets = Total Solution • Jobs helps schools automate the job posting, hiring, and reporting process for students, employers, and administrators. • Timesheets helps schools automate the time sheet submission and approval process for students, employers, and administrators. • Jobs and Timesheets are seamlessly integrated.
Automated notices Online applications 24-hour service Web accessibility Eliminated paper forms Job search skills development Nelnet Student Employment JobX Benefits for Students:
Automated notices Award balance display Never a lost time sheet Web accessibility Eliminated paper forms Full work history Deadline reminders Nelnet Student Employment Timesheet Benefits for Students:
Institutional Specific • Your site has YOUR Institution’s look and feel • Your site has YOUR Institution’s accounts, departments, etc. • Your site is configured to YOUR Institution’s processes
Today’s Demo • Student finds and applies for job • Employer hires student (implied) • Student enters time
Find A Jo b
Navigate to http://paine.studentemployment.nelnet.net • Click ‘Students’
Click ‘Shop for A Job’ • To go directly to a recently posted listing, click the Job Title in the ‘Recently posted jobs’ section
Quick Search: A search containing pre-defined criteria • Click ‘Quick Search’ for each type of search • Click ‘Advanced Search’ to define your own criteria
Click the Job Title to view details • For help, click the ‘i’ • To start another search, click ‘Run a New Search’, located under the search results
Click the ‘Click here to apply for this job’ link • To return to the search results, click ‘Return to search results’ • To view additional help information, click the ‘i’
Fill out the questions on the application • USE YOUR APPLICABLE STUDENT ID!!!
To continue without printing, click ‘Student Employment Home’ on the NavBar
Navigate to http://paine.studentemployment.nelnet.net • Click ‘JobMail’
Enter your Institutional e-mail address & Password • Select “Log In”
Click ‘View/Modify’ to add criteria for each criteria • You may set search criteria for Employers, Job Categories, and Time Frames
Click ‘add’ next to each item you wish to add to your search.
If you would like to add information about yourself, click ‘Edit My Profile’
To edit your biographical information, click ‘Update User Info and Password’
To change your graduation year, click ‘Edit Info’ under ‘JobX Student User Info’ • To return to the Student Employment Home page, click the link in the NavBar.
You’re Hired! Now what do you do?
To access your timesheets, first click the ‘Students’ link from the Student Employment Home page.
IS THIS YOUR FIRST TIME? IF SO, CREATE AN ACCOUNT! • If this is the first time you’re entering timesheets, click ‘click here’ in the login box.
Check your e-mail. • Click the link in your e-mail. You can also copy and paste it • into your browser if clicking the link does not work.
Click the link for students to automatically log in and continue to your list of jobs.
IF YOU HAVE AN ACCOUNT, LOG IN WITH YOUR E-MAIL ADDRESS AND PASSWORD (Paine Student ID)
If this is the first time you are entering a timesheet for the current pay period, click ‘Start Timesheet’. If you have already entered time for the current pay period, the link will be labeled ‘Go to Timesheet’.
You may optionally add break time if needed. • Click ‘Add’ to save your time entry.
If you are finished entering time, click ‘Return’ to return to your list of jobs. • If you wish to log out, click the ‘Log out’ button and you will return to the Student Employment Home.
Done Entering Time? Hand It In!