Download
1 / 44
440 likes | 536 Vues
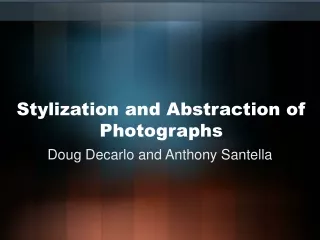
Explore the art of stylization by simplifying and decorating objects to create your own unique style. Learn to add decorative details and make objects your own. Follow step-by-step guidance on how to stylize a fish, bird, flower, and tree. Plan and create mandala thumbnail sketches using collage and mosaic techniques. Dive into Zentangles, transfer images onto styrofoam, and print your designs to bring your artistic vision to life. Enhance your drawing skills and create mesmerizing artwork with a focus on stylization.

E N D
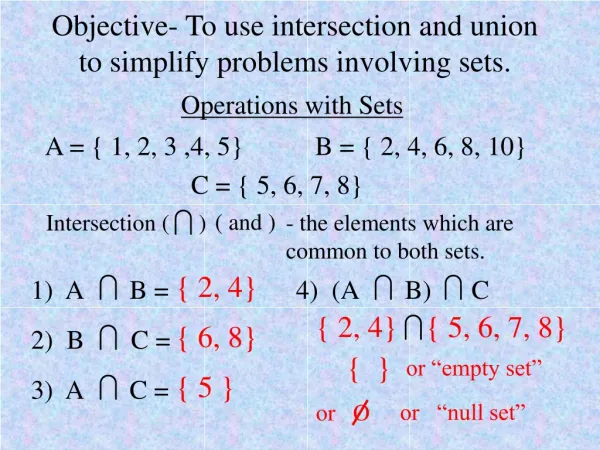
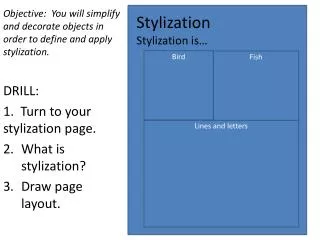
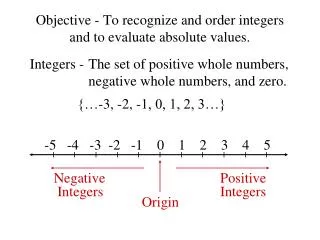
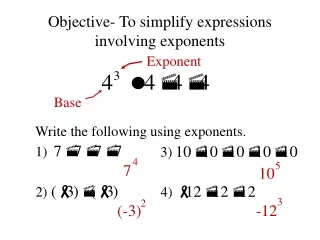
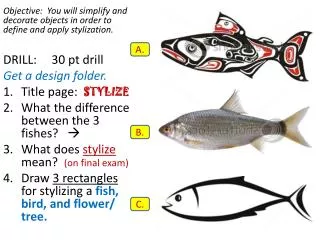
A. A. Objective: You will simplify and decorate objects in order to define and apply stylization. DRILL: 30 pt drill Get a design folder. • Title page: STYLIZE • What the difference between the 3 fishes? • What does stylize mean? (on final exam) • Draw 3 rectangles for stylizing a fish, bird, and flower/ tree. B. C.
Sit in actual assigned seat. • Do class work or you will have a 45 minute detention to make up your time. • Today you will stay seated until the bell.
StylizationTo Stylize is to………. And……… Bird Fish Flower or tree
styl·i·za·tion is… • Adding decorative details to make it your own style.
Simplify the fish. • Add details and decorations to it.
Steps: 2. Simplify into easy lines, less detail 3. Add Designs 1. Look at realistic flower
Period 5Turn in your sketchbook now! Teona Crystal Cathy Kevin Matthew Due today! Anna Greg Tianna Jordan Malik
Period 4Turn in your sketchbook now! Jake B. Destiny Katerena Jake M Due today! Dilan Ryan Kevin Lauren
StylizationTo Stylize is to………. And……… Bird Fish Flower or tree
Stylize a Letter Bottom of Stylization Page: 1. Draw a simple letter. 2. Draw 4-7 lines that break up page. 3. Look at packets to stylize and add decoration to each space.
Planning for your Mandala: Collage Mosaic Mosaic Objective: You will list ideas in order to plan your mandala thumbnail sketches. DRILL: (10 pts graded today) Write the underlined words, then answer. • Which animal(s)/ natural object(s) are you going to draw? (2 minimum) • List your color scheme (3-5 colors): • Which collage technique(s) are you going to use? • What lines, shapes, or designs do you want to draw? • Which materials will you use? Pencil, colored pencil, paint? • Look at every other page in your sketchbook for other ideas: Shade Shade Shade Shade Mixed Paper Shade
Objective: You will use previously learned skills in order to combine them in a final mandala. Create a minimum of 2 sketches: • Minimum of 2 animals and/ or natural objectsfrom an image. • 5 spaces for shading/ value. • Minimum of 3 spaces for collage. • Minimum of 10 spaces. • Other designs or images of your choice. • Must include a circle!
Assignment Checklist: Thumbnail SketchChecklist: T1 T2 • Mandala Day One • Value • Applying Value (flower) • Basics of Drawing • Bird with shapes • Deer – Proportions • Thumbnail Sketches • Collage Techniques • Does it have 2 animals and/ or natural objectsfrom an image? • 5 spaces for shading/ value (marked) • Minimum of 3 spaces for collage. (marked) • Minimum of 10 spaces. • Other designs or images of your choice. • Must include a circle! • Does it have a rectangle around it to show paper edge?
Steps on big paper: Collage Mosaic Mosaic You will only get one piece of paper. Draw lightly and erase. Flip over if necessary. • Put your name on it small in corner. • Trace circle (not in middle) • Divide your spaces up with lines and shapes. (10 or more) • Label sections. • Look at image to draw your animal or natural object. Shade Shade Shade Shade Mixed Paper Shade
ASSIGNMENTS TO WORK ON: Mandala Day One Value Applying Value (flower) Basics of Drawing Bird with shapes Deer – Proportions Thumbnail Sketches Collage Techniques www.gaugerfunofart.pbworks.com
1ST Period sketchbooks: • Taylor Carroll • Rashard Smith Due today! Turn them in now!
Period 4Turn in your sketchbook now! Jake B. Destiny Katerena Jake M Due today! Dilan Ryan Kevin Lauren
Period 5Turn in your sketchbook now! Teona Crystal Cathy Kevin Matthew Due today! Anna Greg Tianna Jordan Malik
Zen tangles When you create a Zentangle, you create a beautiful piece of art. You also can deliberately create a mood, a focus, a state of mind. Creating a Zentangle is an easy to understand process of simple deliberate strokes which build on each other in beautiful, mesmerizing and surprising ways.
Stylize a Letter Bottom of Stylization Page: 1. Draw a simple letter. 2. Draw 4-7 lines that break up page. 3. Look at packets to stylize and add decoration to each space.
How to Transfer Image Objective: You will follow along with demonstration in order to learn how to make a print. • Take a piece of white transfer paper from corner of table. • Trace your letter. • Flip it over, put it on the styrofoam. • Use ball point pen to trace design. • A line impression will show up on the styrofoam. • Take off transfer paper. • Re-draw into the styrofoam with ball-point pen.
Directions for Printing Finish the groove on your styrofoam. Mix a color to print. Preferrably light, so that you can create a visible Art Element on top of it. Paint one coat of paint onto styrofoam. Use old ball point pen to carve paint out of groove. VERY IMPORTANT. Flip over plate and press on artwork in space created for your print. WORK ON YOUR PLAN/ LARGE ARTWORK. GET ON BIG PAPER.
TODAY’S GOAL: • ***Print 2 practice prints in to your sketchbook. We will use them tomorrow. • Transfer your plan to large paper. • Draw rectangles for letters. • Lightly label - LINE, SHAPE, COLOR, VALUE, STYLIZATION, SCRATCH ART, and PRINT. • Create your scratch board. • Draw detailed letters in all boxes except your scratch art and print box. • Create your line, shape, color, value, AND STYLIZATION artworks.