Introduction to Writing Java GUI Programs
140 likes | 160 Vues
Learn the basics of creating GUI programs in Java through lectures. Explore event handling, AWT, Swing, and GUI class hierarchy. Hands-on practice included.

Introduction to Writing Java GUI Programs
E N D
Presentation Transcript
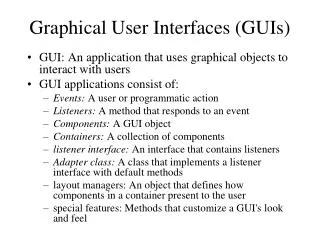
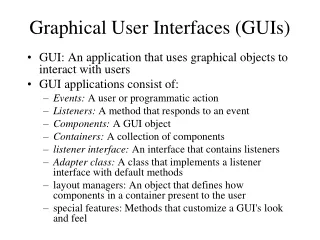
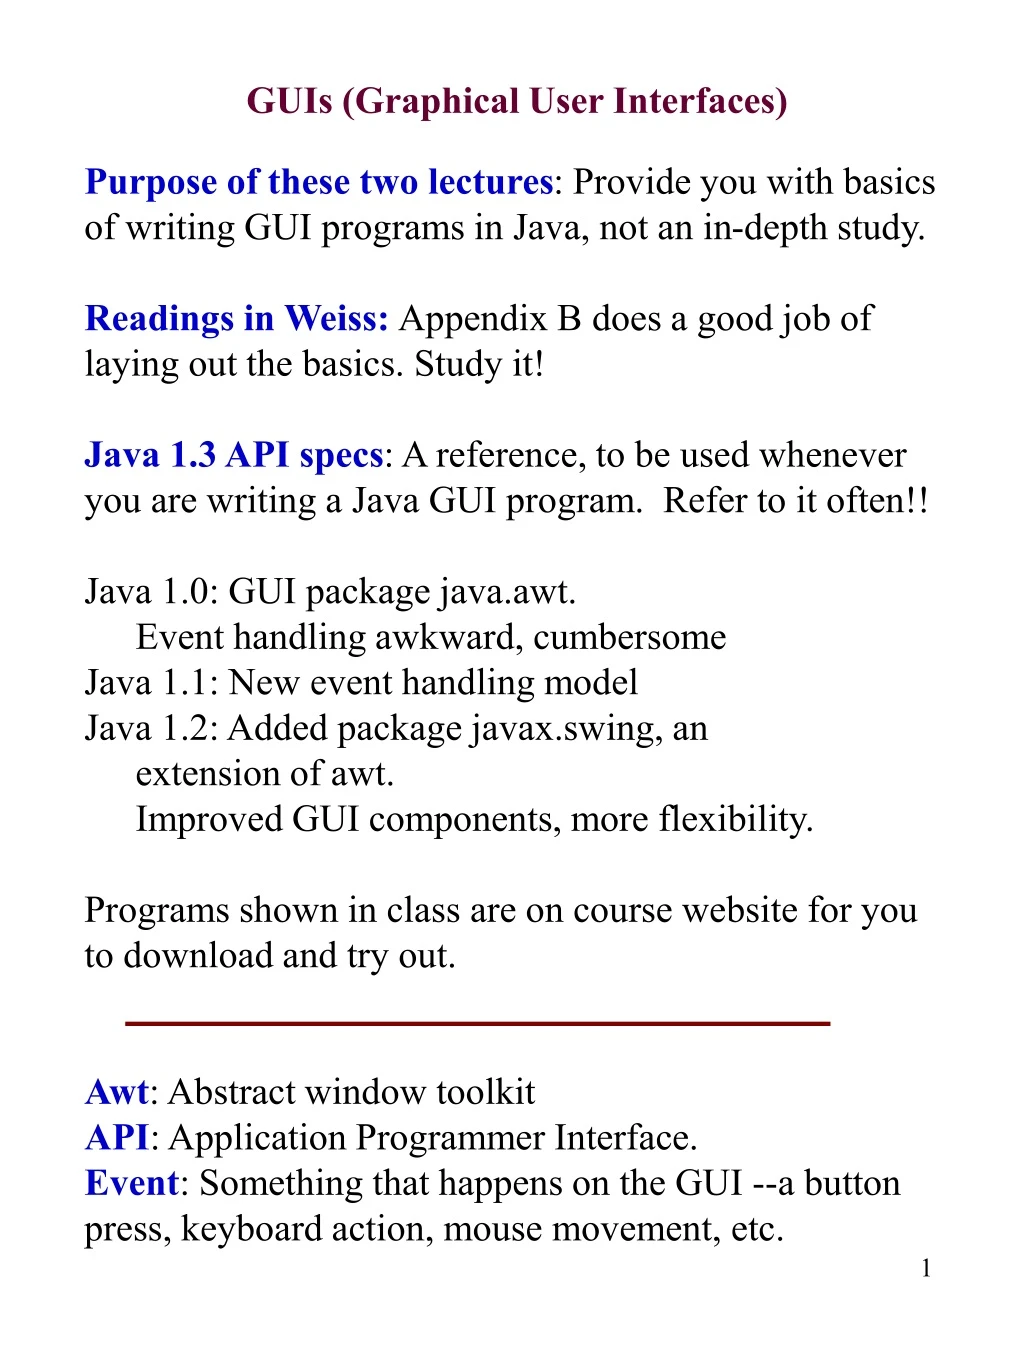
GUIs (Graphical User Interfaces) Purpose of these two lectures:Provide you with basics of writing GUI programs in Java, not an in-depth study. Readings in Weiss: Appendix B does a good job of laying out the basics. Study it! Java 1.3 API specs: A reference, to be used whenever you are writing a Java GUI program. Refer to it often!! Java 1.0: GUI package java.awt. Event handling awkward, cumbersome Java 1.1: New event handling model Java 1.2: Added package javax.swing, an extension of awt. Improved GUI components, more flexibility. Programs shown in class are on course website for you to download and try out. Awt: Abstract window toolkit API: Application Programmer Interface. Event: Something that happens on the GUI --a button press, keyboard action, mouse movement, etc.
awt versus Swing package java.awt.*; package javax.swing.*; Button JButton (extends Button) Frame JFrame (extends Frame) TextField JTextField (extends TextField) no JToggleButton Color no Swing really is an extension of awt, providing more flexibility and more features. Many of awt’s classes are actually written in the native windowing system on your computer --they are “heavyweight”. Most of Swing’s classes are written entirely in Java itself --they are “lightweight”. A few, e.g. JFrame, are heavyweight. Many of the Swing API specs point you directly to tutorials that show you how to use them. Very useful.
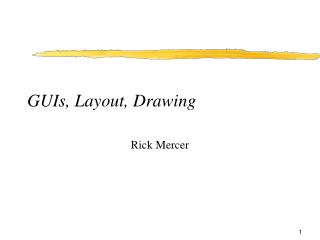
each row is a JPanel with components in it A window with component uneditable JTextfield editable JTextfield JLabel JList JButton JComboBox JCheckBox JPanel, green background, nothing painted on it These are in a Button- Group JRadioButtons
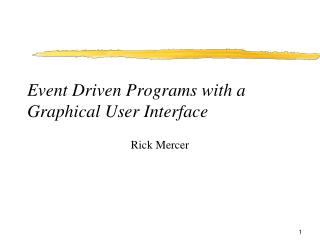
Basic Hierarachy of GUI classes • Class Component is abstract, • cannot be instantiated. But • its subclasses can. • A Component generally has a • position and size, can be painted, • can receive input events. Component Canvas Container Window JComponent JButton JFileChooser Dialog Frame JCheckBox JDialog JFrame JPanel JComboBox JLabel JRadioBox JTextArea JTextField
Component • A Component has a position and a size and can be painted. • Methods in a Component --there are many more! • c.setSize(width, height); • c.setBackGroundColor(color); • c.setFont(f); • c.show(); Component Canvas Container Window JComponent Dialog Frame JDialog JFrame JPanel
Container: superclass of all Components that can hold other components. • Components are generally added to a Container c: • c.add(new JButton(“yes”)); • c.add(new JButton(“no”), “north”); • Basic top-level containers: • JWindow: top-level window with no border • JFrame: top-level window with border, menubar • JDialog: top-level window used for a dialog • JPanel, primary use: as a container of other components. Allows one to organize objects into a unit, often to simplify layouts. See this on the next slides. • JPanel, secondary use: paint on it with graphics commands --lines, circles, text, etc. (instead of using class Canvas). Container Window JComponent JDialog JFrame JPanel
Producing the window on slide 3 publicclass GUI extends JPanel implements ActionListener { // Constructor: a demo window for CS211 public GUI() {makeTheObjects(); doTheLayout(); theDrawButton.addActionListener(this); } // Handle the draw button push publicvoid actionPerformed(ActionEvent evt) {...} private GUICanvas theCanvas; private JComboBox theShape; private JList theColor; private JTextField theXCoor; private JTextField theYCoor; private JRadioButton smallPic; private JRadioButton mediumPic; private JRadioButton largePic; private JCheckBox theFillBox; private JButton theDrawButton; private JTextField theMessage; next slides variables that will contain the objects in the window
privatevoid makeTheObjects() { theCanvas= new GUICanvas(); theCanvas.setBackground(Color.green); theCanvas.setPreferredSize(new Dimension(99,99)); theShape= new JComboBox( new String[]{"Circle", "Square"}); theColor= new JList(new String[]{"red","blue"}); theColor.setSelectionMode( ListSelectionModel.SINGLE_SELECTION); theColor.setSelectedIndex(0); theXCoor= new JTextField(3); theYCoor= new JTextField(3); ButtonGroup theSize= new ButtonGroup(); smallPic= new JRadioButton("Small", false); mediumPic= new JRadioButton("Medium", true); largePic= new JRadioButton("Large", false); theSize.add(smallPic); theSize.add(mediumPic); theSize.add(largePic); theFillBox= new JCheckBox("Fill"); theFillBox.setSelected(false); theDrawButton= new JButton("Draw"); theMessage= new JTextField(25); theMessage.setEditable(false); }
privatevoid doTheLayout(){ JPanel topHalf= new JPanel(); JPanel bottomHalf= new JPanel(); // Lay out the top half topHalf.setLayout(new FlowLayout()); topHalf.add(theCanvas); topHalf.add(new JLabel("Shape")); topHalf.add(theShape); topHalf.add(theColor); topHalf.add(new JLabel("X coor")); topHalf.add(theXCoor); topHalf.add(new JLabel("Y coor")); topHalf.add(theYCoor); // Lay out the bottom half bottomHalf.setLayout(new FlowLayout()); bottomHalf.add(smallPic); bottomHalf.add(mediumPic); bottomHalf.add(largePic); bottomHalf.add(theFillBox); bottomHalf.add(theDrawButton); bottomHalf.add(theMessage); // Lay out the GUI setLayout(new BorderLayout()); add(topHalf, "North"); add(bottomHalf, "South"); }
The main program import javax.swing.*; import java.awt.*; import java.awt.event.*; publicclass TrivialApplication extends JFrame{ publicstaticvoid main(String args[]) { JFrame jf= new TrivialApplication(); jf.setTitle("GUI Demo"); jf.getContentPane.add(new GUI()); jf.pack(); jf.show(); } } Create instance of this frame, give it a title Add a new GUI to frame jf Add a component to a JFrame’s content pane, not to JFrame itself. Don’t ask why; just do it! Tell jf to lay out its components Make frame jf visible on the monitor
Methods in components Weiss explains the basic commands for dealing with components like JLabel, JButton,JList; we don’t go into detail here. Also look at API specs JLabel jl: You can change the text whenever you want. jl.setText(“whatever you want”); JCheckBox jc: A checkbox is either checked or unchecked: jc.isSelected(); jc.setSelected(true); or jc.setSelected(false); jc.setLabel(“whatever you want”); ButtonGroup bg: Only one button (e.g. a JCheckBox) in a ButtonGroup can be selected at any time. If the user checks one, the others become unchecked. Simply add buttons to a ButtonGroup bg.add(jc);
Layout managers Layout managers A container is associated with a layout manager, which does the layout of the components in the container. Different layout managers, for different designs. Defaults JPanel: FlowLayout Frame (and JFrame): BorderLayout Setting container c’s layout manager c.setLayout(new FlowLayout()); FlowLayout.Suppose components c1, c2, c3, …, cn are added to a JPanel. The components are placed in that order in a row, from left to right; whenever there is no room, a new row is started. A scrollbar appears for the JPanel if there is no room for all the rows. Make the window width bigger (or smaller), and the number of components in each row change accordingly. BorderLayout: See next slide. GridBagLayout: Gives most flexibility, but is most difficult to use. We won’t cover it.
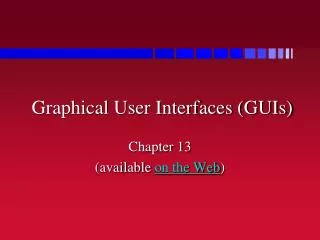
BorderLayout manager Allows placement of 5 components, in 5 places: north, east, south, west, and center. Any of the five components can be a Jpanel, which can contain its own subcomponents. So there is really no limit on how many components can be there. // add component c at position p on panel (or // frame) p. place is one of “north”, “east”, “south”, // “west”, “north” p.add(c, p); Program that produced this window is on next slide.
BorderLayout managers class is a JFrame import java.awt.*; import javax.swing.*; public class BorderEx extends JFrame { publicstaticvoid main(String[] pars) { JFrame f= new BorderEx(); // create instance // of this class JPanel p= new JPanel(); // Create a JPanel p.setLayout(new BorderLayout()); p.add(new JButton("North"), "North"); p.add(new JButton("East"), "East"); p.add(new JButton("West"), "West"); p.add(new JButton("South"), "South"); p.add(new JButton("Center"), "Center"); f.getContentPane().add(p); f.pack(); f.show(); } } use a BorderLayout add buttons to Jpanel p add panel to f tell f to lay out it’s components make frame visible