Download
1 / 11
120 likes | 225 Vues
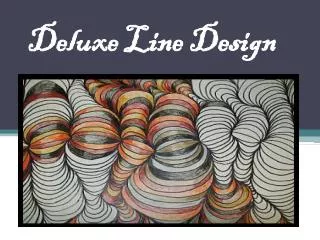
Explore the art of line design by following simple steps to create depth and dimension in your drawings. From gentle curves to strategic dot placements, this tutorial will guide you through the process of crafting intricate and visually pleasing designs. Avoid common mistakes like criss-crossing lines and discover how different color techniques can enhance your finished product. Unleash your creativity and elevate your artwork with this deluxe line design tutorial!

E N D
Where to Start?Step 1 Start with a gentle curve line across the paper. Don't go too crazy hilly with the line...it will make it difficult in the steps that are to come!
Step 2: Place eight dots on the line spaced at different distances.
STEP 3: Go dot - to - dot across the entire line.Do not continue to do this however...or it will create a kind of boring column like work(going straight up & down).
The lines need to continue off of the paper...and should not just stop cause they are close to the edge. As it gets bigger and bigger, the lines will have to be shared going back to the dot...and yes..they should really go back to the dot. Going back to the dot each time creates the darker shadow"ish" areas that help create depth.
The two pictures above are the WRONG way to do this. The lines should NEVER criss-cross each other. The second picture is the "RAINBOW CONNECTION". It is a lot easier to do it that way..but it is not correct.