Download
1 / 25
250 likes | 360 Vues
Learn about Quality Center 10.0, including essential installation steps and features. Ensure you uninstall current versions before downloading QC 10.0. Discover the Management Module for defining releases and cycles, and how the Requirements module aids in managing and establishing traceability. Familiarize yourself with the Test Plan and Test Resources modules, and understand how to calculate requirement risks to optimize your testing strategy. Access documentation on the BI Shared Services Tools Team SharePoint site before proceeding.

E N D
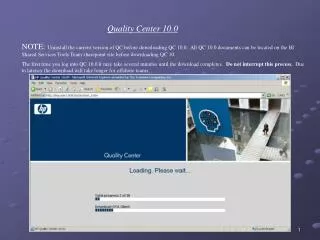
Quality Center 10.0 NOTE: Uninstall the current version of QC before downloading QC 10.0. All QC 10.0 documents can be located on the BI Shared Services Tools Team sharepoint site before downloading QC 10. The first time you log into QC 10.0 it may take several minutes until the download completes. Do not interrupt this process. Due to latency the download will take longer for offshore teams.
The Management Module Defining Releases and Cycles • Allows users to clearly define releases and cycles. Cycles equates to builds/service packs etc. • Define folder structure • Establish Standard Naming Conventions • Define release • Define cycle • Enter Start/End Dates
Libraries A library represents a set of entities in a project and the relationships between them. The entities in a library can include requirements, tests, test resources, and business components. Select the folder level for the Requirement Root, Test Root and Resource Root
Requirements Module The Requirements module is now folder based. The base functionality remains the same with the addition of the ‘Assign to Release’, ‘Assign to Cycle’ and ‘Requirement Traceability’.
Requirements Traceability Using the Requirements Traceability tab in the Requirement Details view, you can add traceability links to and from a selected requirement. Trace from links indicate requirements that affect a selected requirement. Trace to links indicate requirements that are affected by a selected requirement. Right click on the requirement. Select Requirement Traceability • Requirements traceability defines a relationship between two or more • requirements. When analyzing the impact of a change proposed in a specific • requirement, the traceability links indicate the other requirements that the • change might affect. • After defining your requirements in the requirements tree, you can establish traceability • between the requirements. Using the Requirements Traceability tab in the • Requirement Details view, you can add traceability links to and from a • selected requirement. Trace from links indicate requirements that affect a • selected requirement. Trace to links indicate requirements that are affected • by a selected requirement. • When a requirement changes, Quality Center alerts the affected • requirements. The alerts can be seen by all users. Quality Center also sends • email notifications to the authors of the affected requirements.
Requirements Traceability Example The Trace From grid displays requirements that affect a selected requirement. The Trace To grid displays the requirements that are affected by the selected requirement. After establishing traceability relationships, you can analyze the impact of requirement changes by reviewing the relationships. The Impact Analysis tab helps you understand the many associations and dependencies that exist between the requirements by displaying them in a hierarchical tree structure. Unlike the Relationships tab, the Impact Analysis tab shows the affected requirements along with their parent and child requirements.
Test Plan Module There has been minimal changes to the Test Plan module. There is a new enhancement to add Test Parameters. This allows a tester to use different variables with their testing. During test execution this allows a tester to select a default value or to enter in the actual value.
Test Resources The Test Resources module enables you to manage resources used by your tests. You can organize your resources by defining a hierarchical test resource tree containing resource folders and resources. For each resource in the tree, you select and upload a set of resource files to the Quality Center repository. These files can be used by one or more tests.
About Calculating Requirement Risks When planning how to test your requirements, you generally do not have unlimited resources available, and are not able to fully test every requirement. You must make compromises and only partially test requirements that have low criticality to the business, or those that have only a minor risk associated with their implementation. The risk-based quality management feature enables you to calculate at which level to test each requirement, based on the nature of the requirement and the resources you have available. You can then plan your testing process based on these recommendations. Each requirement type can be enabled for risk-based quality management. Each requirement type with risk-based quality management enabled can support either risk analysis which is referred to as an analysis requirement, or an individual risk assessment which is referred to as an assessment requirement. ➤ An analysis requirement is a requirement belonging to a type that represents higher levels in the requirements tree hierarchy, such as the Folder type. You perform risk analysis on an analysis requirement based on the assessment requirements under it in the requirements tree. The risk results of multiple assessment requirements are aggregated to give an overall risk analysis which can then be used to determine testing effort and test strategy. ➤ An assessment requirement is a requirement belonging to a type that represents requirements that are children of analysis requirements and at a lower level in the requirements tree hierarchy. Assessment requirements under a particular analysis requirement form the basis for risk analysis on that analysis requirement. You work with risk-based quality management in the Requirement Details view of the Requirements module. You can also work with risk-based quality management in the Risk view of the Requirement Details dialog box.
For each assessment requirement under the analysis requirement, you can assign or calculate the Risk and Functional Complexity. The Risk Category is composed of its Business Criticality and Failure Probability. The Functional Complexity Category indicates the complexity of the requirement’s implementation. You determine the Business Criticality, Failure Probability, and Functional Complexity of a requirement by assigning them values directly or by assigning values to a set of criteria. If you do not determine these factors for a requirement, Quality Center does not include the requirement in the risk analysis. You can customize these criteria, their possible values, and how these values determine the Business Criticality, Failure Probability, and Functional Complexity. You can also customize how the Business Criticality and Failure Probability are used to calculate the Risk.
Select the Risk tab for the specific requirement. Begin with the Risk Assessment tab. Select the Business Criticality tab. Select the appropriate value from the Criterion drop down list. Reference the ‘Description of Criterion’ window for definition of data values. Do the same for the Failure Probability.
Follow the same steps with the Functional Complexity tab. The Functional Complexity Category indicates the complexity of the requirement’s implementation.
At the bottom of the Risk tab, in the Estimated development time box, you can type the estimated time needed to develop the requirement. Quality Center can then calculate the total estimated development time for an analysis requirement and its children as the sum of the estimated development times of the children. Assigning the estimated development time is optional, and does not affect the risk analysis.
The Risk Category is composed of two factors: Business Criticality and Failure Probability. Business Criticality measures how crucial a requirement is for business. Failure Probability indicates how likely a test based on the requirement is to fail. The Failure Probability of a requirement is a measure of how likely a test on the requirement is to fail. It has three possible values: 1 - High, 2 - Medium, and 3 - Low. For example, a requirement whose implementation involves making significant changes across most areas of your application would probability be assigned a High Failure Probability. In contrast, a requirement that involves changing an icon in your application would probably not have many associated risks, and so is likely to be assigned a Low Failure Probability. The Business Criticality of a requirement is a measure of how important the requirement is to your business. It has three possible values: A - Critical, B - Important, and C - Nice to Have. For example, a requirement affecting a minor feature that is likely to be used rarely might be assigned a Nice to Have Business Criticality, whereas a requirement that is essential to your application’s functionality would probably be assigned a Critical Business Criticality.
After you have finalized your testing policy for an analysis requirement, you can analyze the testing strategy for the analysis requirement and for the assessment requirements under it. The analysis results are only valid for the requirements at the time the analysis was last performed. If you subsequently modify the Risk or Functional Complexity Categories of the requirements, or the testing policy, you should re-perform the analysis.
Defining the Testing Policy Settings After you have defined the Risk and Functional Complexity for each requirement, you determine how much time each requirement needs to be tested. The time needed to test a requirement depends on the Functional Complexity of the requirement. A requirement with a high Functional Complexity generally requires more testing time as it is more likely that the requirement’s implementation contains defects. For each Functional Complexity, you define the Testing Time needed to fully test a requirement with that Functional Complexity. Quality Center defines four Testing Levels: Full, Partial, Basic, and None. For partial and basic testing, you define how much Testing Time is required for a requirement as a percentage of full testing. For example, if 20 hours are required to perform full testing on a requirement and partial testing is defined as 75% of full testing, Quality Center calculates that 15 hours are required to perform partial testing on the requirement. A requirement whose Testing Level is set to None is not tested at all, and the Testing Effort is zero. After you define the Testing Time required for each Testing Level and Functional Complexity, you can estimate at what Testing Level to test requirements. For each Risk and Functional Complexity Category, you assign a Testing Level.
To define the testing policy settings for a requirement: 1 In the Requirement Details view of the Requirements module, select an analysis requirement and click the Risk tab. Click the Show button to display the Change Analysis Constants section. 2 Under Testing Time (full) per Functional Complexity, for each Functional Complexity value, type the estimated Testing Time required to fully test a requirement. 3 Under Testing level, in the Partial and Basic boxes, type the default Testing Time required for partial testing and basic testing of a requirement. You express this as a percentage of the effort required for full testing. 4 In the Testing Policy grid, define the level at which to test a requirement of each Risk and Functional Complexity Category. To define these levels, click the arrow next to the cell in the grid. Select a Testing Level from the available Testing Levels. The available Testing Levels are Full, Partial, Basic, and None. Next to each Testing Level, you can see the estimated time needed to test a requirement at that level, based on the Testing Efforts and Testing Levels you defined. 5 To display the default constants used, click the Show Defaults button. The Risk-Based Quality Management Constants Defaults dialog box opens. In the Risk-Based Quality Management Constants Defaults dialog box, you can click the Restore Defaults button to assign these default values to the constants used for the current requirement.
Finalizing the Testing Policy Based on the testing policy you defined, Quality Center can calculate the total estimated testing time for the analysis requirement and the assessment requirements under it. You estimate how much time you have available to test these requirements and make adjustments to the testing policy to make sure that the testing time required does not exceed the testing resources available. For example, suppose you have 100 hours available to test a requirement. Quality Center estimates that you need 120 hours to test the requirement using the current Testing Levels. You decide to lower the Testing Level for requirements with Low Risk and Medium Functional Complexity from Partial to Basic. After you adjust the Testing Level and recalculate the testing time, Quality Center estimates that you need only 98 hours to perform the testing, which is within the time you have available. You can now plan the testing of your requirement based on Quality Center’s recommendations.
To finalize the testing policy: 1 Make sure that you have determined the Risk and Functional Complexity Categories of all assessment requirements that are located under the analysis requirement for which you want to finalize the testing policy, and that you want to include in the risk analysis. 2 You can filter the requirements tree to include only the assessment requirements you want to include in the risk analysis. 3 In the Requirement Details view of the Requirements module, select an analysis requirement and click the Risk tab.
The Dashboard Module The Analysis View tab contains a tree in which you organize all of your analysis items. Analysis items can be any of the following analysis types: graphs, standard reports, and Excel reports.
The Dashboard View tab contains a tree in which you organize dashboard pages. In Dashboard pages you arrange multiple graphs that you created in the analysis tree, and display them in a single view.