
Maintenance Guide for .009 Ball Valve - Easy Step-by-Step Instructions
Learn how to perform maintenance on .009 ball valves, including removal and reassembly procedures for check valve components. Detailed instructions with visual aids provided.
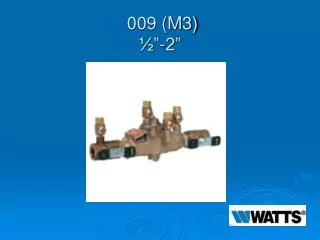

Maintenance Guide for .009 Ball Valve - Easy Step-by-Step Instructions
E N D
Presentation Transcript
Modification Overview- 009 • 009 ¾-1” (1989-1991) (1” 1989-1997) 1¼ -2” (1989-1991) ½” (1992-Current) • 009M1 1¼ -2” (1992-1996) • 009M2 ¾” (1992-1998) 1” (1997-Current) 1¼ -1½ ” (1994-Current) 2” (1996-Current) • 009M3 ¾” (1998-Current) QT= Ball Valve LF= Lead Free (2010) PC= Polymer Coated SS= Stainless Steel U= Union End
Single Access Cover Removal • Cover is o-ring sealed. • Cover has spring load from the RV spring. * Hold cover firmly while removing bolts. * RV stem may come out with cover. • Lift cover straight off.
Check Valve Removal • Check valve modules. • Modules are o-ring sealed and secured by a retainer. • Slide retainer straight out of body. • Modules can now be removed by hand or with a flat head screwdriver.
Check Seat Removal * Check seats are attached to the cage with a bayonet type locking system. * Module is spring loaded- Hold firmly. * Hold the cage in one hand, push the seat inward and rotate clockwise. • ¾” M2 modules snap apart.
Check Disc Replacement • Check disc and disc holder can be replaced as one piece.
Check Valve Reassembly Notes • Reassemble in reverse order. • Apply lubricant to o-rings. • If check retainer does not slide into place easily, make sure checks are seated properly.
RV Stem Removal • The RV stem and spring are situated between the check valves and are free once the single access cover is removed.
RV Seat Removal • Unless damaged, there is no need to remove RV seat. • The seat is pushed firmly into the body and is o-ring sealed.
RV Rubber Replacement • The RV molded disc is on the lower stem. *Simply unscrew the guide from the stem. • The diaphragm is on the upper stem. *Simply unscrew the stem cap from the stem.
RV Reassembly Notes • Center the spring on the seat and insert the cover and RV assembly as a unit straight into the body. • Make sure that the lower guide on the RV stem goes through the guide hole in the seat. • If the cover will not press flat against the body, the stem is crooked and must be realigned.