Digital Storytelling
190 likes | 1.49k Vues
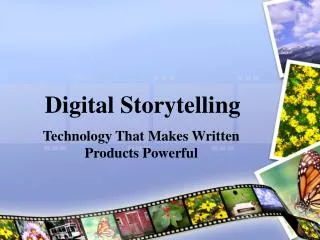
Digital Storytelling. Module 6. Developed by Katie Straka Summer 2014. Digital Storytelling. What is digital storytelling? Digital storytelling is telling a story using technology. Digital stories typically include images, video segments, text, narration, and music.

Digital Storytelling
E N D
Presentation Transcript
Digital Storytelling Module 6 Developed by Katie Straka Summer 2014
Digital Storytelling • What is digital storytelling? • Digital storytelling is telling a story using technology. • Digital stories typically include images, video segments, text, narration, and music. • A digital story usually focuses on a specific topic and is constructed from a unique point of view. • Digital stories are generally between 2 and 10 minutes in length.
Digital Storytelling Example • The best way to help you understand a digital story is • to see one. • This is the digital story I created for my Visual and Media Literacy class at UWG. • http://medt7490-visualandmedialiteracy-project3.wikispaces.com/
Storyboarding • The first step in creating a digital story is to make a storyboard. • A storyboard requires you to think about your project scene by scene and all the details, like text overlays, narration, transitions between scenes, music, and titles and credits. • Storyboard Example: • http://medt7490-visualandmedialiteracy-project3.wikispaces.com/ • Don’t forget . . . The elements and principles of visual design and good layouts apply to all visual messages, so they apply to our digital story, too.
Videography Tips & Techniques • These are some tips and techniques for framing your scenes in your storyboard and when you film your movie. • Framing the Shot • Long shot, medium shot, close-up • Perspective/Point of View • Camera Angle • Movement • Panning, handheld • Transitions • Simple cuts, cutaway, cut-ins • Examples of these techniques. • http://medt7490-visualandmedialiteracy-project3.wikispaces.com/
Digital Storytelling Brainstorming • How could digital storytelling be used in your classroom? • What topic from your content area could you tell a digital story about in 2 minutes or less? How would you start? What would you include? • The Educational Uses of Digital Storytelling website created by the University of Houston is a great resource, and has lots of examples. • http://digitalstorytelling.coe.uh.edu/ • Under About Digital Storytelling at the top, click on The 7 Elements of Digital Storytelling on the left side as a great starting point for developing a digital story.
Your TurnActivity 6: Storyboarding Download the storyboard template from the class Wiki home page to your laptop. As a group, take one of your ideas from brainstorming and start planning your video scene by scene. Make sure you add something to each column of the storyboard, even if it is “none”. This process will make the filming and editing process much easier. Upload your storyboard to your group’s Wikispace page. • 4. From the Cobb County School District web page, click on Professional Learning in the lower right-hand corner, and then click on Atomic Learning on the left side. Click on Campus Tech training, search for Windows Live Movie Maker, then click on Windows Live Movie Maker training to see all the tutorials available. • Open the Windows Live Movie Maker application and try navigating through it/play with it a little bit.
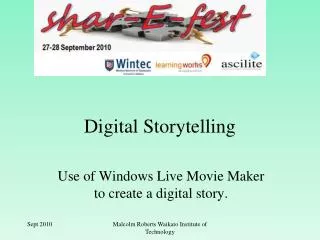
Your TurnActivity 7: Digital Story • Now, it’s time to turn your storyboard into a video. Use your cell phone to record any video or images that you want to use. • In Windows Live Movie Maker (installed on laptops), narration for a video has to be recorded as you are videotaping. • When you are done filming, upload your video and images into Windows Live Movie Maker. • The Windows Live Movie Maker storyboard is on the right side of the screen. • Put you videos and images in order and preview them by clicking on “play” on the left side. • Add title and credit scenes. • Add transitions between scenes. • Add music where there is not any narration. • Save your movie. • Directions for embedding your video on the Wiki are on the next slide and we will do this together.
Your TurnActivity 7: Digital Story (cont.) • Next, we want to embed our video on our Wiki page (not a hyperlink). • Go to YouTube and click on “Upload” in the upper right-hand corner. In the drop down box, select “unlisted”. • Once your video is uploaded, click on it. • Underneath the video is a line that starts with “About”, then “Share”. Click on “Share”, then click on “Embed”. • Select the “Video size:” Go smaller and uncheck any of the boxes below it. • Copy your embed code. • Go back to your Wiki page in Edit mode. Click on Widget, then Video on the left side, and then YouTube. Paste your embed code in the box. • Save your page and you should see your embedded video. • 10. Reflection: What was easy about making your own video? What was the most difficult? How likely are you to try digital storytelling in your classroom? Why?
The teacher will be able to describe the five • essential dimensions of digital and media • literacy – access, analyze, create, reflect, and • act – and give examples of how one or more • of these dimensions can be incorporated into • lessons. • The teacher will be able to identifyadditional • media and technology sources (e.g.,web, • video,pictures/images, Wikispaces,digital • storytelling, etc.) and giveexamples of how • the media or technology could be incorporated • intotheclassroom/content area. • The teacher will develop a working knowledge • of Wikispaces and Windows Live Movie Maker • technologies to support visual and media • literacy within the classroom. • The teacher will be able to explain what visual • and media literacy areand explain their • importance in teaching and learning. • The teacher will be able to identify the basic • elements and principles of visual design and • apply them in the creation of lesson visual aids • andmaterials. • The teacher will be able to apply basic layout • techniques in thecreation of lesson visual aids • and materials. • The teacher will be able to describe what an • infographic is and how it could be used to • support student learning.
References • Baylen, D. M. (2014). Visual and media literacy for teaching and learning (MEDT 7490). University of West Georgia. • Hagen, R., & Golombisky, K. (2013). White space is not your enemy: A beginner’s guide to communicating visually through graphic, • web & multimedia design. Burlington, MA: Focal Press. • Gainer, J. S. (2010). Critical media literacy in middle school: Exploring the politics of representation, Journal of Adolescent & Adult • Literacy, 53(5), 364-373. Retrieved from • http://eds.a.ebscohost.com/eds/pdfviewer/pdfviewer?vid=13&sid=f275b8ca-1e33-43bc-99a7-d50165169acb%40sessionmgr4003&hid=4203 • The University of Houston. (2014). Educational uses of digital storytelling. Retrieved from • http://digitalstorytelling.coe.uh.edu/page.cfm?id=27&cid=27