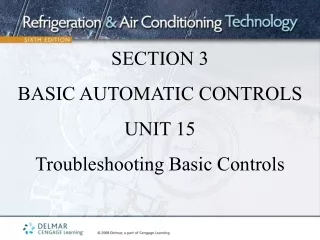
Basic Controls Troubleshooting Guide
Learn troubleshooting techniques for electrical circuits, identifying power-consuming devices, using voltmeters and ammeters, and resolving common issues in heat-cool circuits. Discover how to check thermostats, conduct amperage tests, and troubleshoot complex systems effectively.

Basic Controls Troubleshooting Guide
E N D
Presentation Transcript
SECTION 3 BASIC AUTOMATIC CONTROLS UNIT 15 Troubleshooting Basic Controls
UNIT OBJECTIVES After studying this unit, the reader should be able to • Describe and identify power- and non-power-consuming • Describe how a voltmeter is used to troubleshoot electrical circuits. • Identify some typical problems in an electrical circuit. • Describe how an ammeter is used to troubleshoot an electrical circuit. • Describe how a voltmeter is used to troubleshoot an electrical circuit.
UNIT OBJECTIVES After studying this unit, the reader should be able to • Recognize the components in a heat-cool electrical circuit. • Follow the sequence of electrical events in a heat-cool electrical circuit. • Differentiate between a pictorial and a line-type electrical wiring diagram.
INTRODUCTION TO TROUBLESHOOTING • Recognize the control and its purpose in the system • Controls are either electrical, mechanical or both • Electrical devices • Power consuming devices use power • Example of a power consuming device: a light bulb • Power passing devices pass power to the power consuming devices without consuming power themselves (ideally) • Example of a power passing device: a switch
Power-passing device Power-consuming device 115V
TROUBLESHOOTING COMPLEX CIRCUITS • Check the thermostat • 0 volts from R to W when there is a call for heat • The coil of the heating relay should be energized • Check the fan circuit • 0 volts from R to G when the fan relay coil is energized • Check the cooling circuit • The Y terminal controls the cooling circuit • 0 volts from R to Y when there is a call for cooling
Terminal block in air handler Thermostat wire R C G W Y To cooling contactor coil From heating, fan and cooling coils To heating relay Secondary Primary To fan relay Transformer
Terminal block in air handler Thermostat wire R C G W Y Secondary 0V Primary Zero volts from R to G when fan relay is energized
Terminal block in air handler Thermostat wire R C G W Y Secondary 0V Primary Zero volts from R to W when heat relay is energized
Terminal block in air handler Thermostat wire R C G W Y Secondary 0V Primary Zero volts from R to Y when cooling coil is energized
TROUBLESHOOTING THE THERMOSTAT • Control voltage must be present in order for the thermostat to operate • Turn the fan switch to the ON position to see if the fan begins to operate • If the fan comes on, there is low voltage present • If the fan does not operate there may be a low voltage problem • Check voltage supplied to the transformer primary • Check voltage at the transformer secondary
Thermostat Fan switch FAN AUTO ON HEAT OFF COOL When switched to the “ON” position, the indoor blower should operate if there is low voltage present
TROUBLESHOOTING THE THERMOSTAT • The thermostat can be removed from the subbase • Install an insulated jumper between R and G (The fan should come on) • Install an insulated jumper between R and W (The heat should come on) • Install an insulated jumper between R and Y (The cooling should come on) • If the circuits operate with the jumpers and not with the thermostat, the thermostat is defective
Line Voltage R G Fan circuit W Heating circuit Y Cooling circuit Insulated jumper Thermostat subbase
TROUBLESHOOTING THE THERMOSTAT • On a call for heat, power is passed through the thermostat to the heating relays • On electric heating systems, the fan will also be energized on a call for heat • On a call for cooling, the following system components are controlled • Compressor • Condenser fan motor • Evaporator fan motor
TROUBLESHOOTING THE THERMOSTAT • The compressor and condenser fan motor are wired in parallel with each other • Controlled by the Y terminal on the thermostat • The Y terminal passes power to the contactor coil • Contacts close and energize the compressor and condenser fan • The indoor fan will operate continuously when the fan switch is in the ON position • The indoor fan will operate only when the compressor is operating when the fan switch is in the AUTO position
TROUBLESHOOTING AMPERAGE IN LOW-VOLTAGE CIRCUITS • Transformers are rated in volt-amperes, VA • VA rating can be used to determine if the control circuit is drawing too much current • Maximum amperage = VA rating/secondary voltage • A 40 VA transformer with a secondary voltage can handle a maximum current of 1.67 amps • Maximum amperage = 40/24 = 1.67
TROUBLESHOOTING AMPERAGE IN LOW-VOLTAGE CIRCUITS • Using a clamp-on ammeter • Coil a jumper wire around the jaws of the meter ten times • Place the jumper is series with the circuit being checked • Divide the ammeter reading by ten • Actual circuit amperage should be lower than the calculated maximum circuit amperage • Electronic clamp-on meters can often be used without using the 10-wrap method
Line Voltage R G Fan circuit W Heating circuit 7.0 amps Y Cooling circuit Actual amperage = 7/10 = 0.7 amps
TROUBLESHOOTING VOLTAGE IN THE LOW-VOLTAGE CIRCUIT • Power consuming devices need to have the proper voltage supplied to them • If a relay’s holding coil is rated at 24 volts, there should be 24 volts applied to the coil • If there is a reading of zero volts across the coil, the problem is likely not the coil • If there is a reading of 24 volts across the coil and the relay contacts do not switch position, the coil is defective and the relay should be replaced
GENERAL PURPOSE RELAY 24-volt coil Normally closed contacts Normally open contacts Relay
RELAY – NORMAL OPERATION 24-volt coil Coil energized Normally closed contacts are now in the open position Current flows through closed contacts Normally open contacts are now in the closed position Relay
RELAY – DEFECTIVE COIL - CONTACTS DO NOT CHANGE POSITION Voltage applied to the coil 24-volt coil Current flows through closed contacts Normally closed contacts remain closed Normally open contacts remain open Relay
TROUBLESHOOTING VOLTAGE IN THE LOW-VOLTAGE CIRCUIT • Thermostats can be removed from the subbase to check the low voltage circuits • There should be a reading of 24 volts between the R (hot) terminal and the Y (cooling) terminal • There should be a reading of 24 volts between the R (hot) terminal and the W (heating) terminal • There should be a reading of 24 volts between the R (hot) terminal and the G (indoor fan) terminal
24V 24V 24V Line Voltage R G Fan circuit W Heating circuit Y Cooling circuit Thermostat subbase
TROUBLESHOOTING ELECTRICAL SWITCHES AND LOADS • Switches are wired in series with power-consuming devices (light switch in series with a light bulb) • When switches are wired in series with a load, all of the switches must be closed for the load to operate • Switches in parallel provide alternative control sequences for the load • If there is line voltage supplied to the circuit, there will be line voltage across an open switch
115V 115V LINE VOLTAGE READING ACROSS THE OPEN SWITCH
115V BOTH SWITCHES MUST BE CLOSED FOR LOAD TO BECOME ENERGIZED
115V BOTH SWITCHES MUST BE CLOSED FOR LOAD TO BECOME ENERGIZED
115V BOTH SWITCHES MUST BE CLOSED FOR LOAD TO BECOME ENERGIZED
115V SWITCHES IN PARALLEL PROVIDE ALTERNATIVE CONTROL PATHS
115V SWITCHES IN PARALLEL PROVIDE ALTERNATIVE CONTROL PATHS
115V SWITCHES IN PARALLEL PROVIDE ALTERNATIVE CONTROL PATHS
115V SWITCHES IN PARALLEL PROVIDE ALTERNATIVE CONTROL PATHS
115V SWITCHES IN PARALLEL PROVIDE ALTERNATIVE CONTROL PATHS
TROUBLESHOOTING ELECTRICAL SWITCHES AND LOADS • There will 0 volts across a closed switch • The voltage reading across the windings of a de-energized motor will be 0 volts • An ohmmeter can be used to check switches and loads if all power and wires are disconnected • Infinite resistance reading indicates an open circuit • Never use an ohmmeter on energized circuits
115V READING OF ZERO VOLTS ACROSS THE CLOSED SWITCH 0V
PICTORIAL WIRING DIAGRAMS • Schematic diagram • Used to show the location of circuit components • Diagram configured to show the circuits as they are seen in the actual unit • Wires are color coded in the diagram to make wire identification easier • All wires and connections are included
RED BK TRANS PICTORIAL DIAGRAM (SIMPLIFIED) BK BL P1 S1 S2 L1 LIM1 LIM2 L2 COM Hi Lo G2 P2 6 5 4 3 2 1 G3 G1 C 1 2 3 4 C Y Gc Gh R W GRN Gas
LINE DIAGRAMS • Used to follow the logic of the circuit • Shows circuits and component functions • Easier to use in the troubleshooting process as each circuit is on a separate line (ladder diagram) • Lines representing the power supply are located on the left and right sides as vertical lines • Power passing and power consuming devices are located on horizontal lines between the power lines • The right side of the diagram often has no switches
Load Load Load SIMPLIFIED LADDER (LINE) DIAGRAM L1 L2
UNIT SUMMARY - 1 • Recognize each control and its purpose in the circuit • Electric components can be power consuming or power passing devices • A measurable voltage reading across a switch indicates that the switch • is in the open position • A reading of zero volts across a switch in an energized circuit indicates • that the switch is in the closed position • The thermostat can be evaluated by removing it from the subbase • Jumper wires at the subbase can be used to check the individual circuits • Control voltage must be present in order for the system to operate
UNIT SUMMARY - 2 • If the system does not operate, the voltage at the primary and secondary of the transformer should be checked • The indoor fan motor will operate if the fan switch is turned to the ON position • The indoor fan motor will cycle on and off with the compressor (in the cooling mode) when the fan switch is turned to the AUTO position • Max. control circuit amps = VA rating/secondary voltage • Control circuit amperage is measured with an ammeter • Power consuming devices must be supplied the proper voltage
UNIT SUMMARY - 3 • If proper voltage is supplied to a component and it fails to operate, the component should be evaluated • Switches are wired in series with the power consuming device in the circuit • Multiple switches can be wired in series • Switches in parallel provide alternate control sequences • Pictorial diagrams show component locations, color-coded wires, and all electrical connections • Line or ladder diagrams show each circuit on a separate line and make the troubleshooting process easier