Download

1 / 17
170 likes | 384 Vues
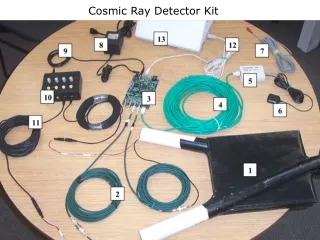
Calibration Instructions for Quarknet Cosmic Ray Detector . How to Plateau the Counters A friendly guide for students and teachers Edited by Jeremy Paschke, August 2009 Instructions specific for 6000 series. Expected Flux.

E N D
Calibration Instructionsfor Quarknet Cosmic Ray Detector How to Plateau the Counters A friendly guide for students and teachers Edited by Jeremy Paschke, August 2009 Instructions specific for 6000 series
Expected Flux Rough estimates say that one or two muons pass through the area of your hand every second. As you do this calibration process with the Quarknet Cosmic Ray Muon Detector (CRMD), you should expect your counters to detect approximately 10 muons per second (between 500 and 1000 counts per minute).
Review on Voltages There are two voltages you can adjust: • Photomultiplier Tube (The PMT is the voltage you will adjust in this calibration process.) • The PMT voltage amplifies all signals from the tube. • The PMT voltage is adjusted through the power distribution unit (PDU). • Threshold Level • The threshold voltage can be set at various levels to discriminate against pulses of lesser magnitude. • The threshold level is adjusted by typing commands on the computer. • We recommend setting the threshold level to a constant 300 mV, and not adjusting it afterwards.
Common Commands: CD-Counter Disable will stop the scrolling up of events. CE-Counter Enable resumes the scrolling up of events. TL 4 300 - Set Threshold Level of all four counters to 300 mV. WC 00 3F - Write Counters to read a two-fold coincidence with all four counters activated. V1, V2 - View settings. H1, H2 - Help with commands
A Note on Numbering • These instructions refer to the counters and channels as 0, 1, 2, 3. • All the hardware and terminal commands refer to channels 0-3. • Only the e-Lab refers to channels 1-4.
Step A Set all voltages on the photomultiplier tubes (PMTs) to minimum (0.3 V) by turning potentiometers on the four-way power distribution unit (PDU) all the way counterclockwise.
Step B Place counter 0 and counter 1 together in a stacked configuration.
Set threshold voltage for all four counters to 300 mV. Step C • In your terminal emulator (Hyperterm for PCs, ZTerm for Macs), type TL 4 300 (TL = Threshold level; 4 = all counters; 300 = mV). • Type V1 to view the first panel of setting to verify your commands were followed. Voltage (V) 0 Time (ns) -0.300 Threshold Value
Step D • Increase the PMT voltage for counter 0 until it reads between 40 and 60 events per second. • Type WC 00 01 to activate only channel 0 and read a one-fold coincidence. • Use the digital counter to monitor counts per time until you reach desired range.
Step E Set the DAQ card to accept only channels 0 and 1 with two-fold coincidence. (Type V1 to check settings are correct.) There are two ways to accomplish this: • Activate all four channels (counters) and unplug the two that are not being used. Type WC 00 1F • Activate only the counters that are being used. Type WC 00 13 for channels 0 and 1. Type WC 00 15 for channels 0 and 2. Type WC 00 19 for channels 0 and 3. Type WC 00 16 for channels 1 and 2. Type WC 00 1A for channels 1 and 3. Type WC 00 1C for channels 2 and 3.
Measure the counts on channels 0 and 1 for one minute at time over increasing PMT voltages. Step F Type ST 3 1 to read out counts on each channel and the coincidence counts for each minute. (Mode 3 displays the scalar count from each channel and resets the counters after each display. The 1 stands for the time interval you choose in minutes.)
Record data in a table. Step G • The registers in the ST command are in hexadecimal. • Record the readings for your two scalars of interest and the scalar for coincidence in hex and then convert to decimal. • Create a data table: Ask your mentor for a copy of the Excel file: Plateau_Template_2009.xls
Note: If you have never used the HEX2DEC( ) command in Excel, you will get a “NAME##” error in some boxes. You need to activate the proper tools. • Go to the Tools pull-down menu and select Add-Ins. • Then check the two top boxes: Analysis ToolPak, and Analysis ToolPak – VBA. • Click <OK> and the file should now convert hexidecimal to decimal properly.
Step H Look for where the coincidence counts level off, or “plateau.” You should set the PMT voltage near the start of this plateau.
Steps I, J, K • Now you have found the optimal operating voltage for counter 1. Record this value in your logbook and on the Excel file you are using. • Repeat the process to calibrate the other three counters. In at least one case you will need to use a new reference counter. Make sure to set the reference counter at a high voltage (about 40-60 events per second).
Step L • Once the CRMD is plateaued, let it run for a couple hours and capture the file through Hyperterm or Zterm. • Upload a file to the e-Lab and run a performancestudy on that data. • Make minor adjustments to PMT voltages to bring all channels together. • An ideal perfomance plot shown to the side
Be aware that the detector might drift over time. This plateau calibration process ought to be repeated at least once a year. It’s a good activity for each new group of students. THE END of Calibration (Plateau) Instructions