Download
1 / 41
410 likes | 426 Vues
Learn how to create a historical tour in Alice, a virtual world program, with this step-by-step tutorial. Explore the building and unveiling of the Brooklyn Bridge and apply the guidelines to create a tour on any topic of interest.

E N D
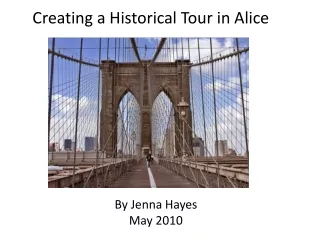
Creating a Historical Tour in Alice By Jenna Hayes May 2010
Overview Making a “historical tour” in Alice is a good way to visualize a historical place, event, or person, and can help you learn facts about history. In this tutorial, I will be making a historical tour in Alice about the building and unveiling of the Brooklyn Bridge. However, the tutorial will provide guidelines for making a tour about any topic that interests you.
Choosing a Host The first thing to do is to choose a host that will narrate your tour. I want my host to be John A. Roebling, the designer of the Brooklyn Bridge. I will choose the MadScientist object to represent Roebling, and add it to my world. Go to Add Objects to choose an object that you think best represents your host.
Naming Your Host In your object tree, right click on your host, in my case, MadScientist. Click rename, and then give your host its real name. I will name mine John Roebling.
Picking a Background Open up your internet browser and do a Google image search for the main topic of your tour. I’m searching for “brooklyn bridge”. Pick one that you like for the background of your introduction. Save that image onto your computer, somewhere where you can find it again.
Inserting the Background Click on File in Alice, and then click on Make Billboard in the drop down list. Use the window that pops up to find where you saved the picture. When you find it, click on it, and then click on Import. A small picture will appear in your world.
Adjusting the Background Now we want to adjust the size and position of the picture so that it takes up the entire screen as a background. Use the object positioning buttons to make it larger, turn it, and bring it forward until it fills up the screen of your Alice world. It should look like mine does on the next slide.
Positioning Your Host Now that you’ve got your background, you need to make your host visible again. Click on your host’s name in the object tree, and drag and drop it over your worlds viewing window. A drop down list will appear.
Positioning Your Host Select move to, then the name of your picture background in the list. Your host will move to the picture and you will be able to see him/her again. Using the object positioning buttons,position your host so that they are standing in front of the picture somewhere. See mine on the next slide.
Saving the Position of the Camera and Host We’re going to be moving the host and the camera around more as we set up the world, but we want to to remember where they are now. Click on more controls under the object positioning buttons. Click on drop dummy at camera. A Dummy Objects folder will appear in your object tree. Click on the plus sign next to it to see what’s in it.
Saving the Position of the Camera and Host Right click on the dummy object, and rename it introView. You can return to this object when you want your camera to go back to the beginning. Now click on your host in the object tree, and then click on the drop dummy at selected object button. Another dummy will appear in the object tree. Rename this one introPosition.
Writing the Intro Scene Now it’s time to write the first scene. Click the Done button to get out of the objects screen. Then click on world in your object tree, and click on create new method in the details pane.
Writing the Intro Scene In the box that pops up, name the method introScene. Now it’s time to write the method. Have your host introduce the tour, and say some basic facts about your topic. You can write methods so that your host moves around some, or you can keep your host stationary. At the end of this scene, you may want to have your host introduce the next scene, which will be in front of another picture that you decide. See the next slide for the code in my introScene.
As you’re writing your method, test it out by setting your When the world starts event to world.introScene. When your host speaks, make sure the duration is long enough so that you can easily read what they are saying. This is a method I wrote to make my host make a “follow me” type of gesture.
Setting up the Second Scene Now we’ll move the camera and the host so we have a fresh area to set up a new scene. Click on camera in the object tree and drag and drop it onto the viewing screen for your world. Go to move, then right, then 10 meters. Your camera will move to an empty area.
Setting up the Second Scene Now we want our host back in view of the camera. Click on your host in the object tree, and drag and drop it over the viewing area for your world. Go to move, then left, then 10 meters. Position him in front of the camera as you wish.
Setting up the Second Scene Now go back to Google and find a background picture for your second scene. Repeat the process to add the background into your world. It will drop into your world in the area where your first scene is, so to move it, click on its name in the object tree, drag and drop it over the viewing screen, and go to move to, then the name of your host.
Setting up the Second Scene Adjust your background with the object moving buttons until it looks right to you. Now, this may not be the case for you, but my picture is a strange shape, and can’t really be fit into the background very well. We can fix this. Since my picture is a different shaped rectangle, I’ll have to fill in the rest of the background with something else.
Fixing the Background Go to your object gallery, and click on the Shapes folder. Scroll over until you find the Square, and add it into your world. Make it move to your host so that you can see it in your second scene area.
Fixing the Background Now position the square so that it takes up the rest of the background space not covered by the picture. You can change the color of the square if you want, by clicking on square in the object tree, then going to its properties tab on the pane below that, then clicking next to color. Try out a few colors to see what looks best.
Saving the Position of the Camera and Host When you’ve got the host positioned how you want him/her, save the position of both the host and the camera by dropping dummy objects where they are, using the buttons in the add objects window. Don’t forget to rename them as they appear in your object tree, you should name them sceneTwoView for the camera object, and sceneTwoPosition for the host.
Writing Scene Two Now its time to write scene two. Click on world in the object tree and then go to its methods pane. Click on create new method, and name it sceneTwo.
Writing Scene Two The first thing scene two needs is code that moves the host from the intro scene to where they are now. Put a Do together in SceneTwo’s code, then click on your host in the object tree, and drag a move to into the Do Together. Make the host move to sceneTwoPosition.
Writing Scene Two Now we want to do the same thing to the camera. Click on camera in the object tree and go to the camera’s methods. Find move to, and in the Do together, make the camera move to sceneTwoView.
Writing Scene Two Now write the rest of scene two. Your host should give information about the new background picture, and you can also write code so that your host moves around if you want. My finished code is on the next slide.
Setting up the Third Scene For the third scene, we need to move the camera and the host again. Using the steps I outlined before, move the camera and the host to a new, empty area, and position the host until he is in a good position in front of the camera.
Setting up the Third Scene Find another background picture using Google, and place it into your world. Move it to your host so that it is in the new Scene Three area. Mine is another oddly shaped picture, so I will also add in a square again to cover the rest of the area.
Setting up the Third Scene Now, again, you must drop dummy objects at both the camera and the host to save their positions. Use the buttons on the add object screen, and name the object for the camera sceneThreeView, and the host object sceneThreePosition. Remember to click on the host before you drop a dummy for him, so that it goes to the right place.
Writing the Third Scene Now you can write the third scene. Make a new world method called SceneThree. Remember, at the beginning of the scene you must move the host and the camera to their new positions. Then the host will describe the new background picture. Remember to test out your code as you are writing it. See the next slide for my code for this scene.
Setting up the Final Scene This will be the last scene. Move the host and the camera just as you did in the previous two scenes, and choose a picture on Google that will be good for a concluding scene. Remember that your picture will drop into your world in the intro scene area, so you must use move to to get it into the final scene. Also, don’t forget to drop dummy objects at your camera and your host, to remember their positions.
Writing up the Final Scene Now create a new world method called FinalScene, and write the code for the final scene. Remember to include code at the beginning to move the camera and host to the final scene area. See my code for this scene on the next page.
Putting it All Together Now we just have a few more steps to make our historical tour complete. First of all, we must move the camera and the host back to the intro positions, so that when we press Play to see our world, that is where they begin. Use the object tree and move to to get them back to these positions.
Putting it All Together The last step is to put all of the code for our scenes together. Go to the world.my first method tab in your method editor, and drag your scenes in order from the world’s methods into this area. See the next page for what it should end up looking like.
Test your World! Now the only thing left to do is press play! Although I have ended my world here, you can certainly add as many scenes and backgrounds as you wish, to make your tour longer. You can also introduce other characters into your tour, besides your host. There are endless possibilities for variation!
Fixing the Light If you add more than three stops into your world, you may notice that the further you move your camera, the darker your screen becomes. To fix this, you can click on light in your object tree, go to its properties tab, click the plus sign next to Seldom Used Properties,and change its vehicle to camera. Good luck with your tour!