SunTech Adview Diagnostic Station: Features & Instructions
120 likes | 201 Vues
Learn how to use the SunTech Adview ADC for automated BP, manual BP, temperature, and SpO2 measurements, recalling and clearing readings. Detailed instructions for each function provided.

SunTech Adview Diagnostic Station: Features & Instructions
E N D
Presentation Transcript
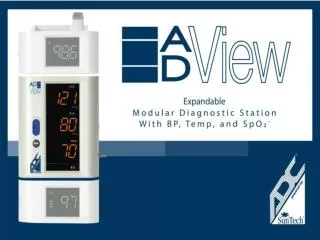
ADC by SunTech Adview features • Overview of theADC by SunTech Adview • Taking an automated BP measurement • Taking a manual BP measurement • Taking a temperature measurement • Taking an SpO2 measurement • Recalling the last reading • Clearing the last reading • Need help? Contents
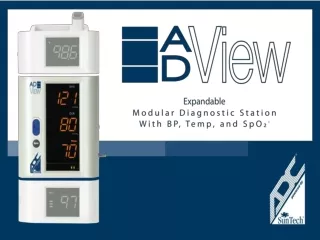
Overview of the ADC by SunTech Adview BP Module Pressure column 1 bar = 10mmHg Systolic BP/ Cuff pressure Diastolic BP Automatic button Manual button Pulse rate icon Warning icon MAP icon Pulse rate/ Mean Arterial Pressure (MAP) Cuff/Hose Error icon Contents
Overview of the fully configured ADC by SunTech Adview Temperature Mode button Temperature Module BP Module Signal quality SpO2 Module Retention clip Contents
Taking a BP Measurement Press the auto button to take an automatic measurement OR Press and hold the manual button to inflate the cuff, and take a traditional manual reading with a stethoscope Contents
Taking an automated BP measurement Wrap cuff snugly around upper arm. Click here to visit the ADC website for further details on proper placement. Ask the patient to stay still and quiet, press and release the automatic button to start an automatic measurement. A measurement is displayed in about 35-40 seconds Contents
Taking a manual BP measurement Wrap cuff snugly around upper arm and position your stethoscope. Press and hold the manual button to inflate the cuff to the desired pressure. Watch the pressure displayed and quickly release the button to deflate the cuff at 3mmHg/sec. When the measurement is determined, press the auto button to completely deflate the cuff. Contents
Taking a temperature measurement • Place a disposable cover on the blue probe; the display shows the type of measurement, (oral). • Wait for the device to beep. • Then, place the probe under the patient’s tongue; the posterior medial sublingual pocket is preferred for accuracy. • A “traveling dash” displays for 10-15 seconds until a reading is displayed. Contents
Taking an SpO2 measurement For the reusable finger sensor, insert the patient’s digit into the sensor; a “traveling dash” displays for 10-20 seconds until a reading is displayed. The reading is updated every second. Contents
Recalling the last reading Note: Measurements are displayed for 2 minutes after which the display shows- - - Press and hold the Automatic BP button for 2 - 3 seconds to display the last measurement values. Contents
Clearing the last reading Note: If there are privacy concerns with regards to measurements on the display, you can clear the display. Once cleared, they cannot be recalled. Press and hold the Automatic BP button for 5 - 6 seconds to clear the last measurement values. Contents