Download

1 / 42
530 likes | 1.79k Vues
CHEST TUBES AND DRAINAGE SYSTEMS NURSING COMPETENCY. Presented by: Jonna Bobeck BSN, RN, CEN. Objectives. Discuss anatomy and physiology of chest Describe mechanics of breathing Explain indications/contraindications Discuss nursing care Describe set up and monitoring Understand water seal.

E N D
CHEST TUBES AND DRAINAGE SYSTEMS NURSING COMPETENCY Presented by: Jonna Bobeck BSN, RN, CEN
Objectives • Discuss anatomy and physiology of chest • Describe mechanics of breathing • Explain indications/contraindications • Discuss nursing care • Describe set up and monitoring • Understand water seal
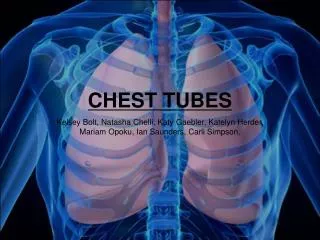
Anatomy of the Chest Visceral Pleura Parietal Pleura Lung Ribs Intercostal Muscles
Contraindications and Cautions • Be aware of hemodynamic status • Use of a trocar • Pneumothorax and air transport
WATER SEAL • Safe • Cost effective • Measurement of intrathoracic pressure
PREPARATION AND INSERTION • IV, O2, Monitor • Proper cleansing • Place patient supine • Administer antibiotics • Prepare drainage device • Tape or band connections • Apply occlusive dressing • Obtain CXR • Monitor
WHAT TO CHECK DURING SYSTEM OPERATION: SUCTION CONTROL STOPCOCK
WHAT TO CHECK CONTINUED • Verifying system operation • Placement of unit
PLACEMENT OF UNIT • Place below patient’s chest • Use floor stand or hangers
WHAT TO CHECK CONTINUED • Positive pressure protection • Adding water to water seal • Adding water to suction control • Suction greater than -20cmH20 • How to lower suction control pressure setting • Recording drainage volume
GRAVITY DRAINAGE AND SYSTEM DISCONNECT • Placement • Stopcock • Close slide clamp
WARNINGS AND PRECAUTIONS • Colleceted blood should not remain in chest drain for more than 6 hours • Keep patient tube clamp open during operation • Purge all air/do not administer entire contents • Citrate toxicity • Use a microemboli filter • Use hangers • Maximum infusion pressure 150 mmHg
SET UP ATS COLLECTION • Close chest drain ATS access line clamp and remove spike port cap. Insert ATS bag spike into access line of chest tube drainage system. • Position ATS bag below the base of the chest drain. • Open both clamps. Holding ATS bag below base of chest drain, bend ATS bag upward where indicated and it will pop open. Do not activate ATS bag prior to connecting chest drain. • When drainage has been collected Close ATS access line and ATS blood bag clamps. • Remove spike from ATS access line and recap ATS access line spike port and position access line in the holder located on top of the chest drain. • Keep ATS clamp fully closed at all time when not in use.
ATS BAG REINFUSION SET UP • Prime I.V. blood administration and microemboli blood filter with sterile saline. • Invert ATS bag with spike port pointing upward and remove cap using sterile technique. • Insert saline filter spike into ATS bag spike port. • Return bag to upright position and place on standard height I.V. pole.
TROUBLESHOOTING GUIDE • How to confirm airleak • Floatball is at the bottom of water seal column • Lowering water seal level • Water rises to the top of the water seal float valve • Tidaling of pressure ball
TROUBLESHOOTING CONTINUED • No bubbling in the suction control chamber • Vigorous bubbling noted in the suction control • Should suction control valve be turned off for transport? • should the manual vent be used during gravity drainage? • What to do if drainage system gets knocked over
UNEXPECTED OUTCOMES • Air leak • Mediastainal shift • Tube dislodgement • Substantial increase in bright red drainage • Loss of suction • Crepitus
DOCUMENTATION • Patient and family education • Reason for tube • Assessment • Presence of fluctuation and bubbling • Amount of suction • Patient tolerance
References • Atrium Medical Corporation, Initials. (2010). A personal guide to managing chest drainage. New Hampshire: Atrium Medical Corporation.