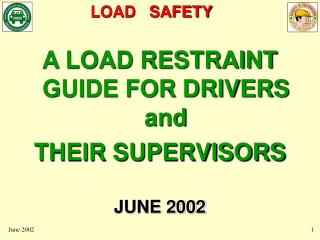
Load Restraint T-1130: Preventing Load Shift - DGL (Aust) Pty Ltd.
870 likes | 1.05k Vues
This learner’s tool covers the skills and knowledge required for load restraint to ensure safe transport of freight and prevent accidents. Learn about load shifting causes, consequences, and effective restraint methods. Contact us for support.

Load Restraint T-1130: Preventing Load Shift - DGL (Aust) Pty Ltd.
E N D
Presentation Transcript
Load restraint T-1130 This work has been produced by DGL (Aust) Pty Ltd This Learner’s Tool is about the skills and knowledge required for load restraint at DGL (Aust) Pty Ltd.
Before you get started • It is important that you complete all sections in this learning tool as it has been designed so that You can abide by the procedures of our organization. You can apply what you have learnt in this package in your day to day activities • This Learning Tool is designed to be relevant only to DGL (Aust) Pty Ltd employees and only applied whilst employed with DGL (Aust) Pty Ltd • You may have already acquired knowledge in the area identified in this package as you may have completed some specialized training. Or you may have been working within the industry for some time. Should you identify any improvement opportunities in the information contained in this package or have difficulties completing the package please contact National Training and Compliance Manager DGL (Aust) Pty Ltd PO BOX 1594 EAGLE FARM QLD 4009 Ph 07 3868 1001 Fax 07 3868 1055
Load restraint Loading, unloading and securing general freight safely and efficiently saves lives and saves money. Proper and secure loading will ensure that damage to freight during transport is significantly reduced. The following areas are covered in this learning tool A load restraint system on a vehicle should be capable of restraining the following percentages of the weight of the load from shifting: • • 20 per cent upward. • • 80 per cent forward. • • 50 per cent rearward. • • 50 per cent sideways
What causes load shift Generally, there are six factors that cause the load to shift or move on a vehicle (if you don't restrain the load). These are: • Sudden braking and accelerating • Cornering • Hills and undulating roads • Uneven road surfaces • Adverse road camber • Wind and airflow over the vehicle
Braking : Factor #1 Sudden braking will make the unrestrained load move forwards. The load could fall off the vehicle or crash into the cab potentially injuring the driver
Braking (in Reverse): Factor #1 Sudden braking when reversing will make the unrestrained load move backwards. It may fall off the back of the vehicle
Cornering: Factor #2 Going around a corner will cause the unrestrained load to shift sideways. The load will shift considerably more the higher the speed or the tighter the corner.
Hills: Factor #3 Travelling over undulating or hilly roads causes your vehicle to travel at either an upwards or downwards slope. Going down the slope will cause the unrestrained load to shift forwards while going up the slope causes the load to shift backwards.
Uneven road surface : Factor #4 Rough or uneven road surfaces may cause the unrestrained load to bounce, shift or fall off the vehicle.
Road Camber: Factor #5 The camber of the road will cause the unrestrained load to shift sideways. The greater the camber, the more the load will shift. This is particularly hazardous on worn or poorly maintained roads.
Airflow and Wind : Factor #6 Travelling at high speed on a highway or in windy conditions can cause the unrestrained load to shift. Particularly if you are carrying lightweight objects with large surface areas.
Consequences of load shift Load shifting can: • Cause the load to fall off a vehicle and hit other vehicles or pedestrians. • Cause accidents because other vehicles swerve to miss the load that has fallen on the road. • Cause loss of vehicle control because the load was out of position or too heavy or too long
Load restraint methods Think about how you can prevent loads from moving on a vehicle. Loads can be restrained: • Directly by attaching the load to the vehicle, • Directly by containing the load within the vehicle, • Directly by blocking the load from moving, • Indirectly by tying down the load.
Increasing Load grip • Some loading deck surfaces will grip the load better. • Rusty steel grips better than smooth steel. • A rubber load mat grips better than smooth or rusty steel
Textured surface doesn't always improve grip! A textured surface like checker plate steel doesn't always provide better grip than smooth steel. It depends on the type of load that you are carrying and the material that is in contact with the load deck. Smooth Steel load deck Checker plate load deck Many operators think that textured surfaces like checker plate or ribbed steel will result in better grip. However, these surfaces can have the same amount of friction as smooth steel.
What happens when you carry unrestrained equipment Unrestrained or improperly restrained plant and equipment will slide on a load deck. This can cause damage to the vehicle, equipment, the public or the road system.
What happens when you attach equipment Attached equipment is prevented from moving by using direct lashings (chains) or connectors (twist locks).
Key Learning points for Attaching Load restrained by attaching • Loads such as heavy equipment can be directly restrained by lashings or twist locks. This is known as 'attaching'. • Heavy equipment is often attached to a loading deck of a vehicle using chains and the anchor points on the equipment. • Shipping containers are often attached to the loading decks of semi-trailers with twist locks.
What happens when you carry loose loads When loads are unrestrained, they can shift or fall from the vehicle. Load shifting can cause some or all of the load to fall off a vehicle and it may affect vehicle performance
What happens when you 'contain' the load When the load is packed tightly within the headboard, side gates and tailgate of the vehicle, it is less likely to shift. The gates also restrain the load in all directions except upwards.
Key Learning points for containing Contained loads are directly restrained without using any securing devices such as lashings. Typical contained loads can include: • liquids in tanks, • bulk solids in tanks or rigid sided truck bodies or • mixed loads in rigid sided truck bodies or containers • General freight can sometimes be contained by using gates and the headboard, although this is often in combination with lashings.
Load shift during braking An unrestrained load positioned in the middle of the load deck can shift when the vehicle brakes. This can cause damage to the load, the vehicle, the public or the road system.
Blocking the load Positioning the load against the headboard prevents the load from shifting in the forward direction when the vehicle brakes
Key Learning points for blocking • Moving the load against the headboard of the truck: • blocks (stops) the load from moving forward is known as "Blocking".
Uneven Surfaces When the vehicle travels over rough or uneven surfaces, the load can lose contact with the load deck resulting in load shift.
What happens when you tie down the load When the load is tied down, it is clamped to the load deck and is less likely to shift.
Key Learning points tying down Using lashings to restrain a load is known as 'tying down'. Tying down prevents: • movement to the sides of the vehicle • movement to the rear of the vehicle • movement upwards (from rough roads)
Sometimes tying down is not enough If you rely on tie-down lashings only, the load can still shift. .
Tying down and blocking a load Combining tying down and blocking will ensure that the load is much less likely to shift. The load doesn't need to be against the headboard to be blocked. The load can be blocked by positioning wooden pallets between the load and the headboard.
Key Learning points • It is often necessary to combine more than one type of load restraint. For example blocked by the pallet (dunnage) tied down by lashings
Load restraint methods Summary Load restraint can be either: • Direct (attaching, containing, and blocking) • Indirect (tie-down) or • A combination of both types.
When to use chains Chains are the strongest type of tie-down lashing. Chains are often used with heavier non-crushable loads such as: • Steel tubing or pipes • Steel coils • Concrete panels • Concrete tubing • Heavy equipment • Only chains complying with the Australian/New Zealand standard should be used. Chains are usually tensioned with a dog or turnbuckle.
The lashing angle affect tie-down strength The lashing angle is the angle made between the edge of the load and the tie-down point on the vehicle. The lashing angle is usually rounded to the nearest of: 15, 30, 45, 60 or 90° (degrees). .
Key Learning points The strength of your tie-down restraint depends on the lashing angles. • High lashing angles provide stronger load restraint. This is true for all types of lashings: ropes, webbing and chains. High angle = Stronger restraint You can often achieve higher angles by stacking loads, repacking loads, using dunnage, or repositioning loads on the load deck.
Combine load restraint You can reduce the number of chains by using other forms of restraints and equipment. Whenever practical, use: Blocking Containing Dunnage (including load mat) Packed and palletised loads Stanchions and pins Corner protectors
How many chains to use Engineers determine the maximum weight that can be restrained by a single chain under certain conditions and publish them in tie-down tables. The tie-down load tables for chains are found in section F of the Load Restraint Guide. This animation shows you how the tables can be used to work out the number of chains needed to restrain a load.
Practise at calculating the number of chains to use Practise with the problems above and see how blocking, lashing angle, weight and friction affects the number of restraints. Enter the values for each problem by clicking the buttons. This will show you the minimum number of chains that are needed to restrain the load. This animation is based on the Tie-down table for chains.
Summary on chains The number of chains needed depends on: • Lashing angle • Use of other restraint equipment (blocking, dunnage, floor of vehicle) • Weight of the load Do: • Corner protectors prevent this load from being damaged by chains • Combine restraints whenever possible • Use dunnage and load mat • Block load against headboard or with a pallet in front of load • Position loads to maximize tie-down angle • Use corner protectors on crushable loads • Ensure that the lashing capacity of the chain is suitable for the load • Don't: • Use worn or damaged chains • Use faulty or worn restraint devices
How to tie down a load usingchains You need to use strong restraints to tie down loads such as steel and timber or other heavy loads. You can get very high levels of restraint using a dog and chain, if you use them correctly. This section will show you how to tie down a load with a dog and chain. You will learn to: • Select a suitable chain for the load • Attach chain hook to one side of vehicle • Throw the chain over the vehicle • Attach chain hook to the other side of vehicle • Connect dog hooks onto chain • Adjust the tension • Close the dog • Secure loose chain ends This section contains a number of instructional video clips. If you have a slow Internet connection, some video clips may take a minute or two to appear on your screen. This section also contains a number of flash animations. You will need to move your mouse over the round blue buttons in the animation to find out more.
Equipment • The chain assembly includes the chain, chain hooks, dogs and a dog pipe. • The chain must be the correct strength for the job (typically, 8mm chain is used) • The most common type of chain hook is the grab hook • The dog pipe should be the size specified by the dog manufacturer
Select a suitable chain Before you use your equipment, you must ensure that: All parts are in working order The chain is not worn or damaged The lashing capacity (LC) of the chain is suitable for the load.
Road Safety • You must ensure that your working environment is safe before you tie down your load. Make sure that you: • If possible place tensioners on the passenger side of the vehicle • Watch for traffic if you have to secure or retension on the side closest to traffic • Don't secure the load with your back to traffic • Don't step back without looking • Wear a safety vest at all times • Consider placing traffic cones to warn other motorists
Attach the chain Attach a hook by looping it around the tie rail at a cross member. The tip of the hook should be pointed outwards as shown in the video. This ensures that the hook tip won't catch on anything whilst tensioning the load. Always be sure to connect the chain at a cross member on the vehicle. Chains attached at the middle of a tie rail may bend or break the tie rail.
Throw the chain over the load ……… safely Before you throw the chain, be sure that you check the other side of the vehicle to ensure that it is clear of people or obstructions. The chain and hooks are quite heavy and could harm someone or damage equipment. It is important to yell out to warn other people who might be passing by before you throw the chain.
Attach hook to the other side of the vehicle Go around to the other side of the vehicle. Attach the chain hook by looping it around the tie rail at a cross member. Once again, ensure that the tip of the hook is pointed outwards as shown in the video. Return to the original side of the vehicle and pull up the slack in the chain. Always be sure to connect the chain at a cross member on the vehicle. Chains attached at the middle of a tie rail will bend or break the tie rail.
Hook the dog onto the chain • Open the dog. • Connect the upper dog hook to the chain that is secured to the other side of the vehicle. • Connect the lower dog hook onto the chain that is secured to the same side of the vehicle.
Adjust the dog • Make adjustments to the dog and chain until you get the tension right. • You may need to move the chain through the lower dog hook one link at a time until you find the right tension. • Test the tension by partially closing the dog.
Close the dog • Once you have attached the dog hooks and adjusted the dog, you are ready to tighten it. You are allowed to use a dog pipe (cheater bar) providing that this meets the manufacturer's specifications. Using the dog pipe will make it easier to close the dog and achieve a high tension on the chain. • Be very careful that the dog pipe does not slip off the end of the dog. The dog can recoil with a large amount of force. Also, make sure that your arms don't move above the 9 o'clock position. This can lead to back injury.
Secure the loose ends • Wind the loose end of chain around the dog handle once or twice. • Secure the remaining chain underneath the load.