Large Scale Visualization with ParaView
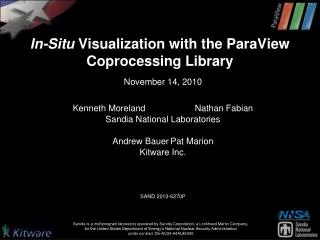
Large Scale Visualization with ParaView. Supercomputing 2011 Tutorial November 13, 2011 Kenneth Moreland W. Alan Scott Nathan Fabian Jeffrey Mauldin Sandia National Laboratories Andrew C. Bauer Robert Maynard Kitware, Inc.

Large Scale Visualization with ParaView
E N D
Presentation Transcript
Large Scale Visualization with ParaView Supercomputing 2011 Tutorial November 13, 2011 Kenneth Moreland W. Alan Scott Nathan Fabian Jeffrey Mauldin Sandia National Laboratories Andrew C. Bauer Robert Maynard Kitware, Inc. Sandia is a multiprogram laboratory operated by Sandia Corporation, a Lockheed Martin Company,for the United States Department of Energy’s National Nuclear Security Administration under contract DE-AC04-94AL85000.
Outline • Introduction • Basic Usage • Visualizing Large Models • There is also In Situ Visualization with ParaView tutorial this afternoon. • Scripting, customization, integration with other codes.
To Follow Along… • Install ParaView 3.12. • http://www.paraview.org Download • Get example material. • http://www.paraview.org/Wiki/The_ParaView_Tutorial • Data also available on tutorial handout USB stick.
What is ParaView? • An open-source, scalable, multi-platform visualization application. • Support for distributed computation models to process large data sets. • An open, flexible, and intuitive user interface. • An extensible, modular architecture based on open standards. • A flexible BSD-2 license • Commercial maintenance and support.
Current ParaView Usage • Used by academic, government, and commercial institutions worldwide. • Downloaded ~73K times in 2010. • HPCwire Editors’ Choice and HPCwire Readers’ Choice 2010 Awards for Best Visualization Product or Technology.
Data Ranges • Used for all ranges of data size. • Landmarks of SNL usage: • 6 billion structured cells (2005). • 250 million unstructured cells (2005). • Billions of AMR cells (2008). • Scaling test over 1 Trillion cells (2010).
ParaView Application Architecture ParaView Client pvpython Custom App UI (Qt Widgets, Python Wrappings) ParaView Server VTK OpenGL MPI IceT Etc.
ParaView Development • Started in 2000 as collaborative effort between Los Alamos National Laboratories and Kitware Inc. (lead by James Ahrens). • ParaView 0.6 released October 2002. • September 2005: collaborative effort between Sandia National Laboratories, Kitware Inc. and CSimSoft to rewrite user interface to be more user friendly and develop quantitative analysis framework. • ParaView 3.0 released in May 2007.
ARL ERDC US Army (SBIR) US Air Force (STTR) ONR Support Contracts Electricity de France Microsoft Current Funding • Other contributors • Swiss National Supercomputing Centre • DOE SLAC • Ohio State • Mississippi State • RPI
Uniform Rectilinear (vtkImageData) Non-Uniform Rectilinear (vtkRectilinearData) Curvilinear (vtkStructuredData) Multi-block Hierarchical Adaptive Mesh Refinement (AMR) Hierarchical Uniform AMR Octree Polygonal (vtkPolyData) Unstructured Grid (vtkUnstructuredGrid) Data Types
More Information • Online Help – F1 • The ParaView User’s Guide • http://paraview.org/Wiki/ParaView/Users_Guide • The ParaView web page • www.paraview.org • ParaView mailing list • paraview@paraview.org
User Interface Menu Bar Toolbars Pipeline Browser Object Inspector 3D View
Creating a Cylinder Source • Go to the Source menu and select Cylinder. • Click the Apply button to accept the default parameters.
Simple Camera Manipulation • Drag left, middle, right buttons for rotate, pan, zoom. • Also use Shift, Ctrl, Alt modifiers.
Creating a Cylinder Source • Go to the Source menu and select Cylinder. • Click the Apply button to accept the default parameters. • Increase the Resolution parameter. • Click the Apply button again.
Undo Redo Undo Redo Camera Undo Camera Redo
Creating a Cylinder Source • Go to the Source menu and select Cylinder. • Click the Apply button to accept the default parameters. • Increase the Resolution parameter. • Click the Apply button again. • Delete the Cylinder.
Supported Data Types • ParaView Data (.pvd) • VTK (.vtp, .vtu, .vti, .vts, .vtr) • VTK Legacy (.vtk) • VTK Multi Block (.vtm,.vtmb,.vtmg,.vthd,.vthb) • Partitioned VTK (.pvtu, .pvti, .pvts, .pvtr) • ADAPT (.nc, .cdf, .elev, .ncd) • ANALYZE (.img, .hdr) • ANSYS (.inp) • AVS UCD (.inp) • BOV (.bov) • BYU (.g) • CCSM MTSD (.nc, .cdf, .elev, .ncd) • CCSM STSD (.nc, .cdf, .elev, .ncd) • CEAucd(.ucd, .inp) • CMAT (.cmat) • CTRL (.ctrl) • Chombo(.hdf5, .h5) • Claw (.claw) • Comma Separated Values (.csv) • Cosmology Files (.cosmo, .gadget2) • Curve2D (.curve, .ultra, .ult, .u) • DDCMD (.ddcmd) • Digital Elevation Map (.dem) • Dyna3D(.dyn) • EnSight (.case, .sos) • Enzo boundary and hierarchy • ExodusII (.g, .e, .exe, .ex2, .ex2v.., etc) • ExtrudedVol (.exvol) • FVCOM (MTMD, MTSD, Particle, STSD) • Facet Polygonal Data • Flash multiblock files • Fluent Case Files (.cas) • GGCM (.3df, .mer) • GTC (.h5) • GULP (.trg) • Gadget (.gadget) • Gaussian Cube File (.cube) • JPG Image (.jpg, .jpeg) • LAMPPS Dump (.dump) • LAMPPS Structure Files • LODI (.nc, .cdf, .elev, .ncd) • LODI Particle (.nc, .cdf, .elev, .ncd) • LS-DYNA (.k, .lsdyna, .d3plot, d3plot) • M3DCl (.h5) • MFIX Unstructred Grid (.RES) • MM5 (.mm5) • MPAS NetCDF (.nc) • Meta Image (.mhd, .mha) • Miranda (.mir, .raw) • Multilevel 3d Plasma (.m3d, .h5) • NASTRAN (.nas, .f06) • Nek5000 Files • Nrrd Raw Image (.nrrd, .nhdr) • OpenFOAM Files (.foam) • PATRAN (.neu) • PFLOTRAN (.h5) • PLOT2D (.p2d) • PLOT3D (.xyz, .q, .x, .vp3d) • PLY Polygonal File Format • PNG Image Files • POP Ocean Files • ParaDIS Files • Phasta Files (.pht) • Pixie Files (.h5) • ProSTAR (.cel, .vrt) • Protein Data Bank (.pdb, .ent, .pdb) • Raw Image Files • Raw NRRD image files (.nrrd) • SAMRAI (.samrai) • SAR (.SAR, .sar) • SAS (.sasgeom, .sas, .sasdata) • SESAME Tables • SLAC netCDF mesh and mode data • SLAC netCDF particle data • Silo (.silo, .pdb) • Spheral (.spheral, .sv) • SpyPlot CTH • Spy Plot (.case) • Stereo Lithography (.stl) • TFT Files • TIFF Image Files • TSurf Files • Tecplot ASCII (.tec, .tp) • Tecplot Binary (.plt) • Tetrad (.hdf5, .h5) • UNIC (.h5) • VASP CHGCA (.CHG) • VASP OUT (.OUT) • VASP POSTCAR (.POS) • VPIC (.vpc) • VRML (.wrl) • Velodyne (.vld, .rst) • VizSchema (.h5, .vsh5) • Wavefront Polygonal Data (.obj) • WindBlade (.wind) • XDMF and hdf5 (.xmf, .xdmf) • XMol Molecule
Load disk_out_ref.ex2 • Open the file disk_out_ref.ex2. • Load all data variables. • Click
Data Representation Toggle Color Legend Reset Scalar Range Mapped Variable Vector Component Representation Edit Colors
Geometry Representations Points Wireframe Surface Surface with Edges Volume
Calculator Contour Clip Slice Threshold Extract Subset Glyph Stream Tracer Warp (vector) Group Datasets Extract Level Common Filters
Quick Launch • Used for searching for filters by name • Keyboard shortcut • Ctrl-space for Windows & Linux • Alt-space for Mac
Apply a Filter • Make sure that disk_out_ref.ex2 is selected in the pipeline browser. • Select the contour filter.
Change to Temp Change to 400 Apply a Filter • Change parameters to create an isosurface at Temp = 400K.
Apply a Filter • Make sure that disk_out_ref.ex2 is selected in the pipeline browser. • Select the contour filter. • Change parameters to create an isosurface at Temp = 400K.
Multiview • Open disk_out_ref.ex2. Load all variables. • Add clip filter. • Uncheck Show Plane. • Color surface by Pres.
Multiview • Split the view horizontally. • Make Clip1 visible. • Color surface by Temp.
Multiview • Split the view horizontally. • Make Clip1 visible. • Color surface by Temp. • Right-click view background, Link Camera… • Click other view.
Multiview • Split the view horizontally. • Make Clip1 visible. • Color surface by Temp. • Right-click view background, Link Camera… • Click other view. • Click
Plotting • Open disk_out_ref.ex2. Load all variables. • Clip, uncheck, , • Select disk_out_ref.ex2 • Filters → Data Analysis → Plot Over Line.
Plotting • Open disk_out_ref.ex2. Load all variables. • Clip, uncheck, , • Select disk_out_ref.ex2 • Filters → Data Analysis → Plot Over Line. • Once line satisfactorily located,
Interacting with Plots • Left, middle, right buttons to pan, zoom. • Mouse wheel to zoom. • Reset view to plot ranges.
Plots are Views • Move them like Views. • Save screenshots.
Adjusting Plots • Place plot with view split, delete, resize, and swap. • In Display tab, turn off all variables except Temp and Pres. • Select Pres in the Display tab. • Change Chart Axis to Bottom – Right.