A1 Acoustic Rhinometer
270 likes | 507 Vues
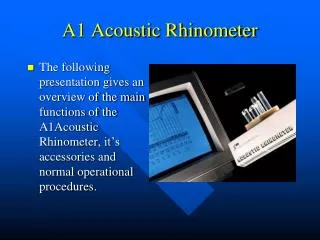
A1 Acoustic Rhinometer. The following presentation gives an overview of the main functions of the A1Acoustic Rhinometer , it’s accessories and normal operational procedures. A1 Acoustic Rhinometer PC Interface.

A1 Acoustic Rhinometer
E N D
Presentation Transcript
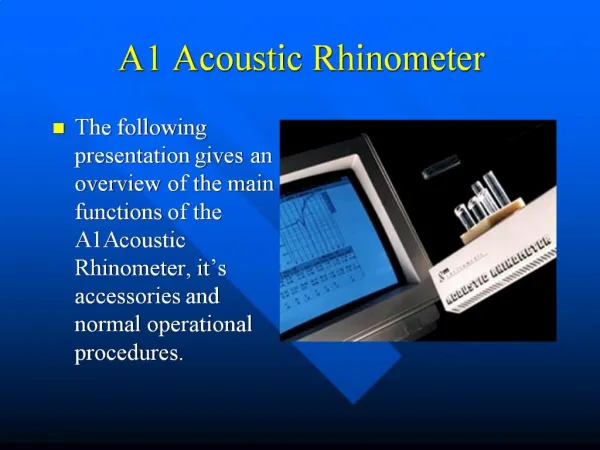
A1 Acoustic Rhinometer • The following presentation gives an overview of the main functions of the A1Acoustic Rhinometer, it’s accessories and normal operational procedures.
A1 Acoustic RhinometerPC Interface • The system comprises the A1 Rhinometer linked to a compatible PC through a USB interface, along with a sound tube and nosepieces to link to the subject.
A1 Acoustic RhinometerSoftware/Hardware • Software capable of running with Windows from XP up to Windows 8 is provided. • The standard sound tube is used with adults and children from about 5 years of age. • Smaller alternatives are available for younger children and animal work
A1 Acoustic RhinometerAccessories • Connection to subjects is by means of anatomical nose adaptors which are available in medium and large sizes. They are supplied in pairs as they are profiled to fit the shape of the nose. An improved seal can be obtained by using gel on the top face. • Round ended (conical) nosepieces are available as an alternative.
A1 Acoustic RhinometerAccessories (Continued) • Every A1 system is supplied with a calibration plug (black unit), while the Clinical/Research versions of A1 are also supplied with an artificial nose model and straight tube to allow confirmation of accuracy and fine tuning of the system for best performance.
A1 Acoustic RhinometerSoftware • The software opens on the patient details tab. • All of the fields shown can be moved, deleted, edited or altered to define which character type and number of characters are allowed. • One field can be set as the file name for the subject eg ID Number.
A1 Acoustic RhinometerSoftware • Under File and Settings it is possible to select the colour used for any element on the screen and also on the printouts. • It is also possible to define the line style, thickness and Font used.
A1 Acoustic RhinometerSoftware • Under the Results tab you can set • The distance range over which volume is calculated • The distance range over which the system looks for minimum areas (turning points)
A1 Acoustic RhinometerSoftware (continued) • You can also specify up to 5 additional distance sectors over which volume is calculated and • Up to 5 fixed distances into the nose at which points, the area present will be reported.
A1 Acoustic RhinometerSoftware (continued) • The scale used for the vertical axis can be reduced or expanded and can be changed from logarithmic to linear. • The scale used for the distance axis can be reduced or expanded. • The scale used when curves are shown in linear mode can also be changed.
A1 Acoustic RhinometerSoftware (continued) • Under the Acquisition tab the default side and the number of curves comprising a test can be altered. • You can also change the time delay between curve measurements. 600 mS is the lowest recommended delay.
A1 Acoustic RhinometerSoftware (Continued) • The Clinical/Research versions of A1 are supplied with an artificial nose to allow the performance of the system to be checked. The true profile is shown on screen and can be compared against a measured value. • Provision has been made to allow other nose models, if generated for other populations, to be added by changing the standard nose Datafile.
A1 Acoustic RhinometerOperation • Switch on A1 and start the program. Fit the calibration plug to the end of the sound tube. • If the patient has not been tested before, select the Patient tab and enter Patient details. If they have been tested before click on OPEN and select their file.
A1 Acoustic RhinometerOperation • Click on the Acquire icon at the top of the screen. • Check that the calibration plug is still in the sound tube, then click on CALIBRATE. • Look for a message saying Calibration Complete
A1 Acoustic RhinometerOperation • Select side to tell the system whether you want to measure the RIGHT or LEFT side of the nose. • Look at the subject and decide whether you need to use medium or large anatomical nosepieces or if appropriate, what size of conical nosepiece. • If anatomical, select a blue nosepiece to measure the left side and a red nosepiece for the right side.
A1 Acoustic RhinometerOperation • Fit the nosepiece to the sound tube, position it on the side of the nose selected earlier with the pointed section of the nosepiece towards the centre. • Ask the subject to hold the sound tube gently in position while you check to see if the nose is distorted. Move the sound tube if required. • Ask the subject to breath gently in and out through their nose to see if a leak is present.
A1 Acoustic RhinometerOperation • When you are happy with positioning, ask the subject to open their mouth and mouth breathe. • Tell them that when you say, take a breath in and hold their breath. • Ask them to do that and then click on the red button to take in data. A footswitch is available as an optional extra, to start the measurement.
A1 Acoustic RhinometerOperation • Over the next couple of seconds curves will show on the screen, after which you can remove the sound tube from the subject. • Curves can be viewed, and if required, deselected by using the tick boxes on the right side of the screen
A1 Acoustic RhinometerOperation • The volume between previously set distances into the nose is displayed below the curves, along with the position and distance into the nose of the first 2 minimum areas found. • The test is added to the patient test list to the left of the screen. • Remarks can now be added to the scroll box on the bottom right of screen.
A1 Acoustic RhinometerOperation • Testing of the other side of the nose, or additional testing on this side, can now be performed. • The new curves will be added to the test list for that subject. • Comparisons of various kinds can now be made.
A1 Acoustic RhinometerOperation • Comparisons can be made between any two left or any two right side curves. Also between any left and right side result. • The picture shows a left/right comparison in linear view, but you can also superimpose them or show them separately in horizontal or vertical split view, or in report view
A1 Acoustic RhinometerOperation • This picture shows the same curve in Report view. • Below the curves see:- • The volume between a number of preset distances into the nose and the first two minimum areas, for LEFT side and RIGHT side. • Percentage differences between the LEFT and RIGHT values are calculated and shown.
A1 Acoustic RhinometerOperation • Having created a combined LEFT/RIGHT test result, you can compare this with another to give ANALYSIS view. • Additional values are calculated and PRE/POST graphical displays created.
A1 Acoustic RhinometerOperation • A printout of any result shown on the screen can be made by clicking on the PRINT button. • A more sophisticated printout can be created by selecting the OUTPUT tab.
A1 Acoustic RhinometerOperation • Any of the files in the patient test list can be selected for printout by clicking in the appropriate tick box. • The system will add the patient details to the top of the first page
A1 Acoustic RhinometerOperation • The final operation in a test sequence will be to save the new results to the subject’s record file. • This is done by clicking on the save button which generates a SAVE AS dialog box, which will show the name of the file already opened, in the case of someone who has been tested before, or the name from the subject details tab designated to be the file name.
A1 Acoustic RhinometerOperation • Having saved/updated the previous records, click on NEW to start testing a subject new to the system, or click on OPEN to add records to someone who has already been tested, or on EXIT to close the program.