Intramuscular Injections
Intramuscular Injections. Goal:. - After giving this review session student/co-worker will be able to confidently administer an intramuscular injection, know sites used for injections , and demonstrate different techniques of giving an intramuscular injection.

Intramuscular Injections
E N D
Presentation Transcript
Goal: • -After giving this review session student/co-worker will be able to confidently administer an intramuscular injection, know sites used for injections, and demonstrate different techniques of giving an intramuscular injection. • -Perform giving IM injections. • -Demonstrate correct technique for giving IM injections. • -Identify equipment used for giving IM injections. • -Demonstrate and explain: Z track method and Air lock technique. • -Demonstrate correct disposal of used needle. • -Explain and be able to identify how the patient tolerated the IM injection.
-In this session learner will be educated in IM injections- • -Where to give an IM injection. • -Technique for giving IM injection • -Demonstrate different method for giving an IM injection. • -Equipment needed to perform an IM injection.
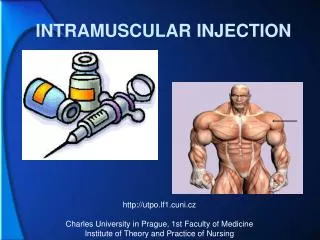
-Equipment needed to perform an IM injection- • -Syringe 1-2 inches in length. • -Medication to be administered. • -Gloves • -Band-Aid • -Alcohol swab • -Patient • -Muscle where medication will be administered
-Choosing the site to administer medication- -There are several different sites an IM injection can be given.- Site determination- • -Stage of patients development. • -Body build • -Physical condition • -Amount of the medication to be given
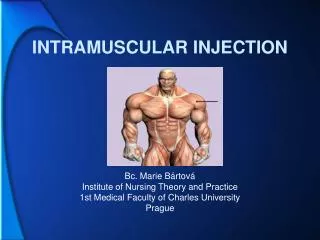
-Sites- • Mid Deltoid- common site, upper arm, 3 fingers width. • Dorsalgluteal- look out for sciatic nerve, given in the butt. • Rectus femoris- right on top of the thigh. • Ventrolgluteal- side of the butt, or on the hip. • Vastislateralis- outer thigh, in the middle.
Mid Deltoid- • -Is on the upper arm. • - Take 3 fingers and place them at the top of the shoulder. • -At the end of the third finger in the middle of the muscle is where the injection can be made.
- Dorsalgluteal- • -Injection is in the butt. • -Watch out for the sciatic nerve. • -Have patient stand or lay face down with toes pointing inward. (relaxes muscle) • -Divide the buttocks into 4 quadrants; give the injection in the outer, upper quadrant toward the hip. • -DO NOT give to children who are not walking yet. (Muscles are not developed enough)
Ventrogluteal- • -Good for adults and small children. • - Find the upper part of the hip. • -Place palm on hip (greater trochater), with fingers point to the ground, and make a very large “V” with your pointer finger and middle finger. • -In the middle of the “V” is where the injection can be done.
Rectus Femoris • -On the anterior thigh, above the knee. • -Used mostly by people who have to get themselves injections. • -This is painful, because the muscles in the anterior thigh are tense when given.
VastusLateralis- • -Most preferred site. • -Given to children under 5 years of age. • - Patient should be sitting when this injection is to be given. • -On the outer thigh about half way between the knee and the hip.
-Technique of Giving an Intramuscular Injection- • -Check the 5 rights of medication administration. • -Choose the site the IM injection. • -Check the patient for any allergies. • -Gather you supplies needed to perform IM injection. • -Wash your hands. • -Put on gloves. • -Open alcohol swab and in a circular motion, clean area in a 2 inch diameter at the site of the intended IM injection. • -Let fully dry.
Continued… • -Pull skin around the clean site taut. • - take needle in dominate hand between the thumb and the index finger. • - At a 90 degree angle, plunge the needle into the skin in a dart like motion. • -Depending on the site and the condition of the patient, determine how far the needle is going to have to go into the skin to be in the muscle. • -Stabilize the needle with the non dominate hand. • -Use dominate hand to pull back on the plunger and aspirate or blood. (If there is blood aspirated back into the needle, remove and dispose in a sharps container. start from the beginning.) • -Push the medication at a slow and steady pace. Remember to hold the needle as steady as possible.
Continued.. • To take the needle out, quickly pull up at a 90 degree angle. • -Make sure to cover the needle immediately after withdrawing it from the skin. • -Apply some pressure at the site with the alcohol swab that was used to clean the site. • -Message the site to help disperse the medication that was just given. • -Cover site with Band-Aid. • -Dispose of needle into a sharps container. • -Throw away gloves and wash hands. • -Observe the patient for signs of any allergic reaction, N&V, or any other adverse reactions that may go along with the medication. • - Always remember to document.
-Different Methods of Giving IM injections- • -Just giving IM injection and massaging site- • - Z track • - Air lock
Just giving IM injections and messaging site- • -Just dose of medication given. • -Message site after to help disperse medication in to the muscle.
Z track method- • -Used for medications that can cause irritation, can be used for all IM medications. • -Pull skin at the site to the side. • - Still give the injection at 90 degree angle. • -When shin is let go and needle removed the needle track is cut off and the medication can not leak out. • -This will decrease irritation and bruising of the skin.
Air lock Technique- • -Medication is drawn up. • -0.2mL of air can be added to the medication. • -This will ensure that all the medication has been pushed though the needle. • - Still given at a 90 degree angle. • -Make sure medication is given first and the air lock second. • -Seals needle track so medication will not go into the subquncaneaus tissue, which can cause pain, soreness and bruising.
Review- • -Always remember 5 rights of medication administration. • -Right dose • -Right patient • -Right time • -Right route • -Right medication • -Choosing an IM Injection site that works best for your patient. • (Ex: Infants can not have injections in the dorsal gluteal (butt), In determining a site take into account the patients body build, try to avoid flabby tissue.) • -Different techniques of giving an IM injection: Z track, Air lock.
1.) Name the site that should not be used for children who are not walking yet?
pullingskin to the side, then giving the shot, cutting off the needle track.
Alcohol swab, 2inches around the site in diameter, let dry completely.
3.)How do you determine where to give a mid deltoid IM injection?
Upperarm, 3 fingers down from the top of the shoulder. In the middle of the arm. Use patients non dominate arm.