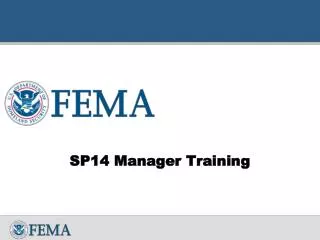
Effective Training for Producers: Guidelines, Responsibilities, and Course Overview
380 likes | 495 Vues
Welcome to the Producer Training program! This course emphasizes participant engagement and respect for fellow attendees. Key topics include data development, quality assurance, project management, and hands-on simulations. Essential guidelines encourage active participation, setting cell phones to silent, and minimizing side conversations. Course components cover developing hydraulic data, managing DFIRM databases, and understanding FEMA roles and responsibilities. Join us for an interactive experience focused on enhancing your skills in producing preliminary map products and ensuring timely project delivery.

Effective Training for Producers: Guidelines, Responsibilities, and Course Overview
E N D
Presentation Transcript
Welcome • Welcome • Introductions • Classroom Protocol • Agenda
Classroom Guidelines • Participate in class! • Ask questions at any time, but one person at a time please • Focus on class – no reading/writing emails, text messaging, surfing the web, etc. • Cell phones off • Limit side conversations with your neighbor. Chances are the group would like to hear the same question or comment • Be respectful of fellow participants and the instructor • Have fun!
Course Components Concepts Hands-OnSimulations Course Evaluation WorkInstructions Jeopardy!
On Your CD Concept Slides Simulations and Work Instructions Develop Hydraulic Data Develop DFIRM Database Preliminary Map Products Post-Preliminary Processing Quick Reference Guides Upload tips SOMA User Guide Workflow map Pop-up Blocker Procedure In Your Workbook Concept slides Quick Reference guides Work Instructions Develop Hydraulic Data Develop DFIRM Database Preliminary Map Products Post-Preliminary Processing Course Materials
Training Approach Show Me Guide Me Let Me -
Role of Producer Submit/upload data Meet all QA requirements Perform independent QA Enter data analysis information Enter actual milestone dates Enter all post-prelim information Role of Manager Update all cost and schedule information, at least monthly Update projected milestones Enter leverage information Project oversight MIP User Roles and Responsibilities Role of FEMA/RMC • Create projects • Establish baselines (obligate funds) • Perform national QA • Validate deliverables • Complete appropriate approvals
Producer Course Topics • Data Development • Develop Hydraulic Data • Develop DFIRM Database • Preliminary Map Production • Produce Preliminary Map Products • Distribute Preliminary Map Products • Post Preliminary Processing
Key Terms Workbench – Where you see all tasks (work items) that you can claim to work on. Submission Status – This field will show if data has passed metadata or DFIRM database QA. You will be unable to complete the task until you have passed. Data Submission Form– Use this form to upload data directly to the MIP or to mail data to the data depot. Analysis – A limited number of questions pertaining to the deliverable Some tasks will not have an analysis section. All other data is harvested from metadata or no longer needed. BFE Changes – Checkbox used to indicate if appeals are required. Critical to complete correctly. Date Fields – Also critical fields. This data is utilized by numerous sources, including FEMA’s CIS and the Key Performance Indicator reporting.
Data Development Process Data Development Tasks: • Acquire Base Map • Develop Topographic Data • Perform Field Survey • Perform Hydrologic Analysis • Perform Hydraulic Analysis • Perform Coastal Analysis • Perform Alluvial Fan Analysis • Perform Flood Plain Mapping • Develop DFIRM Database • Independent QA
Data Development ProcessSP14 Changes • Simpler method for users to submit data • Use Data Submission Form to upload files to MIP or to indicate the files will be mailed to FEMA • User can continue work on the MIP while a file uploads NOTE: do not close the MIP window while the data is uploading; doing so will terminate the submission process and you will have to start over • See QRG handout on Data Submissions in SP14 for more details • MIP Help will no longer move data from J to K drive • Producer now responsible for uploading files through the MIP
Data Development ProcessSP14 Changes • Overwriting files will overwrite all files • No file size limits for data uploads; the MIP can calculate and display estimated upload time • The MIP help ticket that is created automatically when users mail in their data will include important information, such as file size, case number, etc. • Comments created on the Producer workflow screens will display on Manager screens and on certain reports
Data Development Pre-requisites • NFIP profile-compliant metadata • Data submission (deliverable) • Descriptive information concerning the data submission (size of area studied, models used, etc.) • Varies depending on specific Data Development task, which is displayed on the screen
Don’t use your Internet browser’s back button - use the navigation buttons in the MIP tool to move forward and backward. Use this: Not this: Be sure to click Refresh Status to confirm your upload has passed the validation checks. The Manager can see comments you enter. Use the comments field to help coordinate project delivery. Click the hyperlinks in Submission Status to view validation comments. Be sure to click blue buttons at the bottom of sections. This is how the MIP captures what you have entered. Tips and Tricks
Working in Simulations • Simulations are a snapshot of the real MIP • Used to simulate live environment • Walk step by step through process • Does not show the passage of time • Getting started • Active X procedures • Maximize screen to view scrollbars, if necessary
Simulations • Data Development • Perform Hydraulic Analysis • Develop DFIRM Database • Refer to Work Instruction <Develop Hydraulic Analysis.doc> Refer to Work Instruction <Develop DFIRM Database.doc> • .
Data Development Process Review • Click on the View Metadata Profile link at the bottom of the first screen to view a generic metadata profile • Use Data Submission Form to upload files to MIP or to indicate the files will be mailed to FEMA • After uploading the files through the Data Submission form, click on Validate Contents and Refresh Status under the Metadata Profile Validation section to view the validation status • Click on the Passed or Failed link to view the report from the validation process • You will not be able to complete the Producer activity until the metadata file has passed the automated Metaman validation
Preliminary Map Production Process Preliminary Map Production Activities: • Produce Preliminary Map Products • Distribute Preliminary Map Products
Produce Preliminary Map Products Process Highlights • Use the Data Submission Form to upload files to MIP or to indicate the files will be mailed to FEMA • The MIP help ticket that is created automatically when users mail in their data will include important information, such as file size, case number, etc. • Comments created on the Producer workflow screens will display on Manager screens and on certain reports • New option in SOMA tool allows users to indicate no LOMCs to be included in the SOMA
Preliminary Map Production Process Pre-requisites Produce Preliminary Map Products Pre-requisites: • NFIP profile-compliant metadata • DFIRM submission that passes automated DFIRM QA • Number of printed panels Distribute Preliminary Map Products Pre-requisites: • SOMA tool requirements complete for each LOMC in study area • Received pre-preliminary QA passing report from the RMC • *CRITICAL* - Date Preliminary mailed • This information is used in CIS, as well as by FEMA HQ to report Key Performance Indicator (KPI) progress • List of communities where BFEs have changed • Map distribution list – by community
Simulation • Preliminary Map Production • Produce Preliminary Map Products • Distribute Preliminary Map Products Refer to Work Instruction <Preliminary Map Production.doc>
Preliminary Map Production Process Review • Use the Data Submission Form to upload files to MIP or to indicate the files will be mailed to FEMA • Metadata and DFIRM QA validations must both pass in order to complete the Produce Preliminary Map Products task • Use the Add Community button to add every community • If a community is missed, it will not appear in the remainder of the workflow, and will not count toward KPIs. • Utilize the Save and Close function for multiple communities • Upon completion, click Complete Task to advance the workflow to the first task in the Post Preliminary Process
Post Preliminary Processing Process Post Preliminary Processing Activities: • Determine Community Meeting Schedule • Prepare and Hold Community Meetings • Appeal Process • Determine if Appeal Period is Required • Create/Distribute BFE Notice • Record/Review Appeal or Protest • Prepare/Distribute Appeal Package • Prepare Final Map Products • Prepare/Distribute LFD Docket and letter • Prepare/Distribute Revalidation docket and letter
Post-Preliminary Map Products Process Highlights • The MIP enforces PM42 requirements • The Prepare LFD Docket task is simplified; only new 60.3 code is needed • Able to upload LFDs directly to the MIP • Use the Data Submission Form to upload files to the MIP or to indicate the files will be mailed to FEMA • The MIP help ticket that is created automatically when users mail in their data will include important information, such as file size, case number, etc.
Post Preliminary ProcessingPre-requisites Pre Appeal Process. Includes Determine Community Meeting Schedule, Hold Community Meetings, Determine if Appeal Required, Create BFE Notice, Distribute BFE Notice, Record BFE Publication Affidavit • Final meeting (open house) meeting information, by community • Information on appeal periods, by community • **CRITICAL** Second publication date and newspaper name, by community • BFEs on the web date, date affidavit received, date BFE notice sent, by community
Post Preliminary ProcessingPre-requisites Appeals. IncludesRecord Appeal/Protest, Review Appeal/Protest, Prepare Appeal Package, Distribute Appeal Resolution • Appeal type, received and acknowledgement dates, appellant name, by community • Recommendations, date reviewed with FEMA, and validity of appeal, by community • Resolution Letter, revised preliminary DFIRM/FIS (if applicable) • Appeal package distribution date
Post Preliminary ProcessingPre-requisites Post Appeals. • Produce Final Map Products and Submit MSC Deliverable • NFIP Profile compliant metadata. • Final Map Products Data Submission (Deliverable) that passes National QA • Number of printed panels • MSC Deliverable GPO Package (Checklist appears on workflow screen) • SOMA Tool must be complete • Prepare LFD docket – Distribute LFD letter • Projected LFD Date - CRITICAL • New 60.3 Code to be adopted by communities - CRITICAL • LFD letter for upload to MIP • Prepare revalidation letter – Distribute revalidation letter • SOMA Tool must be complete • Date revalidation letter was distributed
Simulation Post Preliminary Processing Refer to Work Instruction <Post Preliminary Processing.doc> .
Post Preliminary Processing Review • BFE changes require a 90-day appeal period. • Click Add Meeting when entering multiple meetings to ensure data are saved. • Utilize the Save and Close button when entering more than a few communities, to ensure data are saved. • You will not be able to complete the Produce Final Map Products task until you have passed both the metadata and DFIRM QA validations. • You won’t see Distribute tasks until FEMA completes the Review and Approve cycle.
Don’t use your Internet browser’s back button - use the navigation buttons in the tool to move forward and backwards. Use this: Not this: Be sure to click Refresh Status to confirm your upload has passed the validation checks. The Manager can see comments you enter. Utilize the comments field to help coordinate project delivery. Click the hyperlinks in Submission Status to view validation comments. Be sure to click “blue buttons” at the bottom of sections. This is how the MIP captures what you have entered. Tips and Tricks
Tips and TricksCustomizing Your Workbench Use the arrows to arrange the information as you’d like. The MIP saves your preferences & display items this way each time you log in.
Summary • Congratulations! You have completed the SP14 Producer Training • You should now be able to: • Recognize and understand the following processes: • Data Development • Preliminary Map Production • Post Preliminary Processing • Describe the new terms and concepts • Understand the tips and tricks available • Execute the simulations and follow along with the work instructions