
You will want to create a new bridge design and then click “OK”
Open the software and click “close” after reading the tip. The screen below will come up. You may want to load a sample bridge design for starters. You will want to create a new bridge design and then click “OK”.
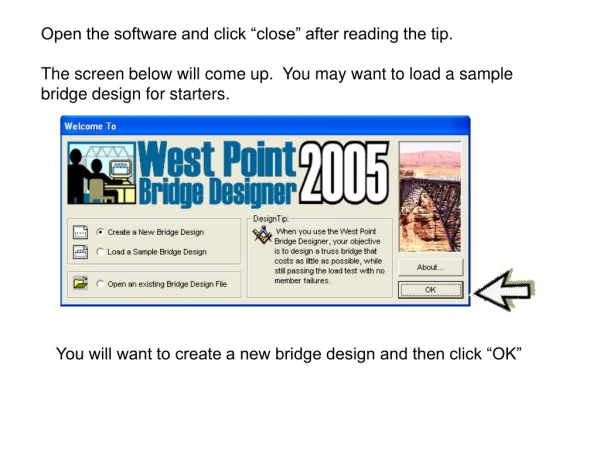

You will want to create a new bridge design and then click “OK”
E N D
Presentation Transcript
Open the software and click “close” after reading the tip.The screen below will come up. You may want to load a sample bridge design for starters. You will want to create a new bridge design and then click “OK”
This window breaks down your objective. Read through the design requirements and the design tip and click next
Here you can adjust the deck elevation. Notice that the lower the deck elevation is, the more money it will cost. You may choose either standard abutments or arch abutments.Then you can choose to add a pier making it a two span bridge. (You cannot add a pier if you choose the arch abutment. When you’re done, click “Next”
For starters, select a template that you like. The computer will outline what the shape of the truss will look like. Click next to continue Keep in mind that no design is necessarily better than the others. It is expected that after learning the program you will try different designs and eventually choose the one you feel is the best.
Read through the list on how to design the bridge (truss) and click finish
This is the drawing board where you insert joints, add/delete/adjust members River Valley Roadway Template Abutment Deck
Click here to add a joint Using the mouse cursor add joints
Let’s create some members. 1. 2. Move cursor to a joint, left click and hold down to another joint. Continue until it looks like this . . .
Our design FAILEDthe load test Don’t worry we can fix it . . .
Engineering design is an iterative process. • Trial-and-error is always necessary to achieve a successful product. • If at fist you don’t succeed, then go “back to the drawing board” and try again.
Lets return to the Drawing Board Click here
Do you notice the appearance of the structural model has changed? What’s wrong with these members?
So, were not strong enough To make the bridge safe, we’ll need to strengthen the members in red . How can we do that?
We need to make the members LARGER. 1. 2. Repeat for all members
The truck crosses the bridge without causing a collapse. Your bridge design is SUCCESSFUL !
Take a moment to watch the Load Test Animation. Note that some of the structural members turn red, while others turn blue.
So what’s happening in the animation? • Members that turn blue are experiencing tension-they are being stretched or elongated. • Members that turn red are in compression-they are being squashed or shortened. • The intensity of the color indicates the magnitude of the member force. Thus the dark red diagonal members are being loaded very close to failure, while the light blue bottom chord members are much stronger that they really need to be. • These observations are important, because they will help us to optimize our design.
Return to the Drawing Board • Since our bridge didn’t collapse, it is a successful design. • Even though, it is successful it’s not optimal design, because it’s much more expensive than it really needs to be. How can we reduce the cost of the bridge without compromising its safety?
What can we do? • In the previous load test, all five bottom chord members were color-coded with a light blue. Light color indicates that, for each of these members, the tension force was much less than the strength. All five of these members can be reduced in size without compromising the safety of the structure. In fact, you can reduce their size from 120mm to 90mm, and the bridge will still pass the load test. • Just like before we have to change the size of five members, let’s use multiple selections to speed up the process. Hold down the Ctrl key on your keyboard, and then click all five bottom chord members. All will be selected simultaneously. Now choose 90mm from the Member Size list, and all five members will be changed to this size.
Notice that the cost of our design has dropped to $196,929.06-a saving of over $5,000. The structure still passes the load test, so the reduction in cost did not adversely affect the safety of the structure. • We can still do a lot more to optimize this design. Many other members can safely be reduced in size. • We can save money by using hollow tubes rather than solid bars or by using different type of steel
Once you have completed your design, you need to print the “Cost Calculations” and “Load Test Results”