Download

1 / 28
280 likes | 304 Vues
Learn how to create a quiz presentation in PowerPoint step by step, from slides to questions, matching quizzes, saving, and formatting. Enhance your quiz with footers and spell check for a polished result!

E N D
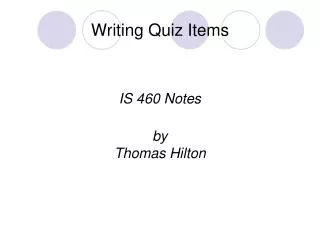
Writing a Quiz Part 1 My Midterm Exam
Creating a presentation • After you start PowerPoint, a dialog box will open • Start PowerPoint • Click blank presentation • Click OK My Midterm Exam
Choosing the type of slide • Click on the blank slide as shown below • Click OK My Midterm Exam
Creating an introduction slide • Your first slide will be an introduction slide. • Introduce your students to the quiz and give them instructions for taking the quiz • When you are finished with the intro slide, click “Start a new slide” • Use the Text Box tool on the Drawing Toolbar My Midterm Exam
Creating a question template After you click the New Slide button, select the blank slide option again ·Use the Text Tool to draw a text box ·Type 1. and hold down the Shift and press Enter ·Type the letter a and press SHIFT ENTER ·Type the letter b and press SHIFT ENTER ·Type the letter c and press SHIFT ENTER ·Type the letter d and press SHIFT ENTER The entire question template is one paragraph My Midterm Exam
Your question template should look like the question below My Midterm Exam
Indenting the Question • Open the View Menu • Select Ruler so the ruler will show • Place the flashing cursor in front of the letter a (the first multiple choice answer) • Click on the lower marker and drag it to the ½ inch indent • The first line of your template should now Outdent ½ inch • Put cursor in front of the letter a and drag lower ruler button to the ½ inch mark • This causes a 1st line outdent. My Midterm Exam
Put cursor in front of the letter a and drag lower ruler button to the ½ inch mark This causes a 1st line outdent. After indenting,click the Slide Sorter View My Midterm Exam
Copying the template • From the Slide Sorter View, click the question template to select it • Hold down the CTRL Key and press the letter C • To copy the question template • Hold down the CTRL Key and press the letter V • To make a copy of your template • Continue pressing CTRL V to make as many copies of the question template as you need My Midterm Exam
Using the slides to create questions • The number 1 slide is your introduction so click on the number 2 slide to create your first question • USE THE ARROW KEYS TO MOVE AROUND THE SLIDE – DO NOT USE THE ENTER KEY • Enter the question and answers on the appropriate lines • This is my first question • Answer • Answer • Answer • Answer My Midterm Exam
Saving your presentation Save your presentation as soon as possible. Do not wait till you have lots of questions completed Open the File Menu Click Save As Place a blank formatted disk in the A: Drive Follow the graphic below to name and save your presentation My Midterm Exam
Place blank disk in A: drive Select the A Drive Name your presentation Click Save My Midterm Exam
Create a new blank Slide From the Slide Sorter View, double Click the new slide to open it. My Midterm Exam
We are going to create a Matching part to the Mid-Term quiz • Open the Insert Menu • Click Microsoft Word Table • Select 3 columns and 4 rows • Of course you can also create a table by clicking the “Word Table Icon” My Midterm Exam
A Table will be created but the font is much too big at 32 points Place the cursor anywhere in the table. Right click to bring up the table menu Choose, Select Table Change the font to 16 pts Because the entire table is selected, the change will apply to all the text in the table. My Midterm Exam
Size the table to the screen and then enter the text for a matching quiz. Finally, click on any part of the white screen to see your table. My Midterm Exam
Obviously our table needs lines. Double click inside the table to bring back the frame. My Midterm Exam
Place the cursor inside the table Open the Table Menu Click, Select Table Open the Border Box Click Grid Lines Finally click anywhere on the white space to view your completed matching quiz My Midterm Exam
G R E A T !! You have created a matching quiz. Next we will check the spelling, add some footers, and print. Spell checking is pretty simple and functions the same in PowerPoint as it does in other Office products such as Word. To start a spell check, select Spell from the Tools Menu or simply press the F7 Key. My Midterm Exam
To create footers, open the View Menu and select Headers and Footers. Complete the options as directed below. Complete the options for Date and time. Choose whether you want the date to be fixed or Automatically updated Check to number the slides Check Footer and enter some footer text that will show on each slide Choose not to show the footer on the Title Slide (slide 1) You now have the option of applying the data to all the slides or just the current one. Apply to all. My Midterm Exam
Formatting the footer text We will now do some character formatting on the footer text. Character formatting changes things such as, bold, italics, font, font size, etc. Hold down the Shift Key and click the slide button My Midterm Exam
This screen is called the Slide Master. It is used to apply changes to the entire slide presentation. There are 3 areas; Master Title, Master Text and Footers. In this lesson we will be formatting the footers. Later we will format Title and Text styles. Master Title Area Master Text Area Footer Area My Midterm Exam
Hold down the left mouse button and drag over <date and time> Change the font, size, color or other characteristics of the text. Do the same for the footer title and the slide number. You can even add your own text to the footer as I did by adding “Slide Number” When you are finished, click the slide button to return to the editing screen. Be creative and add your own style. My Midterm Exam
Printing You may notice that this presentation contains little color. That is because these slides are intended primarily for printing. When you add color to your slide presentation you can never be sure how the slide will look in print. Printing a black or colored background will use excessive toner or ink in printing. There are times when you want to use colored slides and also print them. You can check to see what the slide will look like in print by clicking B&W View button on the toolbar. This will allow you to see the screen as it will look when you print it in black and white My Midterm Exam
Printing Start by opening the Print Menu and selecting Print Complete the options as described below, then print. Select printer(You can even Fax your presentation to someone) Complete the other options such as ….. Which slides Number of slides per page Whether to scale, frame and print for black & white My Midterm Exam
This completes the lesson on tables, footers and printing. Use your creativity to make your presentation interesting, informative and motivating. You did a great job See the notes on the next slide ……….. My Midterm Exam
Notes This presentation is very graphic intensive. It uses lots of screen captures, scalled for presentations. A presentation like this uses a great deal of memory. If your presentation contains lots of graphics you may need as much as 64K of memory. Of course 64K is becoming standard for PC’s because of the new applications that requre lots of memory. This presentation also takes up a lot of disk space. In its present form it is more than 24 MB. A standard floppy holds 1.44 MB You can use file compressionsuch as PKZip to reduce the size to about 644 KB. This is good for transporting your presentation from computer to computer but you need to uncompress the presentation to use it. My Midterm Exam