Download
1 / 49
490 likes | 747 Vues
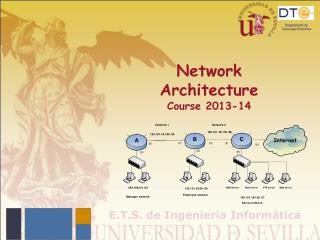
Introduction To The Course Network Architecture. Hervey Allen Chris Evans Phil Regnauld. September 3 - 4, 2009 Santiago, Chile. Overview. Course Architecture Diagram Introducing Your “ccTLD” How to Connect to Your Network Practice Exercises. Course Architecture.

E N D
Introduction ToThe Course Network Architecture Hervey Allen Chris Evans Phil Regnauld September 3 - 4, 2009 Santiago, Chile
Overview Course Architecture Diagram Introducing Your “ccTLD” How to Connect to Your Network Practice Exercises
Course Architecture This architecture was designed to give each group of students a sample “registry” to secure, operate, and defend Each group of two students will be assigned one registry network. Each group will have a separate registry consisting of a Cisco Router, Name Server, and Network Operations Center server at a minimum Other servers and routers exist on the network to simulate an “Internet connected” registry and support course delivery All student “servers” are virtualized!
Course Architecture • Connectivity • Each “ccTLD” is separated from the network by a gateway router – which is under YOUR control • Each “ccTLD” connects to the same “ISP” router which provides live Internet access (except during attack scenarios) and inter-connectivity • The ISP router also connects the instructor management servers and attack boxes • The Core Router provides Internet access and connects you to the ISP and your “ccTLD”
Course Architecture Root (.) .MGMT .TLD1 .TLD2 … .TLD8 • DNS Architecture • A “Root” name server is setup on 192.168.128.20 which provides delegations to the ccTLD networks and to regular TLDs when connected live. • A “ISP” name server provides recursive services for _everyone_ on the network • Each “ccTLD” has an authoritative name server for their own networks (e.g. .TLD1)
Course Architecture • Core Services • Course Support Server: 192.168.75.20 • NTP: 192.168.128.5
Course Architecture YOU ARE HERE!
Course Architecture A “ccTLD” Network
Course Architecture The Core Router
Course Architecture The “ISP” Router
Course Architecture The Management Network
Course Architecture Your Laptop Internet Access
Course Architecture ccTLD Internet Connectivity
Course Architecture ISP Router Backchannel Connection to ccTLD
Course Architecture “External Monitoring”
Course Architecture “Attack” Path
Course Architecture Here’s YOUR ccTLD Network
Introducing Your “ccTLD” Recursive NameServer A “Cheat Sheet” is Available on the Wiki
Introducing Your “ccTLD” Root NameServer A “Cheat Sheet” is Available on the Wiki
Introducing Your “ccTLD” ISP Router A “Cheat Sheet” is Available on the Wiki
Introducing Your “ccTLD” Your Router A “Cheat Sheet” is Available on the Wiki
Introducing Your “ccTLD” Your Auth NameServer A “Cheat Sheet” is Available on the Wiki
Introducing Your “ccTLD” Your NOC A “Cheat Sheet” is Available on the Wiki
Introducing Your “ccTLD” Your “Office” Workstation A “Cheat Sheet” is Available on the Wiki
Connecting to Your “ccTLD” This is Great But, How Do I Use It?!
Connecting to Your “ccTLD” • A Word on Programs • SSH (Secure Shell) is the primary connection protocol used in this network. You must provide a username AND a identity key to login • You can use any ssh client you are familiar with, but we have Putty available for Windows users • To view web pages on your network (e.g. network monitoring from your NOC), use any browser you are comfortable with • To view GUI programs on your network (e.g. wireshark, a packet capture program), you must redirect X11 output via a SSH connection • On Windows, this requires a X11 server; we suggest Xming • On Linux, its easy, use the –X option with ssh • Download links for Putty, XMing, and identity keys are available on the wiki…
Connecting to Your “ccTLD” X – your group number, 1-8 Remember - A “Cheat Sheet” is Available on the Wiki • Connecting to Your Router • SSH as ‘tldadmin’ user to 192.168.10X.1 • Password: tldadmin! • Enable Password: tldadmin! • Example: ssh tldadmin@192.168.101.1
Connecting to Your “ccTLD” X – your group number, 1-8 • Connecting to Your Router with Putty • IP Address: 192.168.101.1 • Click “Open”
Connecting to Your “ccTLD” X – your group number, 1-8 • Connecting to Your Router with Putty • You will be doing this a lot! • Save connection information as a Session! • IP Address: 192.168.101.1 • Session Name: TLD-Router • Click “Save”
Connecting to Your “ccTLD” X – your group number, 1-8 Remember - A “Cheat Sheet” is Available on the Wiki • Connecting to Your Nameserver • SSH as ‘tldadmin’, with tldadmin identity key to 192.168.10X.10 • Password: tldadmin! • Example: ssh –i tldadmin tldadmin@192.168.101.10
Connecting to Your “ccTLD” X – your group number, 1-8 • Connecting to Your Nameserver with Putty • IP Address: 192.168.10X.10 • Enter “TLD-NS1” in Saved Sessions Box
Connecting to Your “ccTLD” • Connecting to Your Nameserver with Putty • Click Connection -> SSH -> Auth • Identity File: Path to tldadmin.ppk
Connecting to Your “ccTLD” • Connecting to Your Nameserver with Putty • Click Connection -> SSH -> X11 • Check “Enable X11 Forwarding” • Put Your Laptop IP Address Here • e.g. 192.168.75.101
Connecting to Your “ccTLD” • Connecting to Your Nameserver with Putty • Click Connection -> Data • Enter ‘tldadmin’ for Auto-login username
Connecting to Your “ccTLD” • Connecting to Your Nameserver with Putty • Click Session • Click “Save”
Connecting to Your “ccTLD” • Connecting to Your Nameserver with Putty • Double Click the Session Name to Connect!
Connecting to Your “ccTLD” X – your group number, 1-8 Remember - A “Cheat Sheet” is Available on the Wiki • Connecting to Your NOC • SSH as ‘tldadmin’, with tldadmin identity key to 192.168.10X.30 • Password: tldadmin! • Example: ssh –i tldadmin tldadmin@192.168.101.30
Connecting to Your “ccTLD” X – your group number, 1-8 • Connecting to Your NOC with Putty • IP Address: 192.168.10X.30 • Enter “TLD-NOC” in Saved Sessions Box
Connecting to Your “ccTLD” • Connecting to Your NOC with Putty • Click Connection -> SSH -> Auth • Identity File: Path to tldadmin.ppk
Connecting to Your “ccTLD” • Connecting to Your NOC with Putty • Click Connection -> SSH -> X11 • Check “Enable X11 Forwarding” • Put Your Laptop IP Address Here • e.g. 192.168.75.101
Connecting to Your “ccTLD” • Connecting to Your NOC with Putty • Click Connection -> Data • Enter ‘tldadmin’ for Auto-login username
Connecting to Your “ccTLD” • Connecting to Your NOC with Putty • Click Session • Click “Save”
Connecting to Your “ccTLD” • Connecting to Your NOC with Putty • Double Click the Session Name to Connect!
Your “ccTLD” Cheat Sheet View Your Copy on the Course Wiki Usernames, Passwords, Keys, IPS, and sample command line instructions included
Your “ccTLD” Configuration • Your Router Has Very Minor Security Precautions, No ACLs, and only allows SSH • Your NOC is a base installation of Ubuntu 8.10 Desktop with OpenSSH server • We’ll be adding to this as we move through the course • Your NS is a base installation of Ubuntu 8.10 Server with OpenSSH and BIND • We may make BIND configuration changes as we go
Ground Rules Please respect other student’s registries – while you have the power to do so, do not change them! Please respect the underlying servers running VMWare! Please don’t make any configuration changes except those presented in class – they may break attack scenarios! Please respect the course management servers, wiki and attack boxes – they are there to assist in course delivery! Do not conduct cyber attacks on others students or the instructors!
Practice Exercises EX: Intro to Course Architecture View Exercises on Wiki Login to your Nameserver by SSH Login to your NOC by SSH Run wireshark on your NOC with X11 Forwarding ** Be sure to save your SSH profiles to make connections easier – you’ll be doing a lot of this!
? questions On YOUR “ccTLD”?