Access Tutorial 3 Maintaining and Querying a Database
660 likes | 828 Vues
Access Tutorial 3 Maintaining and Querying a Database. Objectives. Find, modify, and delete records in a table Learn how to use the Query window in Design view Create, run, and save queries Update data using a query datasheet Create a query based on multiple tables Sort data in a query

Access Tutorial 3 Maintaining and Querying a Database
E N D
Presentation Transcript
Objectives • Find, modify, and delete records in a table • Learn how to use the Query window in Design view • Create, run, and save queries • Update data using a query datasheet • Create a query based on multiple tables • Sort data in a query • Filter data in a query New Perspectives on Microsoft Office Access 2010
Objectives • Specify an exact match condition in a query • Change the font size and alternate row color in a datasheet • Use a comparison operator in a query to match a range of values • Use the And and Or logical operators in queries • Create and format a calculated field in a query • Perform calculations in a query using aggregate functions and record group calculations • Change the display of database objects in the Navigation Pane New Perspectives on Microsoft Office Access 2010
Query Window in Design View New Perspectives on Microsoft Office Access 2010
Updating a Database • Updating, or maintaining, a database is the process of adding, modifying, and deleting records in database tables to keep them current and accurate • Navigation mode • Editing mode New Perspectives on Microsoft Office Access 2010
Finding Data in a Table • The Find command allows you to search a table or query datasheet, or a form, to locate a specific field value or part of a field value New Perspectives on Microsoft Office Access 2010
Deleting a Record • With the table open in Datasheet view, click the row selector for the record you want to delete • In the Records group on the Home tab, click the Delete button (or right-click the row selector for the record, and then click Delete Record on the shortcut menu) • In the dialog box asking you to confirm the deletion, click the Yes button New Perspectives on Microsoft Office Access 2010
Deleting a Record New Perspectives on Microsoft Office Access 2010
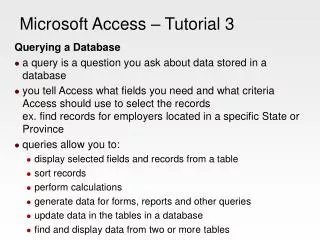
Introduction to Queries • Access provides powerful query capabilities that allow you to do the following: • Display selected fields and records from a table • Sort records • Perform calculations • Generate data for forms, reports, and other queries • Update data in the tables in a database • Find and display data from two or more tables • A Query Wizard prompts you for information by asking a series of questions and then creates the appropriate query based on your answers New Perspectives on Microsoft Office Access 2010
Introduction to Queries • Click the Create tab on the Ribbon • In the Other group on the Create tab, click the Query Design button New Perspectives on Microsoft Office Access 2010
Introduction to Queries New Perspectives on Microsoft Office Access 2010
Updating Data Using a Query • You can update the data in a table using a query datasheet • After updating the query, close the table New Perspectives on Microsoft Office Access 2010
Creating a Multitable Query • A multitable query is a query based on more than one table • If you want to create a query that retrieves data from multiple tables, the tables must have a common field New Perspectives on Microsoft Office Access 2010
Sorting Data in a Query • Sorting is the process of rearranging records in a specified order or sequence • To sort records, you must select the sort field, which is the field used to determine the order of records in the datasheet New Perspectives on Microsoft Office Access 2010
Using an AutoFilter to Sort Data • The AutoFilter feature enables you to quickly sort and display field values in various ways • Clicking the arrow in a column heading displays the AutoFilter menu New Perspectives on Microsoft Office Access 2010
Sorting a Query Datasheet • In the query datasheet, click the arrow on the column heading for the field you want to sort • In the menu that opens, click Sort A to Z for an ascending sort, or click Sort Z to A for a descending sort or • In the query datasheet, select the column or adjacent columns on which you want to sort • In the Sort & Filter group on the Home tab, click the Ascending button or the Descending button or • In Design view, position the fields serving as sort fields from left to right • Click the right side of the Sort box for the field you want to sort, and then click Ascending or Descending for the sort order New Perspectives on Microsoft Office Access 2010
Sorting a Query Datasheet New Perspectives on Microsoft Office Access 2010
Using Filter By Selection • A filter is a set of restrictions you place on the records in an open datasheet or form to temporarily isolate a subset of the records • In the datasheet or form, select part of the field value that will be the basis for the filter; or, if the filter will be based on the entire field value, click anywhere within the field value • In the Sort & Filter group on the Home tab, click the Selection button, and then click the type of filter you want to apply New Perspectives on Microsoft Office Access 2010
Using Filter By Selection New Perspectives on Microsoft Office Access 2010
Selection Criteria in Queries New Perspectives on Microsoft Office Access 2010
Defining Record Selection Criteria for Queries • Just as you can display selected fields from a database in a query datasheet, you can display selected records • To tell Access which records you want to select, you must specify a condition as part of the query • A condition usually includes a comparison operator New Perspectives on Microsoft Office Access 2010
Defining Record Selection Criteria for Queries New Perspectives on Microsoft Office Access 2010
Specifying an Exact Match • With an exact match, the value in the specified field must match the condition exactly in order for the record to be included in the query results New Perspectives on Microsoft Office Access 2010
Changing a Datasheet’s Appearance • You can change the characteristics of a datasheet, including the font type and size of text in the datasheet, to improve its appearance or readability • A theme is a predefined set of formats including colors, fonts, and other effects that enhance an object’s appearance and usability New Perspectives on Microsoft Office Access 2010
Changing a Datasheet’s Appearance New Perspectives on Microsoft Office Access 2010
Using a Comparison Operator to Match a Range of Values New Perspectives on Microsoft Office Access 2010
Defining Multiple Selection Criteriafor Queries • Multiple conditions require you to use logical operators to combine two or more conditions • Use the And logical operator when you want a record selected only if two or more conditions are met • Use the Or logical operator when you place conditions in different Criteria rows New Perspectives on Microsoft Office Access 2010
Defining Multiple Selection Criteriafor Queries New Perspectives on Microsoft Office Access 2010
Creating a Calculated Field • In addition to using queries to retrieve, sort, and filter data in a database, you can use a query to perform calculations • To perform a calculation, you define an expression containing a combination of database fields, constants, and operators • Expression Builder is an Access tool that makes it easy for you to create an expression • Open the query in Design view • In the design grid, click the Field box in which you want to create an expression • In the Query Setup group on the Design tab, click the Builder button • Use the expression elements and common operators to build the expression, or type the expression directly in the expression box • Click the OK button New Perspectives on Microsoft Office Access 2010
Creating a Calculated Field New Perspectives on Microsoft Office Access 2010
Formatting a Calculated Field • You can specify a particular format for a calculated field, just as you can for any field, by modifying its properties New Perspectives on Microsoft Office Access 2010
Using Aggregate Functions • Aggregate functions perform arithmetic operations on selected records in a database • If you want to quickly perform a calculation using an aggregate function in a table or query datasheet, you can use the Totals button in the Records group on the Home tab New Perspectives on Microsoft Office Access 2010
Using Aggregate Functions New Perspectives on Microsoft Office Access 2010
Creating Queries with Aggregate Functions • Aggregate functions operate on the records that meet a query’s selection criteria New Perspectives on Microsoft Office Access 2010
Using Record Group Calculations • The Group By operator divides the selected records into groups based on the values in the specified field New Perspectives on Microsoft Office Access 2010
Working with the Navigation Pane • The Navigation Pane is the main area for working with the objects in a database • The Navigation Pane divides database objects into categories, and each category contains groups • Object Type • All Access Objects New Perspectives on Microsoft Office Access 2010
Objectives • Create a form using the Form Wizard • Apply a theme to a form • Add a picture to a form • Change the color and line type of items on a form • Find and maintain data using a form • Preview and print selected form records New Perspectives on Microsoft Access 2010
Objectives • Create a form with a main form and a subform • Create a report using the Report Wizard • Apply a theme to a report • Resize fields in a report • Insert a picture in a report • Use conditional formatting in a report • Preview and print a report New Perspectives on Microsoft Access 2010
Form Displayed in Form View New Perspectives on Microsoft Access 2010
Creating a Form Using the Form Wizard • The Form Wizard allows you to choose some or all of the fields in the selected table or query, choose fields from other tables and queries, and display the selected fields in any order on the form • Click the Create tab in the Ribbon • In the Forms group, click the Form Wizard button New Perspectives on Microsoft Access 2010
Creating a Form Using the Form Wizard New Perspectives on Microsoft Access 2010
Creating a Form Using the Form Wizard New Perspectives on Microsoft Access 2010
Applying a Theme to a Form • Display the form in Layout view • In the Themes group on the Design tab, click the Themes button • In the displayed gallery, click the theme you want to apply to all objects; or, right-click the theme to display the shortcut menu, and then choose to apply the theme to the current object only or to all matching objects New Perspectives on Microsoft Access 2010
Adding a Picture to a Form • A picture is one of many controls you can add and modify on a form • A control is an item on a form, report, or other database object that you can manipulate to modify the object’s appearance • In the Header/Footer group on the Design tab, click the Logo button • Navigate to the picture you want to insert and then click the OK button New Perspectives on Microsoft Access 2010
Adding a Picture to a Form New Perspectives on Microsoft Access 2010
Changing the Color of the Form Title • The Font group on the Format tab provides many options you can use to change the appearance of text on a form New Perspectives on Microsoft Access 2010
Changing the Type of Line on a Form • A line on a form, such as the box around each field value, is another type of control that you can modify in Layout view New Perspectives on Microsoft Access 2010
Finding Data in a Form or Datasheet • Open the form or datasheet, and then select the field you want to search • In the Find group on the Home tab, click the Find button to open the Find and Replace dialog box • In the Find What box, type the field value you want to find • Complete the remaining options, as necessary, to specify the type of search to conduct • Click the Find Next button to begin the search • Click the Find Next button to continue searching for the next match • Click the Cancel button to stop the search operation New Perspectives on Microsoft Access 2010
Finding Data in a Form or Datasheet New Perspectives on Microsoft Access 2010