Download
1 / 37
370 likes | 385 Vues
At the end of the last class… You should have ended up with a lineplot in illustrator with a set of walls drawn in. But what are we missing?? All the details that make a cave map look like a cave !. The Symbols that show us what is happening in the cave

E N D
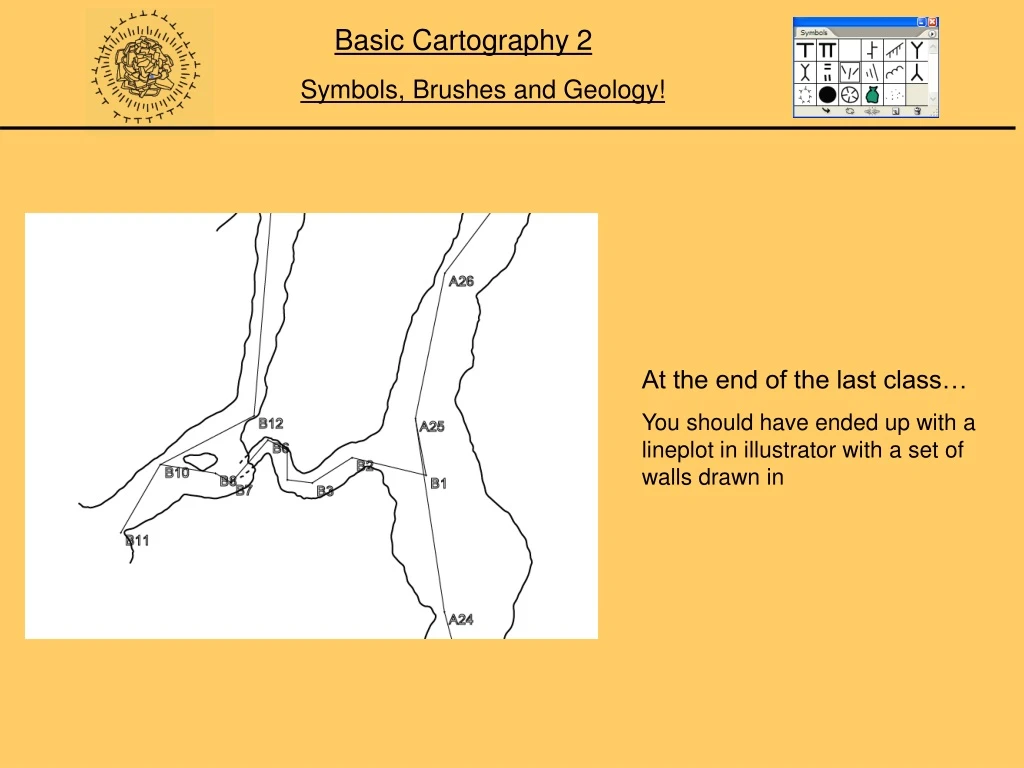
At the end of the last class… You should have ended up with a lineplot in illustrator with a set of walls drawn in
But what are we missing?? All the details that make a cave map look like a cave !
The Symbols that show us what is happening in the cave Remember – We use symbols to ‘explain’ what is really happening in the cave. Slopes really don’t look like ‘Y’s and ceiling drops don’t look like ‘T’s but we use these symbols to represent those features Ultimately we all have to agree on what those symbols mean!
Symbols can come from anywhere We can use: - NSS Symbols - CRF Symbols - MSS Symbols - UIS - Whatever!!! UIS Symbols Australian Symbols MSS Symbols NSS Symbols
You just have to remember: Whatever symbol set you decide to use – you must either supply a key, so that others understand what you mean by that symbol Or Refer to a standard accepted set of symbols
Illustrator has some very simple powerful tools that make using symbols very easy Or else very complex cave passages would drive us crazy! These tools include symbol sets, brushes, and brush sets
So – lets start by taking a look at a often used symbol The Slope symbol We can draw it each time we need it With the pencil Or with the pen But it would take a lot of time, and each one would look different and possibly incorrect!
A much better way is to use the symbol palette in illustrator! It stores symbols for reuse within a single map, or across a group of maps
It is very simple to make a new Symbol First – make a very good copy of the symbol you want to use – take your time. Remember, this will be reused time and time again – so you want it looking good Highlight the entire new symbol Drag it into the symbol palette And drop it in – You are done!
And to use is just as simple Place your pointer over the symbol you want Drag out And Drop! If you want to rotate into the Proper orientation, grab the Corner and spin it
You can do whatever you want with symbols Mix and match between different caves These are three different sets I have for three different projects
Once you have a full palette of symbols created, you may want to save them to use elsewhere! By clicking the toggle on the top of the symbols screen, you open a menu box with a few options One of the most important is to save the symbol library You can name it whatever you like and save it with all other symbol libraries
Then, in other drawings, you can open up Saved libraries and reuse, saving a lot Of time
A second Symbols palette will open up, with Name you saved it under. You can drag off the new palette just like the original After you use a symbol from the opened palette It will be added permanently to the symbol palette For your drawing
To make a long line of symbols You could pull a bunch of symbols And line them up and spin them, But it would take a long time!
Brushes are much more efficient, easier, and just as easy to make and use With it, you can use the brush tool to drag a line that replicates your symbols in the location and direction you want
Brushes are easy to make – first, pick a symbol or an element that you want made into a brush Like our ‘T’ symbol click the toggle on the brushes palette and pick new brush We typically use Pattern Brushes
Leave scale at 100 and spacing at 0 This will leave the symbol at full size and leave no room between successive symbols The Pattern Brush option box will open with your symbol already in place Set to add space Now pick up the brush tool and try!
Highlite the new brush Pick up the brush tool Drag the brush And you have a pattern!!
But wait – it doesn’t look like this In fact it looks a lot more like the ledge symbol then the ceiling symbol. Which is good – but not exactly what we wanted What do we do about that ?
Because the brush we created is helpful as the ledge symbol – lets keep it First we name it! Name it ledge brush Double click on the brush to open the options box
Second – with the first brush highlited, click the toggle and specify duplicate brush A ledge brush copy will be made Double click it to bring up options
Don’t forget to rename your brushes As they can be hard to tell apart in the brush palette
Other Symbols: Think about what you are trying to create. Just this symbol: when joined together with no spacing makes a great train track
Other Symbols: Make up symbols to use if necessary – I used this symbol to denote rocks purposely gathered into piles
Other Symbols: Flowstone
Other Symbols: Entrance - dripline
Once you have built up a library of different brushes, you can save them just as we saved the symbols! And you can open other libraries of brushes as well
In fact, one of the most powerful things about brush and symbol libraries is they can be shared with other mappers, and downloaded over the internet Examples of other brush sets I have available Other symbol sets
Other symbol and brush sets available from internet You do need to make sure they are the same series as your illustrator version
Some Hints: Just as in drawing walls – a tablet can help the use of brushes
Some Hints: Direction that you drag the brush makes a difference Here you can see the ‘leg’ of the ‘T’ is in a different direction based on the way you stroke! This can often screw you up, and there is no easy way to change it, other then to draw from other side I will sometimes start a brush stroke, check the direction and then continue
Some Hints: Sometimes you have drawn the pattern too jagged and it causes the brush to not replicate well This can be fixed by using the smoothing tool, which can be found on the Pencil sub bar, or by pushing the alt key when using brush Dragging the smoothing tool along the path reduces the anchor points and smoothes the path – making symbols look better
Some Hints: Sometimes a bad stroke end can leave a strange remnant at the end of your stroke. This can ususally be removed by cutting the stroke short with the scissors tool And deleting the malformed sections By placing the tool Clicking then separates the end
One last word – I usually have the symbols and brushes in a sinigle layer that I call the geology layer. That’s because these symbols ususally represent the geology of the interior of the cave more so then other layers
It is the second most important of the first three drawn layers (walls, geology, details)