Order the Brown Paper Materials
This guide outlines the steps to order and assemble brown paper materials for use in office spaces. You will need various supplies, including 100 ft rolls of brown wrapping paper, heavy-duty packaging tape, cloth masking tape, and Post-it notes. The procedure includes determining the required length of paper, cutting it to size, securing any overlaps, and hanging it on the wall. Ensure the brown paper is easily accessible and well-attached to maintain its integrity. Follow these steps for effective organization and creative presentation in your workspace.

Order the Brown Paper Materials
E N D
Presentation Transcript
Order the Brown Paper Materials • Order the brown paper materials from a standard office supplies catalog/store. • q One 100 ft. role of 3 foot high brown wrapping paper • One 100-ft. role of 2 inch “clear” packaging tape (heavy- duty), with hand-held dispensing Unit (optional). • Four rolls of 25 ft. 1 in. cloth masking tape for holding the brown paper to a painted or wallpapered office/conference room wall without peeling the paint or damaging the wallpaper. • q Eighteen pads of “post-it” notes (yellow, oblong) • q 12 pads of four color “post-it” notes, two inches by two inches. • q Cellophane (Scotch) adhesive tape, and scissors/Exacto knife • q Tacks for holding the brown paper to the wall. • q Protective carrying case for carrying the completed brown papers (optional).
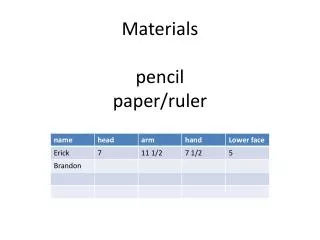
Assemble the Brown Paper 1. Determine the length of the paper needed to address the study area. Usually 20 feet, at a minimum. 2. Identify the walls needed to hang the brown papers. Is there adequate room? 3. Roll out and cut (with a scissors or Exacto knife) two, 20-foot lengths (see #1, above) of brown paper on a large open floor space. 4. Lay the two lengths of paper together, as illustrated: 20 foot length 3 feet high
Assemble the Brown Paper (continued) 5. Overlap the two lengths of brown paper by 3 to 4 inches. 6. Using the clear packaging tape, seal the overlap with a smooth layer of tape. 7. Seal the edges of the paper with the clear packaging tape, as in step 6 (so it won’t tear). 8. Repeat steps 5, 6 and 7 on the reverse side of the paper (otherwise, the brown paper will fall apart when you go to hang it on a wall, or roll it up). 9. Repeat steps 1 through 8 for a second brown paper (one for draft, and one for final) 20 foot length 7 5 Overlap 3-4 inches 6
Hang the Brown Paper on the Wall wall 11 1 foot 10 10. Hang the Brown Paper 1 foot above the floor, so that a 5 foot tall person can easily reach the important parts of the brown paper. 11. Use tacks, and/or the cloth tape (NOT the clear packing tape) to hold the top of the Brown Paper to the wall.