Download
1 / 24
240 likes | 337 Vues
Learn about Cisco IOS Embedded Operating System (Internetwork Operating System) and its components. Understand router components, configuration, access modes, and startup procedures. Explore external configuration sources and network management software. Gain insights into console access and Telnet communication.

E N D
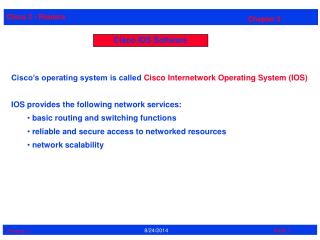
Embedded Operating System & cisco IOS • Embedded operating system Is a type of operating system that is embedded and specifically configured for a certain hardware configuration. • CISCO IOS (Internetwork Operating System) Is a kind of Embedded operating system that is multitasking used on most cisco routers and switches.
Cisco OS Components • Bootstrap – stored in ROM microcode – brings router up during initialization, boots router and loads the IOS (Internet Operating System). • POST – Power On Self Test - stored in ROM microcode – checks for basic functionality of router hardware and determines which interfaces are present • ROM Monitor – stored in ROM microcode – used for manufacturing, testing and troubleshooting • Mini-IOS – a.k.a RXBOOT/boot loader by Cisco – small IOS ROM used to bring up an interface and load a Cisco IOS into flash memory.
Router Components • RAM – holds packet buffers, ARP cache, routing table, software and data structure that allows the router to function; running-config is stored in RAM, as well as the decompressed IOS in later router models • ROM – starts and maintains the router • Flash memory – holds the IOS • Not erased when the router is reloaded • It is an EEPROM [Electrically Erasable Programmable Read-Only Memory] created by Intel • NVRAM – Non-Volatile RAM - holds router configuration; is not erased when router is reloaded
Router Components • Config-Register • controls how router boots; • value can be seen with “show version” command; • Config-Register functions: :
Purpose of the Config Register • Functions of the config-register: • Select a boot source and default boot filename • Enable/Disable the Break function • Control broadcast addresses • Set console terminal baud rate • Baud rate is the number of signal units transmitted per second and one signal unit is able to represent one or more bits. • Load operating software from ROM • Load the IOS from flash memory • Load the startup-config file from NVRAM
Overview • Router configuration controls the operation of the router’s: • Interface IP address and netmask • Routing information (static, dynamic or default) • Boot and startup information • Security (passwords and authentication)
Where is the Configuration? • Can also be stored in more permanent places: • External hosts, using TFTP (Trivial File Transfer Protocol) • In flash memory in the router
Router Access Modes • User EXEC mode – limited examination of router • Privileged EXEC mode – detailed examination of router, debugging, testing, file manipulation. • ROM Monitor – useful for password recovery & new IOS upload session • Setup Mode – available when router has no startup-config file
Router Prompts – How to tell where you are on the router • You can tell in which area of the router’s configuration you are by looking at the router prompts: • Router> – User EXEC mode • Router# – PRIVILEGED EXEC mode • Router(config) – terminal configuration prompt • Router(config-if) – interface configuration prompt • Router(config-subif) – sub-interface configuration prompt
Goal of startup • The goal of the startup routines for Cisco IOS software is to start the router operations. • To do this, the startup routines must accomplish the following: • Make sure that the router hardware is tested and functional. • Find and load the Cisco IOS software. • Find and apply the startup configuration file or enter the setup mode.
Startup Steps • Step 1: Cisco router powers up, • Step 2: Performs a power-on self test (POST). • Step 3: The generic bootstrap loader in ROM executes. • Step 4: The operating system image is loaded. • Step 5: The configuration file saved in NVRAM is loaded into main memory and executed one line at a time. • Step 6: • If no valid configuration file exists in NVRAM, the operating system searches for an available TFTP server. • If no TFTP server is found, the setup dialog is initiated.
Initial startup of Cisco routers • The six steps in the previous slide is summed up here:
External Configuration Sources • Console • Direct PC serial access • Auxiliary port • Modem access • Virtual terminals • Telnet/SSH access • TFTP Server • Copy configuration file into router RAM • Network Management Software • e.g. CiscoWorks
Console access • Console access is usually used to configure newly acquired devices. • These devices usually don’t have an IP address configured, and therefore can not be accessed through the network. • Most of the Cisco devices have a physical console port. • This port can be connected to a computer using a rollover cable,
Telnet access • This type of access used to be a common way to access network devices. • Telnet is a terminal emulation program that enables you to access IOS through the network and configure the device remotely. • The device that is being configured needs to have an Telnet server installed and an IP address configured. • Telnet uses a well known TCP port 23
SSH Access • This access type enables you to configure devices remotely. • It adds an extra layer of security by encrypting all communications using public-key cryptography. • SSH uses well known TCP port 22.
Looking at the Configuration • Use “show running-configuration” to see the current configuration • Use “show startup-configuration” to see the configuration in NVRAM, that will be loaded the next time the router is rebooted or reloaded
Connecting your FreeBSD machine to the Router’s Console port • Look at your running configuration • Configure an IP address for fast Ethernet interface depending on your table • Look at your running configuration and your startup configuration • Check what difference there is, if any
Deleting your Router’s Configuration • To delete your router’s configuration Router#erase startup-config OR Router#write erase Router#reload • Router will start up again, but in setup mode, since startup-config file does not exists
Disaster Recovery – ROM Monitor • ROM Monitor is very helpful in recovering from emergency failures such as: • Password recovery • Upload new IOS into router with NO IOS installed • Selecting a boot source and default boot filename • Set console terminal baud rate to upload new IOS quicker • Load operating software from ROM • Enable booting from a TFTP server
Getting to the ROM Monitor • Windows using HyperTerminal for the console session • Ctrl-Break • FreeBSD/UNIX using Tip for the console session • <Enter>, then ~# OR • Ctrl-], then Break or Ctrl-C • Linux using Minicom for the console session • Ctrl-A F
Disaster Recovery:How to Recover a Lost Password • Connect your PC’s serial port to the router’s console port • Configure your PC’s serial port: • 9600 baud rate • No parity • 8 data bits • 1 stop bit • No flow control
Disaster Recovery:How to Recover a Lost Password • Your configuration register should be 0x2102; use “show version” command to check • Reboot the router and apply the Break-sequence within 60 seconds of powering the router, to put it into ROMMON mode Rommon 1>confreg 0x2142 Rommon 2>reset • Router reboots, bypassing startup-config file