CHAPTER Peer-to-peer Network Installation and Configuration
1.19k likes | 1.83k Vues
CHAPTER Peer-to-peer Network Installation and Configuration. Chapter Objectives. First, provide an overview of peer-to-peer network installation Describe the step-by-step installation procedure NIC resource setting, client and protocol installation etc

CHAPTER Peer-to-peer Network Installation and Configuration
E N D
Presentation Transcript
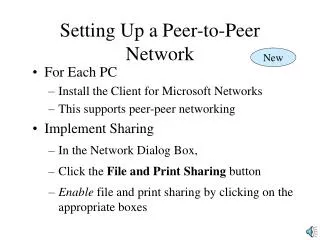
Chapter Objectives • First, provide an overview of peer-to-peer network installation • Describe the step-by-step installation procedure • NIC resource setting, client and protocol installation etc • Illustrate the step-by-step configuration procedure • Preparation for sharing and identification of the network and its components • Include actual screen demonstrations of the installation and the configuration procedure
Chapter Modules • Installation Specifications and Preview • LAN Hardware and OS Software Installation • Obtaining Resource Values • Setting Resource Values • Peer-to-peer Networking Specifications • Peer-to-peer Configuration • Workstation and Workgroup Identification • Logon Specification • Summary of Peer-to-peer LAN Installation and Configuration
MODULE Installation Specifications and Installation Preview
Module Objectives • Windows 9X networking features • Peer-to-peer case example • Environment and hardware • Overview of installation considerations • Hardware and NIC configuration • Driver, protocol and services configuration • Network identification
Windows 9X Networking • Purpose • Peer-to-Peer networking with Windows 9X • Connect • Workstations running a client operating system Windows 9X • Share • Folders and files on peers • Printer • Fax
WINDOWS 9X Cont. • Service • Electronic mail • Access facility • Facilitate remote LAN access
Peer-to-Peer Network:Case Example US Group: NAFTA Canada Mexico
Network Specifications • Network type • 100BaseTX • Hardware • Twisted Pair Category 5 • Built-in 100/10 mbps card • Software • Windows95, Windows 98 and Windows 2000, Windows XP
Installation • Install raw hardware and raw operating system • Perform hardware level configuration of the NIC • This is not necessary in the case of modern NIC • Configure peer-to-peer networking
Installation of Raw Hardware and Software • Install network hardware • Install any Windows client OS • Network card may be automatically installed • Otherwise, skip the installation of the network card for later operation
Hardware Level Configuration of NIC • In modern NIC • The resources are automatically assigned • Otherwise • Find available IRQ, I/O etc. • Set IRQ, I/O etc. on the NIC • Depending on the card, use jumpers or software provided by the vendor
Configuring Peer-to-Peer Networking • Two Step process • Ensure the proper configuration of the following: • Driver (adapter), protocol and services configuration • Network identification • Computer ID • Workgroup ID
Network Driver, Protocol and Services Configuration • Client • Adapter • Protocol • Services • File and Print Sharing
Network Identification • Workstation name • Windows or NetBIOS name • It is customer to keep the windows name and the TCP/IP name of the computer as the same • Workgroup or domain name • Purpose is to facilitate LAN access
Note on Identification NAFTA Computer Name ganesan US Canada Mexico Note: Do not change the computer name if it is already specified.
MODULE Initial LAN Hardware and OS Software Installation
Module Objectives • Initial hardware and software installation overview • Hardware Installation • NIC, cables and connectors • Network connection • Software (OS) Installation • Preparation and installation
Initial Installation • Hardware • Basic physical hardware installation for linking the devices on a network • Software • Initial installation of the client operating system without the networking feature
Hardware: NIC • Newer network • 10/100 100BaseTX card already built into the computer • Older network • SMC Ethernet 16 Ultra • D-Link NE 2000 compatible • Both are 10Base2 ISA cards • Some computers are equipped with SMC and the others with D-Link
SMC NIC Cards Black Ring
D-Link NE 2000 NIC Card White Ring
Hardware: Cables and Connectors • Cable • 10Base2 • 5, 10, 15 and 25 feet segments • Connectors • T-connectors • Terminators
Network Connection Router SMC SMC NE2000 Back- bone NE2000 SMC Windows 95 Stations
Windows 9X: Preparation for Installation • Preparation • Format drive c: as a bootable drive using Windows DOS • Install device driver to recognize CD-ROM drive as drive d: • Note • The above steps are not necessary if start-up diskettes are used to launch the OS installation • In this case, the OS can be installed directly from the CD
Windows 9X Installation • Method 1 • Install from the CD • Method 2 • Copy the Windows 9X CAB files to the c: drive and install from the hard drive • Both methods • Windows 9X will guide through the installation • Skip the installation of the network feature in the process
MODULE Obtaining Resource Values
Module Objectives • Overview of resource statistics and assignment • Obtaining resource statistics • Configurable resources for the NIC • Obtaining resource statistics in Windows 9X • Available resources and resources in use
Resources to be Set • IRQ • I/O Address • Base Memory Address • If present • DMA Channel • If present
Resource Statistics and Assignment • Resource statistics for each work station • Obtain • Identify available resources • Set resources on NIC to match availability • Jumperless cards • Cards with jumpers
Obtaining Resource Statistics • Windows95 Approach • Using Control Panel • MS-DOS approach • Run MSD (Microsoft Diagnostics) • In searching for available resources, one must bear in mind the range of values that could be set on the network card
Configurable Values for a NIC • IRQ • I/O Address • Base Memory Address • DMA Channel
Windows 9X Approach Start Settings Control Panel Select Computer Properties Device Manager System IRQ I/O DMA Memory
Available Resources • IRQ • I/O Address • Base Memory Address
Resources in Use • Note available for assignment • Example • IRQ 7 • I/O 300H • D000- • DMA 5
MODULE Setting Resources Values
Module Objectives • Overview of resource settings on the NIC • NIC configuration • Cards with jumpers and jumper-less cards • Software configuration of SMC card • Check for conflicts
Setting Of Resources On The NIC • Set parameters on the network card choosing from available resource values • Cards with jumpers • Cards without jumpers
NIC Configuraton for Cards with Jumpers 1. Older type cards J3 J1 IRQ J2 DMA - Adjust jumpers to set the parameters
NIC Configuration for Jumperless Cards • Newer type cards • Use software provided by the vendor to set the parameter values
SMC Card • Supports both options • Resources can be configured using the jumpers • Resources can be configures using the software as well • Preferred option
Jumpers in the SMC Card Jumpers BNC Connectors
Jumper Configuration Up Down