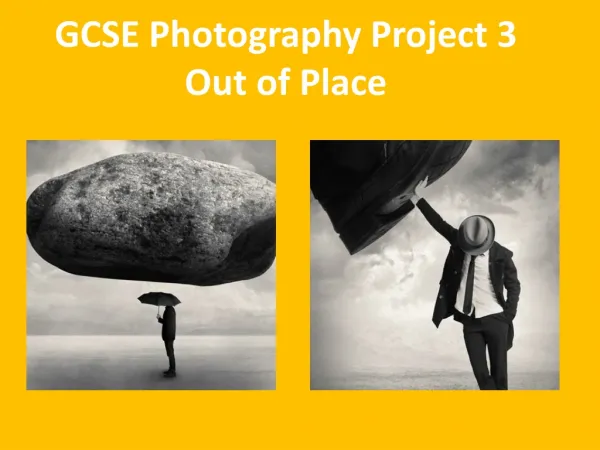

Photography GCSE
E N D
Presentation Transcript
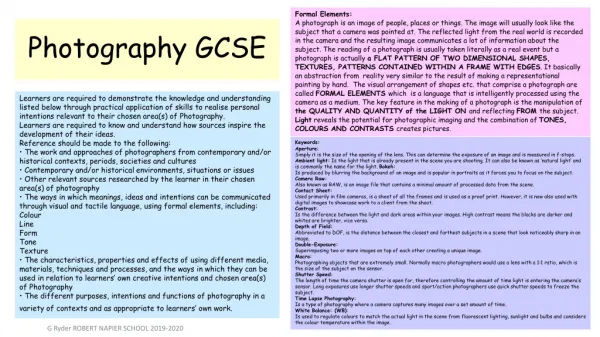
Formal Elements: A photograph is an image of people, places or things. The image will usually look like the subject that a camera was pointed at. The reflected light from the real world is recorded in the camera and the resulting image communicates a lot of information about the subject. The reading of a photograph is usually taken literally as a real event but a photograph is actually a FLAT PATTERN OF TWO DIMENSIONAL SHAPES, TEXTURES, PATTERNS CONTAINED WITHIN A FRAME WITH EDGES. It basically an abstraction from reality very similar to the result of making a representational painting by hand. The visual arrangement of shapes etc. that comprise a photograph are called FORMAL ELEMENTS which is a language that is intelligently processed using the camera as a medium. The key feature in the making of a photograph is the manipulation of the QUALITY AND QUANTITY of the LIGHT ON and reflecting FROM the subject. Light reveals the potential for photographic imaging and the combination of TONES, COLOURS AND CONTRASTS creates pictures. Photography GCSE Learners are required to demonstrate the knowledge and understanding listed below through practical application of skills to realise personal intentions relevant to their chosen area(s) of Photography. Learners are required to know and understand how sources inspire the development of their ideas. Reference should be made to the following: • The work and approaches of photographers from contemporary and/or historical contexts, periods, societies and cultures • Contemporary and/or historical environments, situations or issues • Other relevant sources researched by the learner in their chosen area(s) of photography • The ways in which meanings, ideas and intentions can be communicated through visual and tactile language, using formal elements, including: Colour Line Form Tone Texture • The characteristics, properties and effects of using different media, materials, techniques and processes, and the ways in which they can be used in relation to learners’ own creative intentions and chosen area(s) of Photography • The different purposes, intentions and functions of photography in a variety of contexts and as appropriate to learners’ own work. Keywords: Aperture: Simply it is the size of the opening of the lens. This can determine the exposure of an image and is measured in f-stops. Ambient light: Is the light that is already present in the scene you are shooting. It can also be known as ‘natural light’ and is commonly the name for the light. Bokeh: Is produced by blurring the background of an image and is popular in portraits as it forces you to focus on the subject. Camera Raw: Also known as RAW, is an image file that contains a minimal amount of processed data from the scene. Contact Sheet: Used primarily in film cameras, is a sheet of all the frames and is used as a proof print. However, it is now also used with digital images to showcase work to a client from the shoot. Contrast: Is the difference between the light and dark areas within your images. High contrast means the blacks are darker and whites are brighter, vice versa. Depth of Field: Abbreviated to DOF, is the distance between the closest and farthest subjects in a scene that look noticeably sharp in an image. Double-Exposure: Superimposing two or more images on top of each other creating a unique image. Macro: Photographing objects that are extremely small. Normally macro photographers would use a lens with a 1:1 ratio, which is the size of the subject on the sensor. Shutter Speed: The length of time the camera shutter is open for, therefore controlling the amount of time light is entering the camera’s sensor. Long exposures use longer shutter speeds and sport/action photographers use quick shutter speeds to freeze the subject. Time Lapse Photography: Is a type of photography where a camera captures many images over a set amount of time. White Balance: (WB): Is used to regulate colours to match the actual light in the scene from fluorescent lighting, sunlight and bulbs and considers the colour temperature within the image. G Ryder ROBERT NAPIER SCHOOL 2019-2020
Areas of study: Learners are required to work in one or more area(s) of Photography, such as those listed below. Combinations of these areas are also possible: • Documentary photography • Photo-journalism • Studio photography • Location photography • Experimental imagery • Installation • Moving image Techniques Learners must demonstrate the ability to work creatively with processes and techniques appropriate to the chosen area(s) of study such as: photograms, pin hole cameras, film (chemical) processes, digital processes, time-lapse photography, stop-frame animation, installation, film, video, animation, photomontage, digital manipulation of images. Content of Art and Design: Photography (J173) Overview: Photography is defined here as the practice of creating durable static or moving images by recording light with light-sensitive materials such as photographic film or digitally by means of an image sensor. Learners must explore, acquire and develop skills, knowledge and understanding through the application of traditional and or digital techniques and processes specific to their chosen area(s) of study of Photography. Learners must explore practical and relevant critical and contextual sources such as the work of historical and contemporary photographers and the different purposes, intentions and functions of photography as appropriate to their own work. Learners must demonstrate the knowledge, skills • Skills: • Learners are required to demonstrate the knowledge, skills and understanding as defined in the Art and Design Core Content section of this specification in the context of their chosen area(s) of Photography. • In addition, learners will be required to demonstrate skills in the following: • • develop ideas through investigations informed by selecting and critically analysing sources • • apply an understanding of relevant photographic practices in the creative and cultural industries to their work • • refine their ideas as work progresses through taking, selecting, editing and presenting image(s)/artefact(s)/personal outcome(s) • • record their ideas, observations, insights and independent judgements, in ways that are appropriate to the Photography title such as, recording still and moving images with lens-based media • • Use appropriate specialist vocabulary through either visual communication or written annotation, or both, within Photography • • Use visual language critically as appropriate to their own creative intentions and chosen area(s) of photography through effective and safe use of: • Media • Materials • Techniques • Processes • Technologies • •Use drawing skills for different needs and purposes, appropriate to the area(s) of study used. Drawing may take the form of recording in light, storyboarding and image manipulation for using appropriate media and materials • • Realise personal intentions in Photography, through the sustained application of the photographic process. G Ryder ROBERT NAPIER SCHOOL 2019-2020
Photography GCSE AO1 Develop ideas through investigations, demonstrating critical understanding of sources. AO2 Refine work by exploring ideas, selecting and experimenting with appropriate media, materials, techniques and processes. AO3 Record ideas, observations and insights relevant to intentions as work progresses. AO4 Present a personal and meaningful response that realises intentions and demonstrates understanding of visual language. Component 01: Portfolio Is the Portfolio. Learners must produce work in response to a centre- or learner-set starting point, brief, scenario or stimulus: a portfolio of practical work. This component is a non-exam assessment. It is internally assessed and externally moderated using the marking criteria in Section 3f. This component is marked out of 120 marks and contributes 60% to the overall weighting of OCR’s GCSE (9–1) in Art and Design. Please refer to Section 2b of this specification for further detail. Component 02: Externally set task Is the Externally set task. The early release paper will be issued on 2 January in the year of certification. It will provide learners with five themes each with written and visual starting points or stimuli. From these, one option must be selected by the learner on which they must base their personal response. Centres will allow learners a set period of time, at their discretion, to prepare for the Externally set task 10-hour supervised time period. The Externally set task is a non-exam assessment. It is internally assessed and externally moderated using the marking criteria in Section 3f. This component is marked out of 80 marks and contributes 40% to the overall weighting of OCR’s GCSE (9–1) in Art and Design. G Ryder ROBERT NAPIER SCHOOL 2019-2020
Photography GCSE Studio photography ● The use of a formal studio setting to control the environment for a variety of subject matters such as portraiture and still life. ● The use of a range of studio photography materials, tools and techniques such as lighting and the use of light, props, posing and the arrangement of objects. Location photography ● The use of subject matter found or placed to manipulate the formal elements within an existing environment. ● The use of a range of location photography materials, tools and techniques such as lighting and light metering, developing site-specific shoot plans. Experimental imagery ● The control of light and photographic processes to create non-traditional photographic outcomes. ● The use of a range of experimental imagery materials, tools and techniques such as analogue and digital photography, manual manipulation and digital and non-digital processes and outcomes. Installation* ● The creation and presentation of photographic artwork for a site-specific space to control and transform viewer perception. ● The use of a range of installation imagery materials, tools and techniques such as location, projection, film, sound, scale and interactivity. Moving image: film, video and animation ● The recording and use of moving image to communicate a visual narrative ● The use of a range of moving image materials, tools and techniques such as storyboards, scripts, digital, non-digital mixed media methods Areas of study Work must demonstrate integrated knowledge, understanding and skills. Work is not limited to one area of study and students could develop work in at least one of the following areas of study. Documentary photography ● The use of the photographic process to provide a narrative of events and/or situations. ● The use of a range of documentary photography materials, tools and techniques such as compositional, proximity to the subject, focal points and the involvement of the photographer with the scene being documented. Photo-journalism ● The use of the photographic process to record events as they happen to support the written word. ● The use of a range of photo-journalism materials, tools and techniques such as manipulation of images for artistic effect through depth of field, shutter speed, focal points and viewpoints. G Ryder ROBERT NAPIER SCHOOL 2019-2020
Organisation of your Work • Keep a sketch book / folder DO NOT LOSE IT Store work in school in your allocated drawer • Create a Photography folder in your user area • Create folders inside Photography: Summer term 13, Landscape, Social reportage, Still Life, Portraiture / Fashion, Personal ( Miscellaneous ) • Ensure all your work is saved into one of the folders. Back up all work onto a memory stick. Higher quality photographs take up more space. • Save pictures as a JPEG. If you are working on them in Photoshop and need to complete manipulations another time Save As a PSD file. (Delete this after you have finished and have saved your final image as a JPEG. • Put your name & date on all work Annotating your work Your work will be mounted in order along with written explanations/notes (called annotations) recording details of: · What you took photographs of · Why · What you were hoping to achieve · How it relates to your study · How it has informed you (what you have learned from it) When you print out and mount your work, make sure you include contact sheets, and annotate directly onto prints if necessary (local exposure controls, varying crop, layouts and format etc…) Visual Brain storm The best way to start a project and your workbook is to produce a visual brain storm. This is simple a double page of images, key words and annotations that set you on a path in response to the opening topic of the project. This should include some photos take by you, some photos from books/magazines/internet and some examples of how other famous photographers in the past have approached the same or a similar topic (remember to leave the front page spare for your title page you will complete later). Project plan It helps to produce a basic unit plan outlining: · The theme of your response of the topic · Photographers you are going to research to help inform the development of your ideas · Methods and processes that you will use whilst producing your work
Layout and content of Photographers research pages A good way of gaining an insight into a photographers’ way of working is to step into their shoes by trying to recreate some of their images. But before you do this you need to closely look at their work to try to work out how they did it (which lens, how it was lit? etc.) It is important that you clearly lay out your research in such a way that this method is clear as this is a good opportunity to receive some good marks under AO1. The simplest way is as follows:
Key terms - Composition Focal Point Rhythm Background Mid-ground Normally the focal point is not central to the painting unless for a good reason. , Foreground Viewpoints Line Balance Perspective Forms – 3D shapes created through tone Overlapping objects to create interest in the composition Light The key point to remember with composition is about variety - just “don’t make any two things the same” Ormiston Denes Academy Sally Erb
Photographic terms Artist Connections: Dan Eldon Dada Maholy Nagy, Alexander Rodenko Willie Bester Slow Shutter Artist Connections: Etienne Jules-Marey Macro(close up) Photomontage Photogram Pin Hole Multi Exposure Photojoiner Ormiston Denes Academy Sally Erb
Ormiston Denes Academy Sally Erb Victoria Guy Adrian Limani Bela Borzoi. Thomas Barbéy
Maureen Brodbeck Bernd and HillaBecher Robert Polidori Ormiston Denes Academy Sally Erb
Ormiston Denes Academy Sally Erb Weegee (AurtherFellig) Cindy Sherman Claire Martin
JULIE ANDREWS, 1959 by BEATON, SIR CECIL, CBE (1904-1980) HenDrikKerstens's 'Shopping Bag,' in the collection of Fred and Laura Bidwell. Zhang Huan Tina Berning and photographer Michelangelo Di Battista Ormiston Denes Academy Sally Erb
How do you get assessed? G Ryder ROBERT NAPIER SCHOOL 2019-2020
Evaluating a Photographers work It is very important to evaluate and analyse the work of your chosen photographer rigorously, not only to achieve good marks under AO1 but also to help you to build a greater insight into and understanding of their work and the motives behind it. Use the prompts below to guide you in this process. Your analysis must flow grammatically as one piece of written work and cannot be simply brief and direct responses to the questions. Try to incorporate the formal elements. • Content - looking at the subject of the photograph • What is it? What is it about? What is happening? • Where and when was it taken? • What do you think that the relationship between the photographer and subject/s is? • What does the photograph represent? • What has the photographer called the photograph? • Does the title change the way we see the photograph? • Is it a realistic depiction? • Have any parts been exaggerated or distorted? If so, why? • What is the theme of the photograph? • What message does the photograph communicate? • Composition - How the photograph is set out. • Form - 3 Dimensional shape through use of tone • Colour -Is the photograph colour or black and white? How does this affect the mood? • Tone -Is the photograph high or low contrast? How and why? The quality of light source can affect the tonal contrast? What kind of light source is there? • Line -What sorts of lines are there in the photograph? How have they been positioned in relation to the rest of the composition? What effect does this have? • Shape -What sorts of shapes are there in the image? Doe they remind you of anything? Do you think the photographer meant this? What kind of marks does the photographer use? • Pattern/Texture -What kinds of patterns and/or textures are there in the photograph? • How does the photograph make you feel? • Why do you think you feel like this? • Does the colour, texture, form or theme of the photograph affect your mood? How and why?