Download
1 / 55
550 likes | 956 Vues
Options. Option A Closing Current Year Funds and Transferring Balances to New Year Funds Option B Opening New Year Funds Without Transferring Balances from Current Year Funds Option B Supplement. 1.

E N D
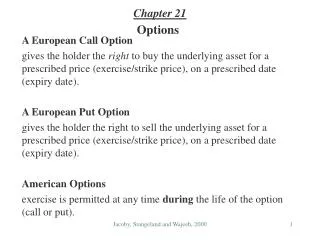
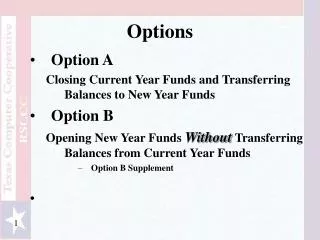
Options • Option A Closing Current Year Funds and Transferring Balances to New Year Funds • Option B Opening New Year Funds WithoutTransferring Balances from Current Year Funds • Option B Supplement 1
Prior to beginning this process VERIFY that ALL Payroll processing for the prior year is completed and interfaced • Payrolls, Voids, Issues, Adjustments…. • Deduction Checks…. • TRS Reports – 373, 3, 489, On-Behalf, Supp Comp Reimbursements, TEA Health Insurance Fed Fund transfer…… • EOY Accruals 2
EXPORTS Highly recommended that when the export prompt is displayed that you process the export i.e., C:\RSCCC2K\Exports\Finance\EOFY\StepXX 3
Steps 1 thru 5Options A or B • Deleting 1099 Work Table • Reversing Purchase Orders • Finance • Requisition • Mass Deleting Requisitions • Reconcile ALL Bank Accounts • Delete Current Year Amendments, including Unposted Transactions 4
Deleting 1099 Work TableStep 1 Finance\\Utilities\\Create 1099 Work Table It is recommended that you export both the current and previous file IDs before deleting the 1099 work table, since an export prompt is not offered and since the 1099 work table includes transactions from two file IDs. If no dates are specified, then all 1099 work table transactions will be deleted. 5
Reversing Purchase OrdersStep 2Finance or Requisition Finance\\Utilities\\Fiscal Year Processing\\Mass Purchase Order Reversal\\Reverse PO by Fund Requisition\\Utilities\\Mass Purchase Order Reversal\\Reverse PO by Fund Backup Before Preview (Process) Screen 6
Mass Deleting RequisitionsStep 3 Requisition\\Utilities\\Mass Delete Requisition Records\\Fund / Fiscal YR Backup After Preview (Process) Screen 7
Reconcile ALL Bank AccountsStep 4 Finance\\Maintenance\\Bank Reconciliation 8
Delete Current Year AmendmentsStep 5 Finance\\CYR Amendment\\Delete Funds Backup Before Preview (Process) Screen 9
continuedSteps 6 thru 9Options A or B • Copy Current Year Funds to New File ID • Delete all Deduction CK Transactions from HR – select both Unprocessed and Processed • Delete all Transfer Transactions from HR – select both Unprocessed and Processed • Create New Funds 10
CopyCurrent Year Funds to New File IDStep 6 Finance\\Move Current to New File ID 3 1 2 11
Delete All Deduction CK TransactionsStep 7 Human Resources\\ Payroll Processing\\Deducting Checks\\Mass Update / Delete\\Mass Delete No Prompts for Backup during Delete 12
Delete all HR Transfer TransactionsStep 8 Human Resources\\ Utilities\\Transfer Transaction Processing\\Mass Update / Delete\\Mass Delete xxxxxxx xxxxxxx No Prompts for Backup during Delete 13
Create New FundsStep 9 Finance\\Utilities \\Mass Change Account Codes\\Fund/Year No Backups Before or After Preview (Process) Screen 14
Option A - Steps 10, 11, and 12 • Closing the Funds (5XXX-8XXX) • Close the Month • Create new Accounts by Fund – copy balance sheet amounts to new year 15
Closing the Funds (5XXX-8XXX) Step 10A Finance\\Utilities\\Fiscal Year Processing\\Fund Close (5XXX-8XXX) If there are any errors on the report, then click Cancel to return to the Fund Close 5XXX-8XXX window without closing any funds. Correct the errors and perform the close funds process again. 16 Backup Before Preview (Process) Screen
Close the MonthStep 11A Finance\\Utilities \\End of Month Closing 17
Create New Accounts by FundStep 12A Finance\\Utilities\\Fiscal Year Processing\\Create New Accounts by Fund 18 Backup Before Preview (Process) Screen
Option B - Steps 10, 11 and 12 • Review Option B Supplement • Create New Accounts by Fund – NO amounts to new year • Close the Month 19
Review OPTION B SupplementStep 10B Allows for districts to take the necessary steps to close your funds in a file ID created by Supplement to Option B. Then to copy your balance sheet amounts from that file ID to the current file ID C anytime into the New School Year 20
Create New Accounts by FundStep 11B Finance\\Utilities\\Fiscal Year Processing\\Create New Accounts by Fund 21 Backup Before Preview (Process) Screen
Close the MonthStep 12B Finance\\Utilities \\End of Month Closing 22
Moving Budget to FinanceStep 13 Finance\\Utilities\\Fiscal Year Processing\\Move Budget To Finance Budget\\Utilities \\ Move Budget To Finance 23 Backup Before Preview (Process) Screen
Update Bank Account Fund GroupsStep 14 Finance\\Utilities\\Fiscal Year Processing\\Mass Change Bank Account Group By Fund 24 Backup Before Preview (Process) Screen
Update Fiscal Years in HR DistributionsStep 15 Human Resources\\ Utilities\\Mass Update\\Employee\\ Backups After Preview (Process) Screen 25
Update HR Fund to Grant Code TableStep 16 Human Resources\\ Tables\\Salaries\\Fund to Grant Remove the grant code from all funds and fiscal years that are to be deleted Add the grant code to all new funds and fiscal years moved from Budget 26
Delete Old Funds from File ID CStep 17 Finance\\Utilities\\Fiscal Year Processing\\Delete Funds 27 Backup After Preview (Process) Screen
Update User ProfilesStep 18 Finance\\Tables\\User Profiles 28
Update District Finance OptionsStep 19 Finance\\Tables\\District Finance Options\\Finance Options 29
Update District Finance OptionsStep 19 Finance\\Tables\\District Finance Options\\Clearing Fund Maintenance Right Click - ADD 30
Update District HR OptionsStep 20 Human Resources\\ Tables\\District Human Resources Options If your fiscal year is July through June and the ten-month employees are paid from September through August, this date should be September. 31
Verify FundsStep 21 Encouraged to print any and all reports you need to verify data • All Funds should exist with balances that where carried from the previous year • Revenue and expenditure amounts from the Budget System 32
ExportsStep 22 Finance\\Utilities\\Export By File ID 33
Next Year RequisitionsMove Next Year Tables to CurrentStep 23 Requisition\\Utilities\\Move Next Year Tables to Current Year Once Executed - NO option to cancel - must restore backup from Finance 34
Move NY Requisitions to CY RequisitionsStep 24 Finance\\Utilities\\Fiscal Year Processing\\Clear/Move Next Year Requisitions To CYR\\”MOVE” Backup After Preview (Process) Screen 35
Verify Finance InformationStep 25 Encouraged to print any and all reports you need to verify data • Detail General Ledger • FIN1400 • Batch Process Balance Error Listing • FIN1600 • Outstanding Purchase Order Listing • FIN2150 36
Verify Requisition InformationStep 26 Encouraged to print any and all reports you need to verify data • Requisitions Pending Approval • REQ1050 • Outstanding Requisition Report • REQ1100 37
Duplicating Auditor Adjusting EntriesStep 27 The duplicate option allows users to duplicate an existing journal actual transaction from a previous year file ID to file ID C. The duplicate function only displays if the user is signed on to the previous year file ID associated with file ID C. For example, if previous year file ID is 7 for file ID C in the District Finance Options table, then the user can sign on to file ID 7, and the Duplicate option will be available. However, if the user signs on to file ID 6, then the Duplicate option will not be available. 38
If you have completed all steps successfully, then notify Human Resources that they can proceed with the First Payroll of the School Year checklist. The first payroll for the school year cannot be processed until the budget has been moved to Finance, and the clearing fund for the new fiscal year is created. 39
Option B Supplement This process will take you through the necessary steps to close your funds in the file ID created in Option B and copy your balance sheet accounts and amounts to file ID C. 41
EXPORTS Highly recommended that an Export by File ID is made for File ID C & 7 i.e., C:\RSCCC2K\Exports\Finance\EOFY\OptBSuppl\ 42
Change to Prior File ID Step 1 Finance\\File\\Change File ID\\ 43
Verify AdjustmentsStep 2 Finance\\Reports\\Finance Reports\\Journal, Checks, Detail Ledgers Verify that all adjustments in the funds to be closed have been entered. All of these adjustments should be made in the current period. You cannot close funds with entries in the next accounting period. You should note the file ID in the upper-left corner is the previous year’s file ID. 44
File ID to Close ?Step 3 If you do not want the closing entries to be reflected in this file ID but want to be able to copy the balance sheet accounts and amounts to file ID C that are influenced by the closing, then perform the following steps. If you want the closing entries to be reflected in this file ID, then proceed to Step 6. 45
Copy File ID (7) to New File ID Step 4 Finance\\Utilities\\Move Current to New File ID 46
Change to New Alpha File ID Step 5 Finance\\File\\Change File ID\\ 47
Close the MonthStep 6 Finance\\Utilities \\End of Month Closing 48
Closing the Funds (5XXX-8XXX) Step 7 Finance\\Utilities\\Fiscal Year Processing\\Fund Close (5XXX-8XXX) When the Fund Close processing is completed, a Fund Close Report is displayed. Review the reports Click Print to print a copy of the report. If the report is correct, then click Process. All selected funds are closed. If there are any errors on the report, then click Cancel to return to the Fund Close 5XXX-8XXX window without closing any funds. Correct the errors and perform the close funds process again. 49
Verify CloseStep 8 Finance\\Inquiry\\General Ledger Inquiry Using General Ledger Inquiry Verify that all funds selected have closing entries for the 5XXX through 8XXX accounts. If not, perform the step above for those funds/FY. 50