Programming, Serial and Virtual Prototyping
Explore the essentials of Arduino programming and serial communication in this beginner's guide. Learn to transfer and receive information between your Arduino and computer using Serial Monitor while mastering the setup with baud rates. Discover how to debug your code, troubleshoot circuits, and send messages efficiently. Engage in hands-on activities using circuit 7, and transition from breadboarding to PCB design. Whether you're coding with semicolons or diving into GUI programming, this course caters to all Arduino enthusiasts.


Programming, Serial and Virtual Prototyping
E N D
Presentation Transcript
Code if ( You like semicolons ) { Stay here for intro to Arduino code } else { Join the MODKit group for GUI code }
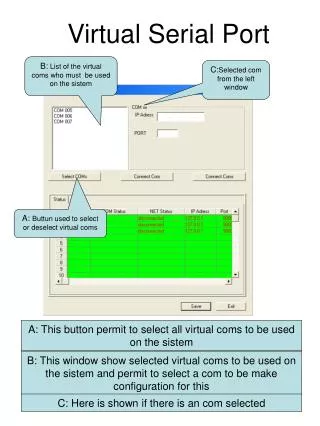
Serial Communication Serial Communication is the transferring and receiving of information between two machines, the Arduino dedicates pin # 0 to receiving information and pin 1 to transferring information
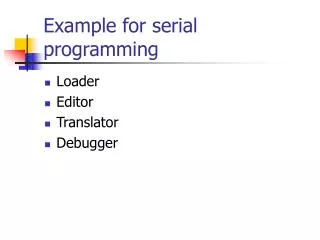
Serial Activity with Circuit 7 Communication Troubleshooting circuits Debugging Code
Serial Communication:Serial Setup void setup ( ) { Serial.begin ( 9600 ) ; } In this case the number 9600 is the baudrate at which the computer and Arduino communicate
Serial Communication:Sending a Message void loop ( ) { Serial.print ( “Constructivism & “ ) ; Serial.println ( “Mechatronics” ) ; }
Serial Communication:Serial Debugging void loop ( ) { int xVar = 10 ; Serial.print ( “Variable xVar is “ ) ; Serial.println ( xVar ) ; }
Serial Communication:Serial Troubleshooting void loop ( ) { Serial.print ( “Digital pin 9 reads “ ) ; Serial.println ( digitalRead ( 9 ) ) ; }
Serial Communication:Circuit 7 code void loop ( ) { buttonState = digitalRead(inputPin); if (buttonState== HIGH){ digitalWrite (ledPin, LOW) } else { digitalWrite(ledPin, HIGH); Serial.print (“button state is “); Serial.println ( buttonState ); } }
Fritzing Now that you feel comfortable putting together circuits with your breadboard let’s talk about how to go from the breadboard to a PCB
Free Time The rest of the class is dedicated to free pursuit Do whatever you like and an instructor will help you with any questions or problems you may have, this includes questions about personal projects using Arduino Thank you for attending our Intro to Arduino class Please fill out a class feedback form before you leave
www.sparkfun.com 6175 Longbow Drive, Suite 200 Boulder, Colorado 80301