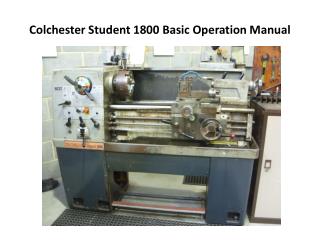
Colchester Student 1800 Basic Operation Manual
241 likes | 2.88k Vues
Colchester Student 1800 Basic Operation Manual. Colchester Student 1800 B asic O peration M anual. 1) Spindle Speed Selection 2) Spindle Operation 3) Setting automatic feed speed rate mm/revolution 4) Operating automatic feed of carriage along bed of machine

Colchester Student 1800 Basic Operation Manual
E N D
Presentation Transcript
Colchester Student 1800 Basic Operation Manual 1) Spindle Speed Selection 2) Spindle Operation 3) Setting automatic feed speed rate mm/revolution 4) Operating automatic feed of carriage along bed of machine 5) Operating automatic feed of cross-slide across bed of machine 6) Drilling holes in material using Tailstock 7) Turning a taper using the compound slide
Spindle Speed Selection rpm To select 53 rpm spindle speed rotate the selector levers (a) and(b) to align the blue arrow and blue box indicating required speed with the fixed blue colour band (1) as example below To select 410 rpm spindle speed rotate the selector levers (a) and(b) to align the red arrow and red box indicating required speed with the fixed red colour band as example below 1 a 1 b
Spindle Operation • To operate spindle in forward direction pull clutch lever (1) out to the right and push down as in diagram (A) • To stop spindle lift clutch lever back up into neutral position as in diagram (B) • To operate spindle in reverse direction pull clutch lever out to the right and pull up (A) (B) 1
Setting automatic feed speed rate mm/revolution 1) Refer to chart of feed rates located on control panel as in diagram (A) 2) Select feed rate for example 0.10 mm/rev in left hand column. 3) Look at gear selector positions in centre column then set gears levers to correct positions as indicated in diagram (B) (L is gear train and is generally set unless told otherwise), the Bold letter C at top of chart indicates this gear selector also needs to be set. (A) (B)
Operating automatic feed of carriage along bed of machine • Push feed direction button (1) in as in diagram (A) • Start machine spindle using clutch lever. • Lift feed engage lever (2) as in diagram (B) • Note disengage feed before turning spindle off on shut down (A) (B) 1 2
Operating automatic feed of cross-slide across bed of machine • Pull feed direction button (1) out as in diagram (A) • Start machine spindle using clutch lever. • Lift feed engage lever (2) as in diagram (B) • Note disengage feed before turning spindle off on shut down (A) (B) 1 2
Drilling holes in material using Tailstock • Rotate hand-wheel (A) on tailstock clockwise until scale on quill (B) is visible as in diagram below • Insert chuck with centre drill fitted into quill ensuring tang lines up correctly as below. • Move tailstock along machine bed until centre drill is around 20mm from work-piece then lock in position by pushing locking lever (C) forward • Turn spindle on and rotate hand-wheel (A) clockwise to drill into work-piece • Rotate anti-clockwise to withdraw, change drill to correct size and repeat process B A C A
Turning a taper using the compound slide Using correct size spanner loosen compound slide securing nuts (A) one on front one on rear Rotate compound slide to align correct angle with datum line, example 15 degrees and lock securing nuts Move Carriage along bed of machine until tool is close to material Set tool at corner of material and wind back slightly carriage , move cross-slide forward by 0.5mm Rotate hand-wheel (B) on compound clockwise at a constant speed to cut taper When cutting stops rewind compound slide, apply further 0.5mm cut using cross-slide and repeat until correct taper is produced A B