W ritten by Neil Rosen
620 likes | 791 Vues
MIT Player User’s Guide. W ritten by Neil Rosen . Table of Contents. 27. Choosing Country or Choreographer Display 28. Determining Program Finish Time 28. Setting Between Dance Pause Time 29. Saving Dances to Your Favorites List

W ritten by Neil Rosen
E N D
Presentation Transcript
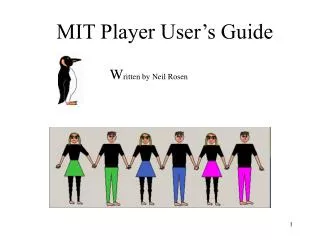
MIT Player User’s Guide Written by Neil Rosen
Table of Contents • 27. Choosing Country or Choreographer Display • 28. Determining Program Finish Time • 28. Setting Between Dance Pause Time • 29. Saving Dances to Your Favorites List • 29. Selecting Dances From Your Favorites List • 30. Viewing Other Programmers Favorites Lists • 31. Editing Your Favorites List • 32. Teasing Dances • 33. Teaching and Announcement Stops • 34. Using a Dance Floor Display CRT or Projector • 35. Configuring Your Player • 39. Editing a Dances Database Parameters • 41. Renaming or Moving a Music File • Adding Individual Dances to the Player • 43. Adding a Group of Dances to the Player • 44. Using the Playlist Editor and Auto-play Feature • 47. Using the Database Health Check Utility • Playing Tracks From CDs • Generating Frequency Counts • Using the Magic Programmer • 53. Saving Tone Presets • 53. Adjusting the Tone Control. • Deleting Tone Presets • Histograms • Tabular View of Database • Editing Database Parameters in the Tabular View • 59. Registering the Player 3. Main window view 4. About this Program 6. Program Requirements 6. Legal Mumbo Jumbo 7. Installation of the Player Software • First Use of Player • Normal Use of Player • Queuing Dances • Un-queuing Dances • Limiting Search to Certain Repertoires • Searching by Country or Choreographer • Defining Country Hierarchies • Searching by Last Play / Taught Date • Searching by Choreographed Date • Queuing a Dance for Teaching • Searching by Complexity / Energy • Searching by Type / Style • Searching by Name or Substring • Exiting the Player • Saving Session Playlists • Setting Preferred Versions of Dances • Quick View of Database Values • Duplicate Dance Warning • Player Controls • Documenting Live Music in Playlist 26. Swapping 1 Playing Dance for Another
Main Screen Played dances Finish Time Repertoire Selector Player Controls Set Time Between Dances Save Playlist See Previous Playlists Search By Name or Sub-string Histograms Holding Area Search Results Search Criteria Queue dances Record Teaching Date Pop-up info on mouse-over dance
About this Program This program will allow you to run your dance session while maximizing your time on the dance floor. No more searching through multiple directories to find just the right dance for the level of your dancers. With just a few clicks, you can find exactly the dance you are looking for. Search by speed, complexity, type, style, country, choreographer, choreographed date, last played date, last taught date, comments, and alphabetically. Dances that match your selections are displayed for easy queuing. Simply drag the dance from the search window into the program window. The player software remembers your preferred volume and speed settings of each dance and also allows changing these during a dance session. Once adjusted, you will never have to run back to the computer to lower the volume on a particularly loud dance. You no longer need to write each dance in your log book. Each session’s playlist is saved to a computer file and can be later printed or combined with other playlists to produce frequency counts. The player allows you to queue dances for teaching. When a dance is queued for teaching, the player will automatically stop, saving you the trouble of leaving the dance floor to stop the player yourself. Read on for many more features. Aside from the initial setup of the MIT Player, the only work you must do to use this software is to convert your music into digital format (make mp3s etc.) and build your database. The more accurate your database is, the more useful the player features will become.
About this Program I wrote this program immediately after learning Visual Basic in order to practice some of what I learned. I never expected it to turn into such a large program and I never expected it to turn into something anyone else might want to use. This program contains no bugs. It may however contain unfortunate consequences of the fact that I was up many nights until way past 2:00 AM trying to make one feature or another work properly. This program is my gift to the MIT Folkdance Club. Any one else that would like to use it may do so for free but if you are still happy with it after using it for 6 months, it would be nice if you would send me $35. Receiving some cash will make me less sad that I missed so much sleep writing the program. Registration of the program is free. The code number that I send you after registration will eliminate a few use restrictions. The program comes "As Is" and is definitely not intended to look or function like a professionally available software package. I cannot promise to fix any bugs you find but I would be interested in hearing about them. I will also consider some feature requests as long as they do not require major coding . Due to being very over extended, I must reserve the right to refuse to make changes. If you would like to send money go to www.paypal.com and click on the send money link. You will have to sign up or log into the paypal site. Use NRpenguin@comcast.net as the recipient’s e-mail address. You can also e-mail me at the same address to learn where to send a check.
Program Requirements Visual Basic runtime files (available for free from Microsoft) Two additional .dll files from Un4seen.com. (I have paid Un4seen so that I can distribute those .dll files with this this shareware MIT Player) DirectX 8.0 or higher (available for free from Microsoft) PC running Windows (not NT) 250MHz processor or faster (faster preferred) Enough disk space for the this software, the Visual Basic runtime files and all of your .mp3 files. Legal Mumbo Jumbo Though I am not expecting anyone to have any of these problems, use of this software is completely at your own risk. This includes any damage to hardware, other software, wasted time, wasted effort, money lost, or health problems associated with the installation, use or misuse of this program. It is your responsibility to have legally purchased all music used with this software. This software does not turn CDs into .mp3 or any other type of music file.
Installation of the Player There are two ways to install this player. You may either copy the .exe and .dll files into a directory of your choosing or you may run the MIT_setup.exe file. In either case, you will need to have DirectX 8.0 or higher installed on your computer. Many computers already have DirectX. When you run the MIT Player, you will be informed if you need to install DirectX. • If you are installing with the MIT_setup.exe file: • Download the MIT_setup.exe file the setup.lst file, and the MIT Player.CAB files to your desktop. • Double click the the MIT_setup.exe file . • Follow the instructions given by the install software. • When you first run the player,you may be informed if you need to install DirectX. If so, go to the website listed below and follow the directions there to install it. • If you have successfully installed the player, skip the next page. Directx 8 http://www.microsoft.com/downloads/details.aspx?displaylang=en&FamilyID=B5099865-D400-4DD7-A93F-8F21B4BEAB1E
Installation of the Player • If you are installing the MIT Player.exe and the .dll files yourself: • Make a directory in the c:\Program Files directory called mit_player • Copy the MIT Player.exe,bass.dll and basscd.dll files to this directory. • Add the Pictures sub-directory as well as the favorites directory. • The directories I have called Sunday and Wednesday could be anywhere you want and named anything you want (One file for each of the two databases. These are used for storing session playlists.). Your setup screen will direct the program to them. • Do not worry about the mit_player.ini file or the two dance_data.txt files. The software will create these for you when begin using the player. • If you do not already have the Visual Basic6.0 runtime files, go to the website listed below and follow the directions there to install them. • When you first run the player,you • may be informed if you need to • install DirectX. If so, go to the • website listed below and follow • the directions there to install it. VB runtime: http://support.microsoft.com/default.aspx?scid=kb;en-us;q192461 Directx 8 http://www.microsoft.com/downloads/details.aspx?displaylang=en&FamilyID=B5099865-D400-4DD7-A93F-8F21B4BEAB1E
First Use of the Player The first time you launch the MIT Player by double clicking on the MIT Player.exe icon you will be informed that there is no mitplayer.ini file. This is because you need to set your preferences in the program. Click the OK button on the message box and you will be taken directly to the main screen, skipping the splash screens. Once the main screen appears, go to the Options menu and select Setup Screen. From the window that appears, you can configure all of the search buttons and other behaviors of the MIT Player software See the section describing use of the Setup Screen window later in this manual. The information on the following page describes the use of this program after configuring the program using the Setup Screen
Double clicking on the MIT Player.exe icon launches the splash screen. A button will appear for each programmer whose name has been added on the setup screen. A maximum of 16 programmers may be specified. When exiting the player, the programmer’s (person choosing the sessions dances) name is stored in the file containing the current session’s dances along with the session start time and session finish time. Selecting a programmer changes the splash screen which now displays two buttons. Each button opens a completely independent database. The two databases might be used by a group that sponsored International dance and Contra dance and there is very little or no overlap of dances between the sessions. The captions of the buttons may be set from the setup screen choice under the options menu on the main program screen.
Queuing Dances Dances in the Program window (1) are automatically played in the order displayed. Dances may be dragged to the Program from the Holder window (2) or the Selector window. (3) Dances may also be queued in the Program window by single clicking on the box (4) which is next to it in the Selector window. 5 1 2 3 4 Note: When dragging and dropping anywhere in this program, the cursor must be over the drop target. Dancesyou are thinking about playing but are not sure about may be dragged from the Selector window to the Holder window. They will remain there until dragged to the Program window or unprogrammed. All dances taught in the last ‘N’ weeks can be added to the Holder window at once by clicking on the Recently Taught Button (5) at the top of the Holder window. A maximum of 29 dances may be queued in the Holder windows at one time. The program can hold 229 dances, but only the top 29 are visible. Dances can be dragged up or down in either window to reorder them. The dance name will follow the cursor when a dance is dragged.
Un - Queuing Dances Adance may be deleted from the Program(1) or Holder (2) window by dragging it back to the Selector (3) window. The entire Program (1) or Holder (2) window may be cleared by right clicking on the word Program or the word Holder. Confirmation will be requested. 1 2 3 Dances may also be deleted from the Program (1) window by right clicking on the dance (name will turn to bold typeface) and pressing the computer’s Delete key. A block of dances may be deleted from the Program (1) window by right clicking on the first dance to be deleted and Shift – right clicking on the last dance to be deleted. Again, hit the computer’s delete key to delete the block. The same is true for the Holder (2) window.
Limiting Dance Searches to Certain Repertoires All dances are displayed in the Selector for each repertoire(6) checked. Dances may be included in more than one repertoire. If no repertoire is selected, all dances in the database are displayed in the Selector window. The Repertoire chooser is useful if you run several nights of dancing and need to limit the dances displayed to a subset or several subsets of the entire database. The repertoire selections can be changed in the middle of the session. Right click on a dance in the selector to add or delete a dance from a repertoire category. Check the repertoires desired on the screen which appears. The repertoire selector names are changeable by selecting Setup Screen from the Options menu on the main screen. 6 Note: Dances in the database might not have any repertoires specified. If this is the case, they will only show up in the Selector when none of the repertoires are checked. One might have repertoire categories such as Sunday Session, Wed Session, Simcha Dances, International, Israeli, Contra, English, etc. Note: Only two Repertoire selectors are available until the program is registered. You may still associate any dance with any of the 8 repertoires, but you will only be able to select the first two of them. After registration, all 8 repertoires retrievable.
Search for dances by Country / Choreographer and Time Period Click the drop-down tab to select from a list of countries (7). Only dances from the selected country are displayed in the Selector(3) window. The number of matching dances is displayed at the top of the Selector window. New countries are automatically added to the drop-down as dances from additional countries are added to the database. One country per line. Clicking the AllCountries radio button or selecting ALL from the drop-down will reset the selector to to display dances from all countries. The country selector is also reset by clicking on the Clear All Selections button at the bottom of the search panel. 7 3 8 The choreographer selector (8) works the same way. When more than one search criteria is used, only dances that match all criteria are displayed in the Selector window. Both of these selectors can scroll directly to items starting with a certain letter by pressing its key on the computer keyboard. Pressing that key multiple times will scroll through all choices starting with that letter.
Country Hierarchies Regions may also be added to the country drop down selector. All dances whose country is in the defined region will appear in the selector window. To add new regions, select Country Hierarchy from the options menu. The screen below will appear. Select a row. It will turn white. Enter a region name. Use the dropdown selector at the far right to add countries to the region. To remove a country from a region, simply backspace over it. To remove the entire region, delete all of the text from the region and the list of countries in region fields. When done, click the Save Hierarchy button.
Search for Dances by Last Play/Taught Date or Choreographed Date To search for dances by when they were last played or taught, type a number into the text boxes (9) . The MIT Player automatically remembers the last played date for a dance. The MIT Player can assume a dance was taught if it is played two or more times in one 24 hour period. (Check the check box on the setup screen window). Taught dates can also be set by queuing the dance via dragging if from the selector window to the Queue for Teaching window (11). This will cause the dance to be displayed in the Program window (1) as well as insert a STOP before it. Finally, the last taught date can be edited by right clicking on a dance in the Selector (3) window. 3 9 10 11 Choreographed time periods are specified using the horizontal sliders (10). Only dances whose choreographed dates are between the “From” and “To” values will be displayed in the selector window. The max and min values for the sliders is specified by selecting Setup Screen from the Options menu. The Time Period search is disabled unless the Use specified range box is checked.
Queuing a Dance for Teaching When dances are dragged to the Drag Dance Here to Queue for Teaching box (11). from the Selector (3). or Holder a STOP will be dropped into the Program queue. Immediately following the STOP, the dance to be taught will be dropped into the Program queue. Finally, the dance’s taught date will be updated to the current date. A dance may also be dragged to this box from the Program queue. The dance will be queued as described above, but in this case, it will be removed from its original location in the queue. 3 11 Note: In the rare instance that the Program queue is full when a dance is dragged to the Drag Dance Here to Queue for Teaching box, the last two dances in the Program queue will be pushed down into the invisible part of the queue. The dance that was selected to be taught will be dropped into the queue preceded by a ‘STOP. It is done this way because it is assumed you will want to drag this dance and its associated stop to a point higher in the Program queue. As dances are played, the dances in the hidden part of the Program queue will reappear automatically.
Search for dances by Complexity or Energy Level Search for dances by complexity or energy level. Click the radio buttons (12). to select from easy, medium, or difficult for complexity or low, medium-low, medium, medium-high, or high for energy. Matching dances are displayed in the Selector window (3). The number of matching dances is displayed at the top of the Selector window (3). The settings for a particular dance may be changed by right clicking on a dance in the Selector window. 12 3 13 All search criteria can be reset by clicking on the Clear All Selections button (13) or <control> C on the keyboard.
Search for Dances by Type or Style Click the radio buttons to select from 8 user definable choices in each category (Type (14) and Style (15)). Matching dances are displayed in the Selector window. The number of matching dances is displayed at the top of the Selector (3) window. The type and style category captions can be set in the Setup Screen found under the options menu on the main screen. The settings for a particular dance may be changed by right clicking on a dance in the Selector (3) window. 14 15 3 Dances of a given type are color coded using 8 preset colors when viewed in the Selector, Holder, Program, Played Earlier windows and on the second monitor. The colors are selectable by selecting setup screen from the Options menu. It is recommended that these type captions and colors be set before adding the first dances to the database and not changed afterward. Note: Until the Player is registered, only the first two Types the Styles will be searchable. You may still configure these types and styles using the setup screen, and you may still designate dances to these types and styles, you will however, only be able to search on the first two.
Alphabetically Searching for Dances by Name or Sub-String Typing the first few letters of a dance name will scroll the top of the selector window to the first dance which begins with the same letters. Only dances which match any previously selected repertoires or search criteria are displayed. Typing an “*” followed by three or more letters will empty the Selector window of all dances except for dances containing the search string anywhere in the name. Backspacing or clicking the Clear All Selections button will reset the Selector. Again, only dances which match any previously selected repertoires and search criteria are displayed. Dances containing a certain string in its comment can be found by typing a “?” followed by three or more letters. Any dance matching the currently selected repertoires and search criteria which also contain the search string in their comments are displayed in the Selector window. When the check box is checked, the alphabetical search will behave like a combination of the ? And * searches described above, without having to type the characters before the search string. Note: Searches are not case sensitive.
Exiting the Player & Saving Playlists Viewing Past Programs Exiting the program will write the list of dances played this session to a file. This file is in a directory specified by clicking on the Setup Screen selection under the Options menu on the main screen. The file will be named using the following format: Monday_2003_7_14.txt Past programs can be viewed during a session by clicking the View a Past Program button. The screen at left is launched and automatically scrolls to the program stored one week ago. Double clicking on a program displays it in the text area of the form. Clicking on a single dance name in this window will queue that dance in the player. Clicking on the red Auto-Play button will queue this entire program in the Program window. Past programs auto-played can be as long as 229 dances. Selecting auto-play will overwrite any dances currently in the Program queue. The player will start playing the dances immediately.
Preferred Versions of Dances & Quick Access to Database Info A bold dance name in the Selector window indicates that this is the preferred version of a dance. The preferred setting can be made by right clicking on a dance in the Selector window and setting the preferred parameter in the data window that appears. A quick view of all database parameters for a given dance may be viewed (but not changed) with a left click and hold on the little box next to the dance name. When the cursor is moved over a dance which has a comment in the database, the comment is displayed under the Selector window. Comments can be added by right clicking on a dance in the Selector window. Complexity, Energy, Country, Type and Duration are also displayed. Mouse-over info is available in any window.
Duplicate warning You can be advised of which dances have already been played in the current session. Dances already played appear “crosses out” in the Selector window. Whether or not the dance is crossed out, it can still be queued to either the Program or the Selector. You can turn this duplicate warning on using the Options menu on the main screen. The default for this can be set by choosing Setup Screen under the Options menu on the main screen and checking the check box. This feature is useful if you are running a dance marathon with many people programming dances. The duplicate warning can prevent subsequent programmers from repeating a dance played earlier in the program.
Player Controls Press play(17) to begin playing the queued dances. Skip (18) will cut off the currently playing dance and begin playing the next dance in the play list. Prev(19) will replace the currently playing dance in the top of the Program queue and begin playing the previous dance. Clicking the Play (17) button while a dance is currently playing will restart the dance from the beginning. The play button will begin playing the current dance immediately. The small clock(20) button inside the play(17) button will wait the “between dance” pause time before starting or restarting a dance. 19 17 22 20 21 To jump ahead or back in the currently playing dance you may click in the progress bar. (22) Indicators at the top of the progress bar show the current position and total duration of the currently playing dance. 18 Pause(21) will stop a dance in the middle but allow restarting at the same point when pause is clicked a second time. While paused, the other buttons are disabled.
Player Controls Slide the volume slider (24) to adjust the volume of the Now Playing dance. This volume setting is remembered each subsequent time the player is used. Over time, if you adjust the volume of the dances using this slider, you will have all dances at the same relative volume and will never have to rush back to the player to adjust the volume in the middle of a session. Clicking on the buttons at the end of the slider changes the volume by a little. Clicking in the slider track will change the volume by a larger amount. 25 26 23 The tempo control (23) can also be adjusted in .2% increments. The tempo setting is not stored in the database unless the Save this tempo(26) button is clicked. Clicking in the slider track will change the tempo of the dance by 1 percent. Clicking on the buttons at the side of the tempo control will change the tempo by 0.2%. The reset button (25) will reset the tempo back to the tempo at which the music was recorded. 24 Function keys can be used to control some of the features. This is useful if you have a remote control for your computer. Just program the remote control software so that the buttons you desire correspond to the function keys indicated above. Function keys F1 – Play F2 - Stop F3 - Previous F4 - Next F5 - Pitch reset F6 - Pitch up F7 - Pitch down F8 - Pause/Unpause
Documenting Live Music in Saved Playlists & Replacing the Currently Playing Dance in the Player Live music can be documented in the stored playlist in two ways. You may type directly in the Played Earlier(16) window or you may drag a dance directly from the Selector window to the Played Earlier window. It will not be played by the computer, but it will be recorded as having been played. You may also delete text from the Played Earlier window to prevent dances from being written to the stored playlist. 17 Dance can also be dragged from the Selector (3) window directly to the Now Playing(17) window to replace the currently playing dance with a different version or different dance. 16 3
Displaying the Country or Choreographer on the Main Screen Under the Now Playing box (27) you can display either the country where the dance is from, or the choreographer’s name. This setting is made by selecting Setup Screen under the options menu on the main screen and selecting country or choreographer from the radio buttons on the form which appears. Bosmat 27 Moshiko 27
Program Finish Time & Between Dance Pause Time The current date and time is displayed on the main screen as well as the projected program finish time. The finish time is adjusted as dances are added and removed from the Program window. The pause time between dances is determined by the number in the text box under the program finish time. The default value for the pause time can be set by clicking on the Options menu and selecting Setup screen. You can also type a new value in the pause time box during a session. This new value will be used for the current session, but it will not be remembered next time the player is used.
Saving Dances to Your Favorites List By left clicking on the penguin logo(28) you can see just your personal favorite dances in the Selector window. Dances can be dragged from the Selector window (3) to the penguin logo (28). This action will add the dance to the current programmer’s favorites file. Favorite dances for each programmer are saved into a file in the favorites directory (under the application directory). There is a unique file for each programmer. Clicking on the Clear All Selections button (13) will reset the Selector window (3) to display all of the dances in the currently selected repertoires 28 3 Note: When you display your favorites, they will be filtered according to the last search criteria specified. To see all your favorites, clear all criteria first. Note: When dragging favorites to the penguin, the cursor arrow must be over the penguin (28) when you release the mouse button. Note: The penguin will reject duplicate entries in the favorites file. Watch the penguin for feedback when adding dances. Note: A new file will be automatically created if one does not already exist. 13
Viewing Other Programmer’s Favorites Favorite dances for any programmer may be viewed in the Selector window (3) by clicking on the Favorites menu (29) and selecting the desired programmer name. All dances on the programmer’s favorites list will be displayed in the Selector window (3), but only if they fall into the current repertoire and match any other chosen search criteria. You can reset the Selector(3) to display all dances by clicking on the Clear All selections button (13) on the main screen or use the Favorites menu (29) which has a Show All Dances selection. 28 29 3 13
Editing You Favorites List You may right click on the penguin logo to remove dances from your (the current programmer) favorites file. The screen pictured on the left will appear. Simply click on a dance name in the editor window and click the Remove Selected button. Exit; No Save will exit the editor screen without making any of your current edits. Save will update your favorites file. Changing Programmers You may change programmers in mid-program using the Change Programmer item on the Options menu. The programmer selector window will appear. The original programmer’s name will appear in the saved playlist along with any additional programmers selected in this manor. The time of each programmer change is also recorded.
Teasing Dances Dances that require sets to be formed often require starting the music to let dancers know what is coming, then stopping the music to give the dancers time to form their sets. The “Teaser” function can allow the programmer to set this up in advance in the program. Click the teaser button (30) to add the word TEASER to the program queue (1). The program is arranged so that the word TEASER is just prior to the dance which needs to be “teased”. After the usual pause time, the teased dance will play for a specified period of time (teaser play time). The dance is then stopped for a different specified period of time (teaser hold-off time) and restarted for normal play. These specified periods of time can be set by choosing Setup Screen from the Options menu. In the below screen capture, BARE NECESSITIES will be “teased”. 30 1
Teaching Stops & Announcements Stops The programmer need not return to the computer to stop the player prior to teaching a dance. Simply click the Insert Stop button (31) to place the word STOP in the program queue (1). The dance after the word STOP will be loaded into the player when its turn comes, however the player will stop automatically before playing it. After teaching the dance, click the play button to resume the program. In the screen capture at left, the player will stop before playing Belasicko Oro. 31 1 Right clicking on the Insert Stop(31) button will place the word ANNOUNCEMENTS in the Program. This will behave just like STOP, however if you are using the second monitor option, STOP before a dance will cause the second monitor to indicate that the dance will be taught. ANNOUNCEMENTS will show up as such on the second monitor.
Dance Floor Monitor If your computer has dual monitor hardware (not just an additional monitor output), you can display the next 6 dances and previous 5 dances on a monitor facing towards the dance floor. The currently playing dance is displayed in large text in the middle of the screen with either the Country or Choreographer. The setting of choreographer or country will follow the setting for the main screen. A picture of the choreographer or map of the country can be displayed on this screen as well. If a .jpg or .gif file exists (in the pictures directory under the applications Directory) whose name exactly matches the choreographer or country in the database the picture will be displayed. If no picture file name matches, a picture which is named default.jpg will be displayed instead. The color key used on this screen matches the color key used on the main screen. Turn this feature on by selecting Playlist on Monitor2 from the Options menu on the main screen. Note: If you do not have dual monitors, you can still turn on this feature. Simply place this screen directly over the main screen. It will come to the front after 50 seconds of inactivity on the main screen. Moving the mouse will bring the main screen back to the front. Use a projector, or face your computer towards the dance floor.
Setup Screen Initial settings and options can be changed by selecting the Setup Screen choice under the Options menu on the main screen. The screen below will appear.. Check this box (2) if you would like the program to record any dance played twice in a 24 hour period as having been taught on that day. Save these settings (4) and exit this screen, or just exit without saving (3). Check here (5) if you want the current repertoire settings to be remembered next time the player is used. If you have a CD drive, set the letter here (6). Tracks from a CD can be added to the Program. Specify up to 16 programmers (1). Each programmer will get his or her own button on the startup screen. 2 3 4 1 5 6
Setup Screen The two databases each have names of your choosing. The names you assign here (1) will appear on the database buttons on the splash screen You may choose from several drag icons (21). You may set whether the country or the choreographer is shown under the dance name on the main screen and the second monitor screen (11) 21 8 7 11 10 9 The default pause time between dances may be set here (10). The value can also be changed on a per use basis on the main screen. 7 11 10 9 Teaser play and hold-off times are set here (8). The default can be set for the duplicate warning (9).
Setup Screen The Recently Taught button above the Holder on the main screen will add any dance taught within the last ‘N’ weeks to the Holder. ‘N’ can be set between 1 and 99 in this box (12). If you choose to register the program, you will be sent a registration code. Enter it in these boxes (13). When a correct code is entered, the background of the boxes turns green. Registration gives you full functionality of all repertoires, types and styles as well as unobstructed use of the tabular view. The player is otherwise fully functional. 13 12 17 14 15 16 The type (14), style (15), and repertoire selector (16) captions can be set here. The colors can be set for the dance types by sliding the RGB color sliders (17) above after clicking in one of the boxes. The dance names that match your captions will be displayed in the color shown when viewed on the main screen. Simply type the desired captions in the boxes.
Setup Screen Set the initial path for where the mp3 files will be stored here (18). The mp3s do not need to be in this directory, but the database manager window will always default to this directory. You can always add music from different directories on the add dance screens. Setting it here just saves you some clicks later. Set the directory where you would like to save the playlists (19) from each. session. While the two databases can store the files in different directories, within one database, the different repertoires all store the playlists into the same directory. The name of the playlists in this directory is sorted by week day, however. 20 18 19 Set the max and min values for the year sliders here (20). 20
Changing a Dances Database Parameters To update a dance’s database parameters, right click on that dance in the Selector window on the main screen. This database manager screen will appear. The database parameters for the dance will be displayed. Any parameter may be changed. Clicking the Close Window button will exit this screen and save the changes to the current dance. You can listen to the selected dance by clicking on the Listen button. Stop listening by clicking the Stop button. You can make edits to other dances by using these scroll buttons or by using the page up and page down buttons on the keyboard. The up and down arrow keys on the keyboard also work the same way, but if the last thing you did was click a button, the arrow keys will tab to the next field rather than scroll. Scrolling to the next dance WILL save any changes you have made to the current dance even if you return to this dance and click the Undo current edits to this dance button. You can either scroll through all dances in the database or just the ones in the Selector window.
Changing a Dances Database Parameters You may also make edits to other dances by selecting them via the file selector windows (1 & 2). If the dance is in your database, its name and database values will be seen in this window. If the dance is not in your database it will not be selected. If you would like to add the dance, select the add dance options from the options menu on the main screen. Note: If you change dances via the file selector, any changes made to the previous dance will be saved. The dance name seen in the player may be changed by editing it in the Name box (3), but if you duplicate a dance name already in your database, the program will add a “_%” to the name. Dances will be re -alphabetized. The mp3 file name will not be changed. 3 To remove a dance from the database, right click on that dance in the Selector window on the main screen. The Update a Dance window will appear. Verify that the dance named at the top of this window is the dance you would like to remove and click the Remove dance named at top button (4). The dance will be removed from the database, but it will NOT delete the mp3 music file from your computer. 1 4 2
Changing a Dance File’s Name or Directory If you would like to change the file name or directory location of an mp3 file on your computer’s hard disk click this button. The above window will appear showing the old name and directory location. Type in a new name or directory path. The dance will be renamed and/or moved on your computer’s hard disk. Note that if you are using the two databases in this program and you change the name of a file that is in both databases, the other database will no longer be able to access that dance. To fix this, just delete the dance from the other database and add it again as if it was a new dance. Bannielou Lambol
Adding Individual Dances to Your Database To add new dances to the database one at a time, use the Add Dances menu on the main screen and select Add individual dances. The window seen below will appear with some defaults filled in. Using the directory and file selector boxes, (1 & 2) choose a music file to add. The dance name (3) at the top of this window will be the same as the file. You may edit the dance name if you wish, but if you duplicate a name already in the database, the program will add “_%” to the name. Set the other database parameters and click the Add Selected Dance button (4) to add this dance to the database. The dance will be added in the correct alphabetical order. 3 Select already existing values from the dropdowns or type in new values. 1 When you are done adding individual dances, click the Done Adding Dances button to dismiss this window and return to the main screen. 2 4
Adding All the New Dances in a Directory to Your Database To add all the dances in a directory to the database, use the Add Dances menu on the main screen and select Add a group of dances. This window seen below will appear with some defaults filled in. Using the directory selector boxes (1 & 2), choose a directory to add. You must specify database parameters to be applied to all of the added dances. You may choose to edit individual dances later by right clicking on the dances in the Selector window. The dances will be added in the correct alphabetical order. Note: Files with names that duplicate existing dance names will not be added. Use the Add individual dances screen if you would like to do this. 3 Once you have chosen the directory and set the database values, click the Add all new dances in selected directory(4) button. 1 When you are done adding groups of dances, click the Done Adding Dances button to dismiss this window and return to the main screen. 2 4
Editing, Saving, and Playing Auto-Playlists The Program queue on the main screen is designed for interactive dance programming. This means that the programmer may respond to requests and build the dance program during the session to suit the constantly changing skill level of dancers on the floor. Dances are not usually being queued too much faster than they are being played (which removes the dance from the Program queue). There may be times however, when a session leader will want to pre program the whole session’s dances before the session and save this list for later use. With a visible length of only 29 dances and no scroll bar, the program queue is not very conducive to creating programs in advance. The Auto-play Playlist Editor is designed to set up longer playlists. Ctrl + L Select Auto-play Playlist Editor from the Utilities menu to launch the editor window seen above.
Editing, Saving, and Playing Auto-Playlists Dances may be dragged into the playlist editor(1) from the Selector window. You may rearrange the dances by dragging them up or down. You may scroll up and down using the vertical scrollbar. You may delete dances by dragging them back to the Selector window or by first right clicking on them and then pressing the computers delete key. In the bottom left corner (2) you can see how many dances are in the play list and the duration of the program you are creating. The green dot (3) under the Quit button will turn red to indicate that there are unsaved edits to this play list. Once you are happy with the playlist, you can save it to a disk file. Simply select the directory and enter a file name. Click the Save Playlist button (4). 4 1 3 2
Editing, Saving, and Playing Auto-Playlists Saved playlists can be recalled by selecting the directory and then clicking on the file name in the file box (4). The playlist will open in the Playlist Editor window (1). Dances can then be added, removed, or rearranged. Click the Autoplay this playlist button (5) to queue all of the dances in this playlist in the player. The player will show only the first 29 of these dances, but as the dances finish playing, the bottom of the queue will be refreshed from this playlist. The player will start playing the playlist immediately. Quit (6) will exit the playlist editor. If there are unsaved edits, you will be given an opportunity to save the playlist again. 4 1 5 6
Recalculating Dance Durations and Database Health Check Dance durations are used to calculate your session’s end time. Durations are stored in your dance database. When you add new dance to the MIT Player, accurate durations are input to the database only if the player is not currently in use. If the player is playing, the duration for any new dance you add is estimated to be 3 minutes. It will remain this way until the dance is played. Once the dance is played your database is updated with the correct duration. Until that time, there could be small errors in the session end time calculated by the player. You may force the player to recalculate all dance durations by selecting Recalculate Dance Durations from the Utilities menu. In addition to updating the dance durations, the dance duration utility also verifies that the music file for this dance is still in the correct place on your hard disk. If a music file has been moved or deleted, you will be informed of this. The utility will also write a file to disk in the MIT Player directory listing all dances which are not found. While this utility is working, the green progress bar on the main screen will indicate how many dances have been checked. It is recommended that you let the utility finish before attempting to do any other operations with the MIT Player. The utility should finish in under two minutes
Playing CDs You can add a track from a CD to your program. Click the Play CD button and click the track you would like to add to your program. The CD must be placed in the cd drive before adding the CD track to your program and the CD must remain in the drive until after the track has played. The Prev button ignores previously played CD tracks. Only tracks from one CD at a time can be placed in the program queue. Track 1.cda Track 2.cda Track 3.cda Track 4.cda Track 5.cda Track 6.cda Track 7.cda Track 8.cda The track name will be recorded in your program, but you can make edits in the Played Earlier window on the main screen before exiting the player and saving the playlist. This program can not “rip” CDs
Frequency Counts Have you ever wondered which dance you play the most? Which dances have been losing popularity? The frequency counter utility can help you answer these questions. Its output is a list of all dances that have been played between the specified dates, ordered by how frequently the dance has been played. To see frequency counts of dances played between any two dates, invoke the frequency counter by clicking on the menu item. Fill out the from and to date fields and click the Go button. The frequency count appears in the output window. Clicking the Save button will write an output file to the MIT Player directory. Optionally, you can limit the frequency count to certain days of the week. Select one or more of the check boxes. Double clicking on any file in the file window will display the program from that day in the output window. Certain characters such as - _ , are used as delimiters by the frequency counter.
Magic Programmer Don’t feel like thinking about which dances to play today? Let the magic programmer do it for you. The magic programmer will automatically pick dances and drop them in the program queue. Dances will be chosen at random, but the average complexity will increase as the session progresses. To use this feature, select Magic Programmer from the Utilities menu. If you have not recently run the frequency count function described on the previous page and saved the results to a file, do so now by clicking on the large button at the top of the Magic Programmer screen. This button is another means of launching the frequency counter window. The magic programmer picks dances from the frequency count file. If the frequency count file does not contain several months worth of dances, there may not be enough dances for the magic programmer to choose from.