Taking Photographs
210 likes | 374 Vues
Taking Photographs. Yearbook Class. Camera Composition: C hange Your P erspective.

Taking Photographs
E N D
Presentation Transcript
Taking Photographs Yearbook Class
Camera Composition: Change Your Perspective You don't have to be a professional photographer to understand and apply good photo composition techniques. Simple changes in perspective can turn a lackluster picture into an engaging one. This class takes the mystery out of camera settings, photo composition and concepts like depth of field. You'll learn how to take better portraits and get a checklist of creative ideas to have you shooting pictures like a pro.
Quiz Name________________ Date ________________ Answer with True or False: • __________ Never worry about what is beyond the subject(s) in the photo • __________ If a tree is coming out of someone’s hear, move so that the background is shifted • __________ Be aware of having parts of the subject out of the field of the shot • __________ Off centering a subject in the frame creates a dynamic photo • __________ One way to make something important is the photo is to Make it larger by shooting closer to him/her • __________ Change angles, such as looking down or up at the people • __________ Shot one picture and hope it turns out • __________ When the camera is set at portrait setting, the background often blurs. • __________ Mood is one way of demonstrating a personal characteristic of the subject. • __________ A yearbook should only have pictures of people, not any of the places or objects that we use. • __________ Creating a triangle of faces is one way to make a portrait interesting • __________ The background can be interesting if it is a geometric shape, such as a dark hallway • __________ Framing a photo with a door or a window means that it is copied and put on the wall like a picture • __________ Full sunshine is harsh and sometimes interferes with the best shot • __________ Cool background colors are often orange, yellow and red. They are best to catch at sunset. • __________ It is alright to force a flash shot when the subject is backlit • __________ To frame a picture is to use a doorway or window to surround our subject • __________ Taking only one photo is always a good idea since you are a wonderful photograph • __________ You are allowed to ONLY take pictures of your friends. • __________ You can take photos with the flash as well as without the flash ( Mrs. N will teach you how)
Cover the bases: photo composition The major difference between a terrific photo and an average one is knowing—and following—a few simple rules and guidelines. In this lesson, you'll learn the fundamentals of photo composition. You'll also examine the different shooting modes your camera offers and learn to choose the appropriate one foryour photo. Removing distractions You can avoid this problem very simply. Once you have your photo composed, let your eyes sweep to each of the four corners of the viewfinder. Clutter in the photo pulls attention from the subject.
Distractions To prevent this from happening in your photos, make it a habit to look behind your subject and detect any objects that may be a problem. Move yourself or your subject to put the distracting background somewhere other than directly behind. Beware of objects growing out of heads. When you decide where to place your subject, watch out for areas that almost, but don't quite, touch -- these are called tangents. If the subject almost touches the edge of the frame or another object, your eye will be drawn to that area and away from the focal point of your photo. Move the camera and take another photo. See how the subject's arm touching the edge of the frame distracts the eye?
Equal Space and Off-center Space Creating a composition with unequal spaces challenges the eye and makes the photo-graph more dynamic. Centering your subject within the frame, leaving equal space surrounding it is a common, but very boring composition. A centered subject. Off-center subjects are more engaging.
Different Camera Settings Making your subject larger than the other elements in the photo or placing it in the foreground creates an obvious focal point. This mode uses a very fast shutter speed to enable you to stop motion. It is useful for sports as well as any moving object. Making your subject larger in the frame creates a dramatic focal point. Using Action shooting mode lets you freeze-frame the action for outdoor shots.
Faces: taking portraits with personalityWhen photographing people, you must first consider the story that you want to tell. Learn essential portrait photography techniques and find out how to use poses, camera angles, perspective, backgrounds, light and motion to createcaptivating portraits. Use a variety of angles; up and down views are interesting. Stand on a chair, lie on the floor, and get at eye level; these all work. Take multiple pictures at various angles. Using the ground as a backdrop. Using the sky as an elegant backdrop.
Set the Camera for Portrait Setting Another example of how a shallow depth of field can create a wonderful portrait.
Get Down on Their Level Photo taken at subject's eye level. Great for animal shots , too. Photo taken at photographer's eye level, or standing height.
Point of View A low camera angle is also useful for creating the illusion of height. Note this is a school bus. A twist on using a down perspective is to have your subjects lie on the ground and shoot looking down at them. This shows a relationship. Try shooting photos with your subjects lying on the ground with heads or feet together. Emphasize height with a low camera angle.
Capture Personality Every person is individual and unique. Consider your subject's interests, hobbies, favorite places, and prized possessions before photographing them. Pay attention to the mood of your subjects and what you are trying to convey. Follow the mood of your subjects. Capture people doing what they love.
Spaces: capturing the world around youBelieve it or not, there are other things to photograph besides people! You can find interest in everyday objects by looking for natural patterns, getting closer and photographing the unexpected. In this lesson, you'll explore landscape photography techniques and learn how to take better close-up photos. Don't be satisfied with the obvious photo. Use widest angle possible to convey the size and scale of your subject.
Shapes Just as your brain tries to make sense of what you see by looking for relationships, it also seeks familiar objects such as shapes. By using simple shapes, such as circles, squares, and triangles in your composition, you are creating a photo that is very pleasing to the eye. Odd numbers of people are always better than even numbers. Look for visual triangles when photographing people. Use repeating shapes in your photos -- and arrange the faces in your photo in a circle.
Frames Framingas a method of creating a focal point. When you are exploring all of the possible angles and locations around your intended subject, make sure that you look for framing possibilities. A photo like this would make a great intro to an album of family vacation photos. Keep an eye out for interesting windows and doorways to use as visual frames.
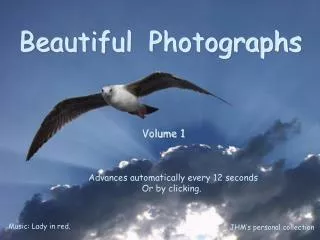
Photography lighting techniquesThis lesson introduces you to some more ideas for taking photos from a different point of view. The best light for photography is just before dawn and just after sunset The cool blue light of dawn. Warm light at sunset.
Avoid Hot Sunny Daylight The first option is to find some shade. Use whatever obstacle you can find to block the sun from your subject. Full sun often causes squinting and harsh shadows. Hot spots like the one here are caused by harsh sun. Use shade to avoid hot spots.
Flash used Outdoor Another option is to use your flash to fill in the subject and even out the light. It sounds counter-intuitive to use your flash during the brightest light of the day, but it works wonders. Remember that your flash has a limited range -- your subject will need to be within that range for it to be effective. This technique is used often when the subject is backlit. Using fill flash to add light to your subject.
Natural Light Indoors Take a few photographs with flash and a few without. The school lights have a yellow quality, but that can be corrected using Photoshop. Use natural window light to create beautiful indoor portraits. Note how clean the background appears due to lack of distractions.
Friends This is a K-8 school yearbook. It is about ALL the students and staff at Vista Verde. Take photos of people who are not your friends.
Thanks to HP, online course: Camera Composition: Change Your Perspective . <http://h30187.www3.hp.com>