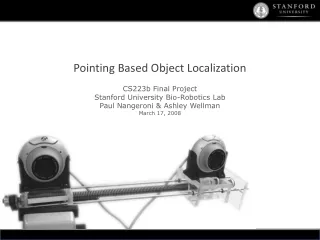
Pointing Based Object Localization
This project by Stanford University's Bio-Robotics Lab introduces a pointing-based object localization method utilizing human line of sight for improved object detection accuracy. The approach involves warping images for precise localization and object detection in cluttered backgrounds. The study presents significant advancements in object localization techniques. Results show high accuracy in detecting objects in free space. Future work involves refining face and finger detection algorithms and incorporating laser technology for enhanced object grasping capabilities.

Pointing Based Object Localization
E N D
Presentation Transcript
Pointing Based Object Localization CS223b Final Project Stanford University Bio-Robotics Lab Paul Nangeroni & Ashley Wellman March 17, 2008
( Motivation ) • Present robotic object detection relies on dense stereo mapping of 3D environments • Pointing based object localization is an intuitive interface for improving accuracy of object detectors • Project represents several advances over prior art • Uses actual human line of sight (eye through fingertip) • Works in cluttered background • Detects objects in free space. Stanford University Bio-Robotics Lab
( Approach: Stereopsis ) Step 1: Warp Images along epilines of eye and fingertip in left image Step 2: Use NCC along epilines to find the matching eye and fingertip in right image Step 3: Project eye and fingertip locations into 3D Step 4: Resolve errors in projection via least squares Step 5: Create line of sight vector. - object known to exist on that line Stanford University Bio-Robotics Lab
( Approach: Stereopsis ) Step 6: Reproject actual eye and fingertip positions back into 2D Reprojected Pts NCC pts Step 7: Rotate images along line of sight and create a slice from the fingertip to the edge of the image SIFT matches Step 8: Apply SIFT and RANSAC to the slice RANSAC matches Step 9: locate the target object by selecting the match point closest to the centerline of the slice Minimum norm from line of sight Target Object Step 10: Project the point into 3D and find the closest point along the known line of sight. This point is the location of the target object RANSAC pt Stanford University Bio-Robotics Lab
( Results + Future Work ) • Conclusions • World coordinates output from stereo accurate to within 3cm at range of 2.5m • Face and finger detection needs more training • Object localization sensitive to background clutter • Object location often at edge or corner rather than centroid of object itself • Future Work • Object location used to center high resolution close-up for improved accuracy and efficiency • Laser will highlight target object before robotic arm attempts to grasp Stanford University Bio-Robotics Lab
( Breakdown of work ) • Paul (60%) • Stereo Calibration, Stereopsis, Object Localization • Ashley (40%) • Eye Detection, Fingertip Detection Stanford University Bio-Robotics Lab