Download
1 / 78
780 likes | 809 Vues
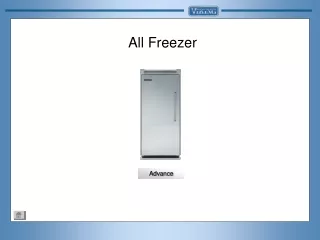
All Freezer. Advance. When the Freezer is first supplied with power or if a power outage occurs, the display will indicate this by flashing the temperature indicator bars as shown above In order to reset the display, depress the “ACTIVATE CONTROLS” or “ALARM OFF” pad above.

E N D
All Freezer Advance
When the Freezer is first supplied with power or if a power outage occurs, the display will indicate this by flashing the temperature indicator bars as shown above In order to reset the display, depress the “ACTIVATE CONTROLS” or “ALARM OFF” pad above.
Select a program below Adjust Temp Settings Door Open Alarm Max Freeze High Temperature Alarm Showroom Mode Thermistor Alarm Sabbath Mode Forced Defrost Service Mode
In order to adjust the temperature settings you must first activate the control panel Using the cursor, depress the “Activate Controls” pad above
With the panel active you can see what the settings are adjusted to. In this example the unit is set to 5 bars, which is the default setting from the factory. In order to adjust the settings you must depress the FRZ TEMP button Using the cursor, depress the “FRZ TEMP” pad above
The unit is set at approximately 15°F. 1 Bars are illuminated. This is the minimum setting –warmest temperature Using the cursor, depress the “HIGHER TEMP” to raise the temperature or “LOWER TEMP” to lower the temp. Main page
The unit is set at approximately 13°F. 2 Bars are illuminated. Using the cursor, depress the “HIGHER TEMP” to raise the temperature or “LOWER TEMP” to lower the temp. Main page
The unit is set at approximately 11°F. 3 Bars are illuminated. Using the cursor, depress the “HIGHER TEMP” to raise the temperature or “LOWER TEMP” to lower the temp. Main page
The unit is set at approximately 10°F. 4 Bars are illuminated. Using the cursor, depress the “HIGHER TEMP” to raise the temperature or “LOWER TEMP” to lower the temp. Main page
The unit is set at approximately 09°F. 5 Bars are illuminated. Using the cursor, depress the “HIGHER TEMP” to raise the temperature or “LOWER TEMP” to lower the temp. Main page
The unit is set at approximately 08°F. 6 Bars are illuminated. Using the cursor, depress the “HIGHER TEMP” to raise the temperature or “LOWER TEMP” to lower the temp. Main page
The unit is set at approximately 07°F. 7 Bars are illuminated. Using the cursor, depress the “HIGHER TEMP” to raise the temperature or “LOWER TEMP” to lower the temp. Main page
The unit is set at approximately 05°F. 8 Bars are illuminated. Using the cursor, depress the “HIGHER TEMP” to raise the temperature or “LOWER TEMP” to lower the temp. Main page
The unit is set at approximately 03°F. 9 Bars are illuminated. This is the maximum setting – coldest temperature Using the cursor, depress the “HIGHER TEMP” to raise the temperature or “LOWER TEMP” to lower the temp. Main page
Showroom mode allows electronic controls and interior lights to function independently of the refrigeration system To place the unit into Showroom mode, press the “Activate Controls” pad to activate the panel. Using the cursor, depress “Activate Controls” from the panel above.
With the panel activated, simultaneously press and HOLD the following pads for 3 seconds: • ACTIVATE CONTROLS • HIGHER TEMP • ALARM OFF Continue
With the panel activated, simultaneously press and HOLD the following pads for 3 seconds: • ACTIVATE CONTROLS • HIGHER TEMP • ALARM OFF
After 3 seconds you will hear 3 “Beeps” and the Blue LED shown above (3rd from right) will illuminate
After 3 seconds you will hear 3 “Beeps” and the Blue LED shown above (3rd from right) will illuminate
You have now engaged “Showroom Mode” To exit the Showroom mode, depress the “Exit Showroom Button” below or to exit, depress “Main Page. Exit Showroom mode Main page
To exit the Display Mode you must first activate the control panel. Depress the “ACTIVATE CONTROLS” pad above
With the panel activated, simultaneously press and HOLD the following pads for 3 seconds: • ACTIVATE CONTROLS • HIGHER TEMP • ALARM OFF Continue Continue
With the panel activated, simultaneously press and HOLD the following pads for 3 seconds: • ACTIVATE CONTROLS • HIGHER TEMP • ALARM OFF
After 3 seconds you will hear 3 “Beeps” and the Blue LED shown above will extinguish
After 3 seconds you will hear 3 “Beeps” and the Blue LED shown above will extinguish
You have now disengaged “Showroom Mode” To enter the Showroom mode, depress the “Enter Showroom Button” below or to exit, depress “Main Page. Enter Showroom mode Main page
Sabbath mode is used to disable interior lights and alarms for observance of the Sabbath To place the unit into Sabbath mode, press the “Activate Controls” pad to activate the panel. Using the cursor, depress “Activate Controls” from the panel above.
With the panel activated, simultaneously press and HOLD the following pads for 3 seconds: • ACTIVATE CONTROLS • DISPLAY OFF Continue
With the panel activated, simultaneously press and HOLD the following pads for 3 seconds: • ACTIVATE CONTROLS • DISPLAY OFF
After 3 seconds you will hear 3 “Beeps” to indicate you have entered Sabbath Mode. All 3 Blue LED’s shown above will illuminate to indicate Sabbath Mode. Disable Sabbath Mode Main page
To disable the Sabbath Mode you must first activate the control panel. Depress the “ACTIVATE CONTROLS” pad above
With the panel activated, simultaneously press and HOLD the following pads for 3 seconds: • ACTIVATE CONTROLS • DISPLAY OFF Continue
With the panel activated, simultaneously press and HOLD the following pads for 3 seconds: • ACTIVATE CONTROLS • DISPLAY OFF
After 3 seconds you will hear 3 “Beeps” to indicate you have disabled Sabbath Mode. The display will return to normal operation Enable Sabbath Mode Main page
Max Freezer mode adjusts the freezer temperature to the coldest setting for 24 hours, at the end of which, the freezer temperature automatically returns to its previous setting In order to activate, depress the “Activate Controls” above
With the panel active you can see what the settings are adjusted to. In this example the unit is set to 5 bars, which is the default setting from the factory. Using the cursor, depress the “MAX FRZ” pad above Main page
Max Freezer has been activated. All 9 bars are illuminated. The Blue indicator marked “MAX FRZ” is also activated in the display. In order to deactivate press the “MAX FRZ” pad again. When the indicator has extinguished you have returned to the normal cooling mode. Main page
The High temperature alarm sounds and the High Temp indicator (Red) will show in the display if the freezer temperature is greater than 15° Fahrenheit (-9.5 °C) for two hours. The FRZ TEMP indicator will flash on and off. The alarm will end when the temperature is brought back to a proper setting. To deactivate the high temperature alarm, press the “Alarm OFF” pad Main page
The Door Open alarm sounds and an indicator (Red) LED will blink in the display if the door is left open for three minutes or more. The delay time can be changed in Service Mode B. To deactivate the door open alarm, press the “ALARM OFF” pad. Closing the door will also shut the alarm off. Main page
Hidden Button MAX REF Service Mode To enter service modes A and B you will need to press a series of pads in a programmed sequence. This sequence includes hidden pads (Shown above as dotted white lines) The pad on the left of the display is the “Hidden Button” while the pad on the right is the “MAX REF” button. Because this is an all freezer model the “MAX REF” button is not indicated on the panel though it is still present. Continue
Hidden Button MAX REF Within 6 seconds press the following sequence: ACTIVATE CONTROLS --- HIDDEN BUTTON --- MAX REF --- MAX FRZ --- MAX REF --- MAX FRZ Using the cursor, enter the code shown on the pads above. For a demonstration depress the Demo button below. Demo
Hidden Button MAX REF Within 6 seconds press the following sequence: ACTIVATE CONTROLS --- HIDDEN BUTTON --- MAX REF --- MAX FRZ --- MAX REF --- MAX FRZ Demonstration
Hidden Button MAX REF Within 6 seconds press the following sequence: ACTIVATE CONTROLS --- HIDDEN BUTTON --- MAX REF --- MAX FRZ --- MAX REF --- MAX FRZ Demonstration
Hidden Button MAX REF Within 6 seconds press the following sequence: ACTIVATE CONTROLS --- HIDDEN BUTTON --- MAX REF --- MAX FRZ --- MAX REF --- MAX FRZ Demonstration
Hidden Button MAX REF Within 6 seconds press the following sequence: ACTIVATE CONTROLS --- HIDDEN BUTTON --- MAX REF --- MAX FRZ --- MAX REF --- MAX FRZ Demonstration
Hidden Button MAX REF Within 6 seconds press the following sequence: ACTIVATE CONTROLS --- HIDDEN BUTTON --- MAX REF --- MAX FRZ --- MAX REF --- MAX FRZ Demonstration
When you have entered the Service Mode you begin in MODE A, which is indicated by the red LED to the right of the High Temp LED as shown above. In Mode A you can read the thermistor temperature by the use of a binary coded decimal format. Mode A is also where you select intervals of defrost when the unit is set to conventional defrost (Assigned in MODE B) Mode B is used for all other programmable modes. To understand how the thermistor is read, depress the Thermistor Demo button below. To advance to SERVICE MODE B, depress the “ACTIVATE CONTROLS” pad above or select Thermistor Demo below NOTE: Pressing and holding the ACTIVATE CONTROLS” pad for 3 seconds at any time will take you out of Service Mode! Thermistor Demo
10’s 0’s The code utilizes the first 8 temperature bars in the display shown above. Depending on the combination of lit LEDS you will be able to determine what the thermistor is reading in Fahrenheit. The 9th temperature bar will light is the temperature is a (-) minus temp. Beginning on the left side of the display, The first 4 digits represent the 10’s Column. The next 4 digits represent the 0’s column. Continue
Add together all lit indicators 1 through 4 according to their value to obtain ten’s column digit The first 4 bars have the following value: 1st bar = 8 2nd bar = 4 3rd bar = 2 4th bar = 1 In the example above, none of the first four bars are lit. This indicates that our temperature is less than 10°Farhrenheit Continue
Add together all lit indicators 5 through 8 according to their value to obtain one’s column digit The last 4 bars have the following value: 5th bar = 8 6th bar = 4 7th bar = 2 8th bar = 1 In the example above, the 5th Bar is lit (8) and the 8th bar is lit (1). Add these two numbers together: 8+1= 9. The thermistor is reading at 9°Farhrenheit Repeat DEMO Service Mode B