Download
1 / 107
1.09k likes | 1.29k Vues
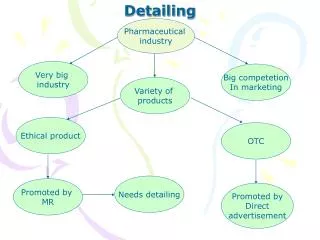
Detailing Wood Structures – In 2 parts – PowerPoint presentation and Hands on Demo. Frank Markovich June 2012. Goals for Clinic. See prototype examples of wood – old and relatively new. Both interior and exterior in a variety of rolling stock and structures. See model examples of the above.

E N D
Detailing Wood Structures –In 2 parts – PowerPoint presentation and Hands on Demo. Frank Markovich June 2012
Goals for Clinic • See prototype examples of wood – old and relatively new. Both interior and exterior in a variety of rolling stock and structures. • See model examples of the above. • Understand some of the techniques to achieve realistic results – not just weathering. • Logical treatments – beyond just overall effect. • Methods to speed things up and keep costs down! • How to simply add: • Grain detail (Appropriate) • Peeling paint • Weathering – the silver gray look. • Interior wood – • Effects of elements – where you would see it – sun, water, dirt, wind etc. to your models. • Rotting wood – yes it does. • Bleached wood – from sun etc. • Weathering of stained wood. – different than painted wood. • Things that attack or attach to wood. Don’t forget mold, plants, etc. • Where dirt, rust etc. attach to rolling stock and structures – just barely talk about that. • Dented wood – broken wood – burned wood. • Wood under water. • Doing all of this safely.
Overview • Let me start by saying that 95% or more of what I am going to cover, I learned from others. • Real wood doesn’t just weather over time, there are dents, discoloration from water, wind etc., cracks, splits, rotting, attacks from plant life and fungus, paint chipping off, accidents breaking the wood etc. • Special thanks to Mic Greenberg, the late Colin Emmerson (both close friends that showed me more than I could ever learn on my own), and the many weathering books and videos that I have taken information from. • In all cases there are at least 2 references that I used for my techniques. • Most of this is done before assembly of the model. • I found what works for me but you may find what works best for you. • Most importantly have fun!!!!!
Samples • During the clinic I will be passing around some samples. • Please return them. • I don’t have samples of everything but a representative group. • Will also demo some of the techniques.
Study the prototype! • Go to the location. • Take pictures • Make notes • Colors • Weathering • Take measurements etc. • If not possible then use references: • Books • Photographs • Videos – use them more and more now. • Internet – User groups really have helped me. Most of the prototype photos are from this source. • Museums • Even eye witnesses if you can find them. • This part can be a hobby itself or a hobby within a hobby.
Some examples • These are from Westside lumber co. • Notice the weathering over time. • Would most likely not do as heavy but for some structures I might. • First picture is the dispatchers office. Notice the peeling paint and how the weathering is more towards the bottom of the building. • Will go through the next 12 slides quickly to just talk about what I look for. • I don’t model WSLC but a private line (fictional) in the same geographic area.
Notice more weather effects towards bottom of building. Peeling paint.
Notice grain on end beams. Weathered grey for fence and how rough cut the fence is.
Rotting wood on stair – rough wood on the end. Shades on the wood – paint missing in spots.
Look at the grain on the end board. Also notice missing paint on the sides and end.
Look at the end of beams on the plow – black color with grain. Paint missing on the rest of the wood. Stains everywhere.
Look at the knots on the ends of this building. Also the foreground building the weathering towards the bottom.
Run down. Most likely too much for a model. But good study in effects of weather and sun.
From the inside out – ages of mis-use. See the framing and how large the framework is. Can see detail even on this wood.
Look at the color change from the top of the building to the bottom.
Water tank discoloration. You can get that with a white wash or even use bleach and a strong light source.
So much here that it would take too much time to go over everything. See the shades in the wood structure. The flatcar sags in the middle. Clutter and scraps of wood and debris everywhere.
Make notes • I suggest you write down everything. • Now onto adding this detail in your modeling.
Real wood • While I have seen some very beautiful models made of other materials, for a wood structure, real wood to me still looks the best. • Some effects cannot be accomplished easily with other materials. Such as exposed wood, broken wood, lifted boards etc. • To me more fun to work with real wood. • Lots of choices now: Strip wood, scribed siding, coffee stirrers, sheet woods. Some choices in wood also from basswood, redwood to even balsa in some structures (good to simulate foundations or piers). • Real wood takes stains well. I know others are able to simulate with various plastics but it just isn’t the same look. • For castings such as windows and doors I always paint them first with a raw wood color. Then continue from there. Floquil CN Grey is a good choice for the base coat.
Why detail wood? • I like to see some depth in a wood building or rolling stock. • If it looks too smooth it loses the real look and the feel. • Even on freshly painted structures and rolling stock, variations can be seen. Nothing stays fresh looking in nature very long! • It is fun and adds much to a model as long as it isn’t overdone! That to me can be a huge mistake. And believe me I have made it more than once.
Some examples • Both from the YSL – (I am a member) and from my own home layout. • On the next slide – look closely at the wood detail – grain detail – variation in the paint etc. • Board ends are fairly even but not perfect. • Wood is worn in many places. • It brings the flatcar to life!
Shacks • Notice different colors and textures. • Shingles are individual. • Nail hole detail. • Grain detail. • Loose board modeled. • Framework. • Roof not complete. • Windows open. • Peeling Paint • Knot Holes – now I do knots themselves – use a wood burning set for this or even an old soldering iron. For holes use a wood carving set and gouge out the wood – distress then use black and dark browns around it. • Broken windows.
Open window and doors – peeling paint – These windows and doors work and are built of individual pieces.
Overall effect of rundown cabin. Broken glass. Interior framing Broken boards.
See splits. Knot hole Missing shingles Lots of detail in the wood and texture. This is an HO model.
Even nail holes.
Dry brush white as a final step. Did add in some chalks to highlight.
Picture rubbed into the side. Sanded on the back and worked in with knife and dental tool. Also missing boards and shingles show the interior framing. Offset boards to simulate too much use. Nail holes.
Shingles are wood veneer – real wood again. Treated similarly but then dry brushed with white.
Paint is there but more of a wash. Distressed quite a bit, nail holes, washes of thinned grimy black then dry brushing. All the detail adds to the effect even if viewers don’t see it at first.
Don’t forget the back of the structure. If placed properly on the layout it can be viewed also.
Next 4 slides • Not my models but others and good examples. • Notice peeling paint. • White works well. Mic Greenberg used it quite a bit. One reason is that it shows up well.
Look at the broken boards. Your eyes go to that immediately. While this can be overdone on a door it looks right. Also lots of variation of the boards and grain detail.
Questions before starting • Even with a kit there are a number of questions that need to be answered before starting your model. • New • Old – • Is it in disrepair? • How long has it been in use or service. • Has it been taken care of? • Era • Location (where prototype is located) • Climate (where prototype is located) • What is the purpose it was used for – rolling stock is obvious usually but buildings may not be. Make sure if you are building a structure that it fits your goals. • Will there be an interior – plan it right out. Much easier than later. • Framing – 16 inch or 24 inch centers for buildings.
Before starting • Examine the wood. • If necessary sand it smooth – unless a rough cut is desired. • Quality of wood is important – Kappler or Mt. Albert are two of the best brands. • Could also use scraps of wood. • Or even coffee stirrers. • I even like siding – can work great – board by board can be better looking if done right but scribed siding can be just as good with some work. In some cases it looks more realistic.
Scale • Plays a big role in this – smaller scales require much less detail. • Wood grain in Z would never be seen. • Wood grain in G scale would not only be seen but would look unrealistic if it were not there. • O scale, S scale would require a little more than HO scale. • But even N scale can use some to add character.
Must look real • In order to do this, you must study to some extent rolling stock, structures etc. to get the correct effects that you want. • While characterization might be ok for some it is not for me. That being said John Allen’s work was superb. • Just like in the movies or theater though you might want to exaggerate a little in order to bring out effects. • Must fit into layout. For structures – work in real dirt and plants.
Planning • Most important part. • Answer the previous questions. • Write out as much as you can for reference and to set a direction. • Do not skip this step – even if building a kit.