AgentPoint Softphone: Your Comprehensive Guide to Efficient Call Management
AgentPoint provides a seamless software connection between your PC and telephone for effective call management. Acting as a softphone, it emulates standard telephony functions with enhanced call details and shift activity data. This guide assists you in logging into AgentPoint, explains its interface, and outlines telephony functions such as answering calls, changing status, and accessing recent numbers. Streamline your communication and enhance productivity by mastering the AgentPoint features, ensuring smooth operations in Genesys call routing.

AgentPoint Softphone: Your Comprehensive Guide to Efficient Call Management
E N D
Presentation Transcript
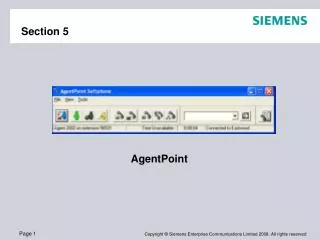
Section 5 AgentPoint
AgentPoint Fundamentals • AgentPoint provides a software link between an Advisor’s PC and their telephone handset – hence the term ‘softphone’ • Through Genesys and the CTI link, the AgentPoint phone behaves the same way as your ‘hard’ phone, with the same main telephony functions • The AgentPoint application and the telephone instrument are ‘interchangeable’ in operation, but it is good practice to use either one or the other • AgentPoint can provide enhanced information about your status, as well as call detail and a limited amount of data on your current shift activity
AgentPoint – let your PC do the work! PSTN T-Server CTI Link PABX Voice Data
Getting Started • Start AgentPoint after you log into Windows, by selecting ‘Start’ > ‘Programs’ > ‘Siemens’ > ‘AgentPoint’ • Once AgentPoint loads, it resides in the System Tray (usually the bottom-right of your Windows desktop) and appears as an image of a phone handset • Whilst the application is initialising and attempting to connect to Genesys, the AgentPoint phone icon will ‘animate’ by pulsating and be circled by a green meteor • Hovering your mouse pointer over the icon at this point will show a tooltip of “Initialising”
Logging In • After a short delay, you will presented with a login screen, requiring you to enter your personal details
The SoftPhone bit • The Softphone application window consists of three sections: • The Menu Bar • ACD Telephony Buttons • The Status Bar
What do all those buttons do…? • The ACD telephony buttons relate to specific telephony functions • Hovering your mouse pointer over any button will display a ‘tooltip,’ describing the button’s function • The button will be highlighted, or greyed out, depending on whether the associated function is possible in the current telephone state • If the telephony state is changed via the physical handset, this is also reflected in the state of the buttons on the softphone
Log me on • If you are currently logged off, the Log On image button will appear as below: • Clicking this button will log you on to the Genesys call routing system, using the information that you entered into the login screen earlier • When you are logged in, the button image will change to Log Off as below: • If you click the button again, you will be logged off from the system, the button will change back to the Log On image and you will no longer receive calls • If you only want to stop receiving calls for a short period of time, you should use the Unavailable or Work buttons
Let’s do some work… • This is the Available button. Once you have logged in, it will be highlighted as above • Click this button when you are ready to receive incoming calls. This will place you in the ACD ‘ready’ state, which will be recognised by the PABX and Genesys • Your status will change in CC Pulse to ‘ready’ and the Genesys routing system will add you to its list of targets for calls to any Agent Group of which you are a member
Phew! Let’s take a break… • This is the Unavailable button. Click this button if you want to go ‘not ready’ and stop calls coming through to your extension • If you go unavailable, the ‘reasons’ window will be displayed, inviting you to enter a reason for excusing yourself from taking calls • Note that, if you delay in entering a reason and a call comes through to your extension, the window will disappear and you will not be put into the ‘not ready’ state
Going unavailable • The ‘Unavailable Reasons’ window pops up when you select the unavailable button • You are required to enter a reason for going not ready from the displayed drop-down box. You must do this in order for your phone to be put into the not ready state – recognised by both the PABX and Genesys • The reason that you enter will be registered in Genesys and the time spent in the not ready state, under that reason, will be recorded and made available for reporting purposes
Telephony functions 6765778 • The telephony function buttons appear to the right of the ACD buttons, as shown above • To dial a call, you should first enter the number to be dialled in the dial box • Click the green/white arrow (dial button) to call the number you have entered • Clicking the down arrow to the right of the dial box will display a list of numbers that you have recently dialled • Selecting one of these entries will automatically populate the dial box with the number, which can then be called by clicking the dial button • Note that, if you are already on a call, clicking the dial button will put the current call on hold and dial the number in the dial box e.g. to consult/transfer
Take that call! • This is the Answer Call button • Click this button to answer a call currently ringing at your handset/softphone • Pressing the ‘Enter’ key on your PC keyboard will also answer the call • If another application has focus on your desktop when a call arrives, the AgentPoint application will flash in the taskbar. Clicking on this (or the AgentPoint application itself) will bring the softphone back into focus and then pressing the ‘Enter’ key will answer the call
Goodbye… • Click the Disconnect/Reconnect button to end the current call • The Disconnect button is replaced by the Reconnect button (below) when a successful consultation call has been made • Click the Reconnect button to disconnect a consulted call and reconnect with the held call
Hold & Retrieve • Click the Hold button above to place the current call on hold • Once the call has been placed on hold, the button will be replaced with the Retrieve button (below) • Click the Retrieve button to return to the held call. The image will revert back to the Hold button again
Transfer • Click the transfer button to transfer the active call to another party • You must be in a consultation call for this button to be enabled • To perform a transfer:1. Enter a number into the dial box and press the dial button to consult with another party2. When you hear ringing, or once the consulted party has answered, click the Transfer button3. The call will now be transferred and your phone will be left in an idle state
Conference • Conference allows you to converse with 2 other parties at the same time • To set up a conference:1. Enter a number into the dial box and press the dial button to consult with another party2. When the consulted party answers, click the Conference button3. You will now be in a conference call
Call Details • The Call Details button is only enabled when you are on a call. It allows you to view information relating to the current call: • The Answer button is used in this window instead of the Softphone window’s Answer Call button • The Close button closes the Call Detail window and returns you to the Softphone window • If a new call arrives whilst you are viewing this window, the details are replaced with those of the current call
AgentPoint – Further Info • Refer to the AgentPoint User Guide for in-depth information on the features and functions of the application • The guide contains useful reference information and also some basic troubleshooting tips. • Any questions?
From Genesys to Exodus – in one day! • Do not be too concerned about the ‘nuts and bolts’ of the Genesys system – an understanding of the infrastructure is helpful, but not essential • ‘Play’ with the reporting elements – particularly CC Pulse, as this provides very powerful real-time management information and can enable and empower Managers and Supervisors to make timely and productive operational changes • You can’t break it! • Have you all seen the light? • Any Questions? • Thank you for your time!