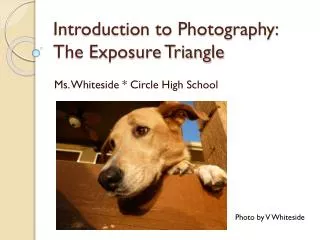
Introduction to Exposure
Introduction to Exposure. GETTING THE RIGHT AMOUNT OF LIGHT TO MAKE THE IMAGE. Exposures. Correct Exposure Image looks the way you want it to Not always the way the scene actually appears in real life Over Exposure Image is too bright Under Exposure Image is too dark.

Introduction to Exposure
E N D
Presentation Transcript
Introduction to Exposure GETTING THE RIGHT AMOUNT OF LIGHT TO MAKE THE IMAGE
Exposures • Correct Exposure • Image looks the way you want it to • Not always the way the scene actually appears in real life • Over Exposure • Image is too bright • Under Exposure • Image is too dark
Four Factors Affect Exposure • Light • Film Speed (ISO) • Aperture • Shutter Speed
Light • Sources • Available light (or ambient light) • sunlight or other available sources at the location • Artificial light • flashes, strobes, lamps organized by the photographer
Six Flavors of Available Light • Frontlight • Light in front of the subject (behind the camera) • Creates a flat, often dull light
Six Flavors of Available Light • Sidelight • Light comes from the side • Creates shadows, dimension • Great for landscapes and scenic shots • Used for people when trying to emphasize character in a face (lines, crags, etc) or more dramatic appearance
Six Flavors of Available Light • Toplight • Noon light, directly over head • Not favorable for people • Creates harsh shadows, tends to be colorless
Six Flavors of Available Light • Backlight • Light directly behind the subject • Great for creating an ethereal look, emphasizing spray in water, adds depth to smoke, halos in portraits • Best for creating silhouettes
Six Flavors of Available Light • Overcast/shade • Cloudy days with clouds filtering the light or in shade avoiding direct light • Creates a soft light that is kindest type of light for portraits
Six Flavors of Available Light • Twilight • Around sunset, known as the “magical hour” or “golden hour” • Best time of day for capturing color in a scene
The Photographic Triangle Photographer’s creative tools include: Film Speed (ISO) Shutter Speed Aperture
Film Speed (ISO) • Sensitivity to light of the light capturing device • Commonly measured using ISO number • 25, 50, 64, 100, 200, 400, 800, 1600 • each is twice as sensitive to light as the previous
Film Speed Speed of film determines its sensitivity to light Slow speed (25, 50, 64 not availalble with all cameras) • less sensitive to light • good for daylight • requires longer exposure times/larger apertures Medium Speed (100, 200) • good for daylight Fast speed (400, 800, 1600) • more sensitive to light • good for cloudy days, night, indoors/low light • can use shorter exposure times/smaller apertures
Aperture • Adjustable hole in the lens that opens to various sizes to allow light in • Hole in the lens is set to f/stops • f stop is the diameter of the aperture expressed as a ratio of the focal length • f/4 is one-fourth of the focal length • ex: f/4 for a 100 mm lens, 100/4 = 25 • each stop is ½ of the previous • each stop lets in ½ as much light as the previous
Shutter Speed • Device in camera that opens and closes at various speeds to let light in for a certain length of time • Shutter speeds are seconds or fraction of second • 2, 1, ½, ¼, 1/8, 1/15, 1/30, 1/60, 1/125, 1/250, 1/500, 1/1000 • Each speed is basically twice as fast as the previous and lets in half as much light as the previous
Shooting Modes and the Photographic Triangle • Program Mode (P) • Select the ISO, camera sets the aperture and shutter speed • Aperture Priority Mode (A or Av) • Select the ISO and aperture, camera sets the shutter speed • Shutter Priority Mode (S or Tv) • Select the ISO and shutter speed, camera sets the aperture • Manual Mode (M) • Select the ISO, aperture and shutter speed