Help / Training / POC Tip 004: DCAMS 02 Plotter Basic
Help / Training / POC Tip 004: DCAMS 02 Plotter Basic.

Help / Training / POC Tip 004: DCAMS 02 Plotter Basic
E N D
Presentation Transcript
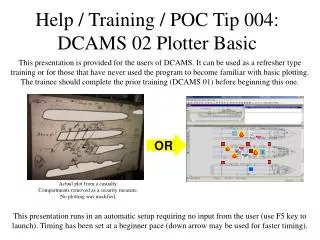
Help / Training / POC Tip 004: DCAMS 02 Plotter Basic This presentation is provided for the users of DCAMS. It can be used as a refresher type training or for those that have never used the program to become familiar with basic plotting. The trainee should complete the prior training (DCAMS 01) before beginning this one. OR Actual plot from a casualty. Compartments removed as a security measure. No plotting was modified. This presentation runs in an automatic setup requiring no input from the user (use F5 key to launch). Timing has been set at a beginner pace (down arrow may be used for faster timing).
Fire, Fire, Fire. Fire in compartment 5-36-0-E, MER 1. General Quarters, General Quarters. A fire onboard has many challenges, the firefighting team must attack and contain it before the damage spreads and consumes the ship. Part of the Damage Control response is good communications, DCAMS provides the ship with non-verbal means to identify, describe, pinpoint, and update casualties, personnel, and boundaries. The laptops communicate all the information plotted automatically to the other stations, reducing the errors of verbal reports.
Tool boxes CASUALTY Fires & Flood Ruptures Smoke/STR/Ord Frag/HAMAT/Heat Xfer/Holes/Mech dam/Weapon Impact/Rad Jammed fitting/Bio/Cas Pwr/Chem/Comms/Debris/Ele Pwr BOUNDARY Primary & Secondary boundaries (Casualty Boundary/Fire Boundary/Flooding Boundary/Smoke Boundary PERSONNEL Attack Team/Boundarymen/CBR/Casualty/Crew/Repair Party/Desmoking/GFE/Flooding/Incident Commander/Medic/Invest/FM/Safety/Stretcher Bearer
09 Apr 2…DCRS 5 Added Attack...2-40-2-L Passageway 45 2 09 Apr 2…DCRS 5 Added Fire Cl…5-36-0-E MER 1 40 5 09 Apr 2…DCRS 5 Added Attack...2-40-2-L Passageway 45 2 DCRS 5 – Attack Team1, on-scene 2-40-2-L, reporting a Class Bravo fire in MER-1, compartment 5-36-0-E When a report comes in, click the ICON, release, then move the curser to the designated compartment (do not “click-hold-drag”) and then click again at the location to be plotted.
09 Apr 2…DCRS 5 Added Fire Cl…5-36-0-E MER 1 40 5 09 Apr 2…DCRS 5 Added Attack...2-40-2-L Passageway 45 2 On Scene Leader – DCRS 5, Set Primary boundaries FWD and AFT for MER-1, compartment 5-36-0-E 225 290 Boundaries are plotted inside the ship (“icon” appears above deck). The boundary icon will remain as the curser until a FWD & AFT boundary are plotted
09 Apr 2…DCRS 5 Added Fire Cl…5-36-0-E MER 1 40 5 09 Apr 2…DCRS 5 Added Attack...2-40-2-L Passageway 45 2 DCRS 5 – Attack Team1, Class Bravo fire engaged MER-1, compartment 5-36-0-E 225 290 Right-click on B fire icon Right-click on any ICON to get an Information box, Move, Delete, change Status, or (only for fires, smoke, rupture) Change Type
09 Apr 2…DCRS 5 Engage Fire Cl.. 5-36-0-E MER 1 40 5 09 Apr 2…DCRS 5 Added Fire Cl…5-36-0-E MER 1 40 5 09 Apr 2…DCRS 5 Added Attack...2-40-2-L Passageway 45 2 “ENGAGED” and “NO” show up on the Icon and in the Events and Alerts (upper right).
Continue adding and updating the casualty, boundaries, and personnel icons as the information is received. When the user “Right Clicks” an Icon they may select “Information”. This will provide them additional capability to enter amplifying information about the casualty. Each Icon has its own Info Box. See example below. This concludes the Plotter Basic presentation. See the DCFPNAVYMIL.ORG website for additional training material.