Android Terminology
Android Terminology. Component: Activities, content providers, broadcast receivers, and services that together make up an application Activity : A single user-based task, usually, but not always, containing views Content Provider: A component that serves data to other applications

Android Terminology
E N D
Presentation Transcript
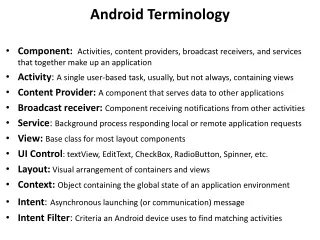
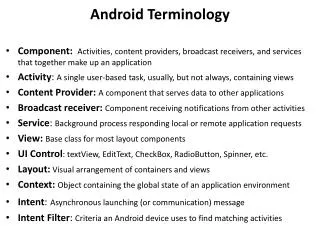
Android Terminology • Component: Activities, content providers, broadcast receivers, and services that together make up an application • Activity: A single user-based task, usually, but not always, containing views • Content Provider:A component that serves data to other applications • Broadcast receiver: Component receiving notifications from other activities • Service: Background process responding local or remote application requests • View:Base class for most layout components • UI Control: textView, EditText, CheckBox, RadioButton, Spinner, etc. • Layout: Visual arrangement of containers and views • Context:Object containing the global state of an application environment • Intent:Asynchronous launching (or communication) message • Intent Filter: Criteria an Android device uses to find matching activities
Android Terminology (cont.) • Preference:A key/value pair, which defines a user option • Context Menu: A menu executing after a long click • Long Click:Analogous to right clicks; Hold click for approximately two seconds • Modal:Dialog requiring a response before continuing an activity • Localize: Separate data from an application, so changes don't require changing source. Refer to the data by an identifier name. • Faded Edge: An edge of a scrollable area that is faded to indicate that more information exists • Fragment: An independent module tightly bound to an application • Bundle:A set of key/value data pairs for persisting an application state
Android Terminology (cont.) • Gravity: Determine alignment of text within a view of different size. Values can include: top, bottom, left, center, fill • Content Provider: Wrapper for data, exposing data (SQL for example) to multiple applications, using a standard API. • Cursor: An object containing rows extracted from an SQL table • Projection:The columns of an SQL table of interest • Live Folder:Deprecated mechanism to display data on home page • Developers now use Widgets • Live: updates display automatically • Widgets: Miniature icon-based application view (clock, battery charge percent) embedded on the home screen or application • Live Wallpaper:Dynamic interactive home screen backgrounds
Creating an Android Application Perform the following steps • Create a new Android project in Eclipse with the wizard icon • Register activities, specify Content Providers, Services, and security specifications in AndroidManifest.xml • Create localized literals in the res/values directory • Create other resources in various res directories • Create UI layouts in the res/layouts directory • Code the activity java class in the package folder
Step 1: Eclipse Android Project Wizard • First Screen • Name the project • Use workspace or browse to a new location • Second Screen: Pick an Android version • The oldest version has the most compatibility • Newer versions obviously have more features • Some newer features are backwards compatible • Third Screen: Pick a package name • Example: com.acorns.lesson or com.cs415.name • Click finish to complete the process
Automatically Generated Files package com.paad.helloworld;public final class BuildConfig{ public final static boolean DEBUG = true; } package com.paad.helloworld;publicfinal class R { public static final class attr { } public static final class drawable { public static final intic_launcher=0x7f020000; } public static final class layout { public static final int main=0x7f030000; } public static final class string { public static final intapp_name=0x7f040001; public static final int hello=0x7f040000; } }
Step 2: Create the Manifest • The new project wizard • Automatically Creates a default AndroidManifest.xml file • Creates a default activity in the project directory • Alter the manifest • Register activities with intents, permissions, content providers, services, etc. • There are two possibilities • Edit the manifest directly • Use the Manifest Editor that displays when clicking the AndroidManifest.xml file
HelloWorld Manifest <?xml version="1.0" encoding="utf-8"?> <manifestxmlns:android="http://schemas.android.com/apk/res/android" package="com.paad.helloworld" android:versionCode="1" android:versionName="1.0" > <uses-sdkandroid:minSdkVersion="1" // User cannot install if less(1=default) android:targetSdkVersion="15" /> // Verify features between min & target <applicationandroid:icon="@drawable/ic_launcher" android:label="@string/app_name" > <activityandroid:label="@string/app_name" android:name=".MyActivity" > <intent-filter > <actionandroid:name="android.intent.action.MAIN" /> <categoryandroid:name="android.intent.category.LAUNCHER" /> </intent-filter> </activity> </application> </manifest>
Step 2: Register Activities Definition: A focused single task • How? Alter the manifest! • Create additional activities • Create and/or fragments with intents, permissions, content providers, services, etc. • There are two possibilities • Edit the manifest directly • Use the GUI that displays when clicking the AndroidManifest.xml file(Double click AndroidManifest.xml, click on application, scroll down and click on add, Choose activity from the dropdown, give it a name, and click finish to start coding)
Intent Definition: Messages that asynchronously launch or communicate with other applications/activities • Android Intent Resolver • Applications sends intents to the Android system • The Android intent resolver searches all application intent filters to find the most suitable matching activity • Intents can target a single application or multiple applications broadcast for sequential handling • Intent Filters • Intent fields contain criteria fields defining whether an activity is appropriate • Criteria fields include actions, a category, path to data, MIME type, a handling class, and security restrictions More Details later
Manifest Intent Filter Example Note: An intent launches an activity <intent-filter> <action android:name="android.intent.action.MAIN" /> <category android:name="android.intent.category.LAUNCHER" /> </intent-filter><intent-filter> <action android:name="android.intent.action.VIEW" /> <action android:name="android.intent.action.EDIT" /> <action android:name="android.intent.action.PICK" /> <category android:name="android.intent.category.DEFAULT" /> <data android:mimeType="vnd.android.cursor.dir/vnd.google.note" /> </intent-filter><intent-filter> <action android:name="android.intent.action.GET_CONTENT" /> <category android:name="android.intent.category.DEFAULT" /> <data android:mimeType="vnd.android.cursor.item/vnd.google.note" /> </intent-filter> The Main Entry when a user launches the application Launched by other applications for list access Launched by other applications for single item access
Providing Access to NotePad Data • Declares legal activity operations on a note directory. • URI, vnd.android.cursor.dir/vnd.google.note , retrieves a cursor of zero or more items (vnd.android.cursor.dir) with note pad data (vnd.google.note). • Legal actions: view or edit the directory of data (VIEW and EDIT ), or pick and return a particular note (PICK). • Activities launched without a explicit package name require the DEFAULT category, or they will not be resolved <intent-filter> <action android:name="android.intent.action.VIEW" /> <action android:name="android.intent.action.EDIT" /> <action android:name="android.intent.action.PICK" /> <category android:name="android.intent.category.DEFAULT" /> <data android:mimeType="vnd.android.cursor.dir/vnd.google.note" /> </intent-filter>
Another Android Manifest <?xml version="1.0" encoding="utf-8"?> <manifest xmlns:android="http://schemas.android.com/apk/res/android" package="com.bikerolas" android:versionCode="30" android:versionName="1.2"> <uses-permission android:name="android.permission.RECEIVE_BOOT_COMPLETED" /> <uses-permission android:name="android.permission.ACCESS_LOCATION /> <uses-permission android:name="android.permission.ACCESS_GPS" /> <uses-permission android:name="android.permission. ACCESS_CELL_ID /> <application android:icon="@drawable/flingicn1" android:label="@string/app_name" android:debuggable="false"> <activity android:name=".Fling" android:label="@string/app_name"> <intent-filter><action android:name="android.intent.action.MAIN" /> <category android:name="android.intent.category.LAUNCHER" /> </intent-filter> </activity> <service android:name=".FlingService" /> <receiver android:name=".FlingServiceManager" android:permission="android.permission.RECEIVE_BOOT_COMPLETED"> <intent-filter><action android:name="android.intent.action.BOOT_COMPLETED" /> </intent-filter> </receiver></application><uses-sdk android:minSdkVersion="2"></uses-sdk> </manifest> Note: ACCESS_LOCATION and ACCESS_GPS were used by earlier Android versions and are now deprecated
Localize Strings How? Create XML files in the res/values directory Why? Promotes Internationalize and easier maintenance Example (Strings.xml) <?xml version="1.0" encoding="utf-8"?> <resources> <string name="hello">Hello World, MyActivity!</string> <string name="app_name">PA4AD_Ch02_Hello_World</string> </resources> • Build: Android creates gen/<packageName>/R.java automatically from the information in res/Strings.xml • Java Access: setTitle(getText(R.string.hello)); • Manifest XML Access: android:label="@string/app_name"
Layout Example (main.xml) How? Store xml text files in the res/layouts directory <?xml version="1.0" encoding="utf-8"?> <LinearLayout xmlns:android="http://schemas.android.com/apk/res/android" android:orientation="vertical" android:layout_width="fill_parent" android:layout_height="fill_parent"> <TextView android:layout_width="fill_parent" android:layout_height="wrap_content" android:text="@string/hello" /> </LinearLayout> Notes • fill_parent (or match_parent Android 2.0 and later) fill the entire space of the parent layout • Wrap_content uses as little space as needed • LinearLayout is a vertical or horizontal list of items (like BoxLayout in Swing)
The Java Code package com.paad.helloworld; import android.app.Activity; import android.os.Bundle; public class MyActivity extends Activity { /** Called when the Activity is created or restarted. **/ @Override public void onCreate(Bundle savedState) { super.onCreate(savedState); setContentView(R.layout.main); } } A Bundle is a bunch of key/value pairs for Applications to restore their state after an Android termination
Android Emulator • Start the Emulator from Eclipse • Right click on the application • Select run as and then Android application • To debug: Select debug as and then Android Application • After the first time, just click the run icon at the top of the Eclipse window • Important notes • The emulator takes quite a bit of time to launch; be patient • Don’t shut down the emulator between application runs. Closing leads to long start up times, and sometimes confuses Eclipse • Every Eclipse run reinstalls and re-launches the application
Debugging Applications • Set debuggable="true" in the <application> tag • This is automatic when debugging in the emulator • Manually explicitly set preference to debug on a real device • Eclipse views • DDMS: Dalvik Debug Monitor Server Simulate Event: Global Positioning Service (GPS), phone calls, Short Message System (SMS), etc. • Debug: Start with "Debug as" • Execute emulator to get a terminal window and execute Linux commands to connect to SQL, execute queries, etc. • ADB (Android Debug Bridge): Debug on actual devices (if debugging enabled) using Eclipse; Note: ADB is part of the SDK platform tools • Techniques:Logcat displays console output, Trace , Breakpoints, Strict mode
Enable Device Debugging • Eclipse: window>open perspective->other>DDMS • Enable debugging on device • Older devices: settings>applications>development • Newer devices: settings>about phone> tap build # seven times> back
Debugging Techniques • Tracing the execution • Start: android.os.Debug.startmethodTracing("foo"); • Stop: android.os.Debug.stopMethodTracing(); • Writes output to: foo.trace on the emulator or device • Log class: • Analogous to Java: System.out.println or Javascript: Console.log • Example: Log.v("category string", "message"); • Asynchronous Alert Dialogs AlertDialog.Builder build = new AlertDialog(context);build.setTitle("Some Message");AlertDialog ad = builder.create();ad.show(); • Breakpoints: Set Eclipse breakpoint and use "Debug as" option
Strict Mode (Android 2.3 and newer) • Report violations and IO Operations: Disk reads, disk writes, etc. • Common options when detection occurs: Write a Log message, display a dialog message, or crash the application • ExampleStrictMode.setVMPolicy(new StrictMode.VMPolicy.builder() .detectDiskWrites().detectLeakedSqlLiteObjects() .penaltyLog().penaltyDeath().build()); Note:The build retuns a ThreadPolicy object to the VM Policy builder • Detect if in debug modeApplicationInfo info = getContext().getApplicationInfo();if (info.flags & ApplicationInfo.FLAG_DEBUGGABLE) != 0) { /* code here */}