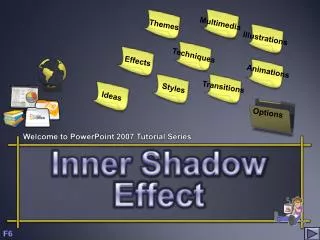
Inner Shadow Effect
Multimedia. Themes. Illustrations. Techniques. Effects. Animations. Transitions. Styles. Ideas. Options. Welcome to PowerPoint 2007 Tutorial Series. Inner Shadow Effect. F6. I tried different Shadow Effects / Inside Center Under Options I tried the Transparency and Blur Options

Inner Shadow Effect
E N D
Presentation Transcript
Multimedia Themes Illustrations Techniques Effects Animations Transitions Styles Ideas Options Welcome to PowerPoint 2007 Tutorial Series Inner Shadow Effect F6
I tried different Shadow Effects / Inside Center Under Options I tried the Transparency and Blur Options Not all the Shape Effects work when you apply this Shadow Effect The Pictures work well with the Blur / Angle Option PowerPoint Series
Let’s try Saveen Reddy’s Idea (professional Designer) http://blogs.msdn.com/saveenr/default.aspx Great Stuff I followed his every move and end up with this Right is his end result! Much smoother around the edges . . . . . • Insert a Shape / add color / Gradient / open ‘More Gradient’ and do the following • Gradient type = Linear, Angle = 90 (goes top to bottom) • Gradient Stops: (select more color ….) • Stop #1: Color = 255,255,55 ; Stop-Position = 0% • Stop #2: Color = 253,186,86 ; Stop-Position = 12% • Stop #3: Color = 255,157,9 ; Stop-Position = 13% • Stop #4: Color = 252,238,218 ; Stop-Position = 100% • See next page for shots of Format Shape Options • A good start. How much more dimension can we add? We'll try a Bevel. PowerPoint Series
A = Stops that needs to change (click once) Definitely more dimension. But also more harsh. Also I hate the corners. I wanted something smoother. Now we bring in "Inner Shadow" With the gradient providing some glass-effect highlights adding an inner shadow provided some smooth depth to give some more dimension. It doesn't look so much like an inner shadow at all PowerPoint Series
A B B = Change Weight & Height (click once) C = Change Blur to 24 pts (click once) PowerPoint Series
As we play with the shadow color and the blur, some rich effects can be achieved. All the images was copied direct from the Blog PowerPoint Series
A disadvantage of using Inner Shadow is that once you use it, you lose the ability to also have an outer shadow at the same time. You can work around this by duplicating the shape, adding an outer shadow, and then moving the shape with the outer shadow, behind the shape with the inner shadow. Great Stuff Great Stuff Great Stuff The first rectangle has no Fill / Glow White Click once The second Black Fill / White Shadow Click once PowerPoint Series
Click Esc to Exit Thank you for watching this short Lesson This is just one of several free Lessons available All these Ideas are readily available on the Internet Come back soon! Creator: Frans Kruger 2009 The End http://outoppie-presentations.blogspot.com www.encryptologic.co.za