Download
1 / 5
50 likes | 60 Vues
Need fluorescent light repair replacement services in your city in GA then Mr. Electric in the Atlanta area is available for all your electrical needs, including replacing ballasts. Contact us today for all electrical needs. Read here for more info..

E N D
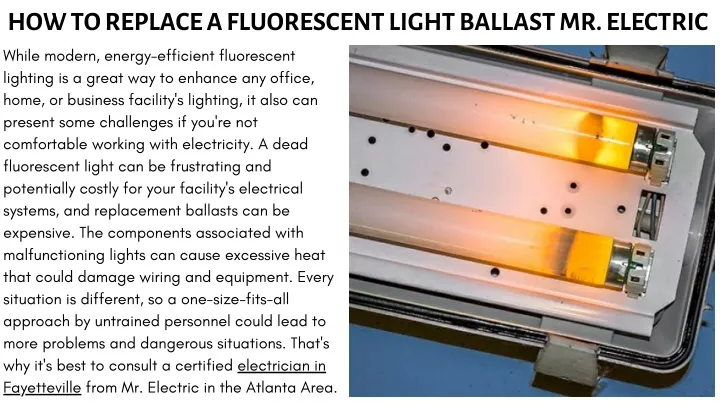
HOW TO REPLACE A FLUORESCENT LIGHT BALLAST MR. ELECTRIC While modern, energy-efficient fluorescent lighting is a great way to enhance any office, home, or business facility's lighting, it also can present some challenges if you're not comfortable working with electricity. A dead fluorescent light can be frustrating and potentially costly for your facility's electrical systems, and replacement ballasts can be expensive. The components associated with malfunctioning lights can cause excessive heat that could damage wiring and equipment. Every situation is different, so a one-size-fits-all approach by untrained personnel could lead to more problems and dangerous situations. That's why it's best to consult a certified electrician in Fayetteville from Mr. Electric in the Atlanta Area.
Tools needed A voltage tester, a screwdriver, and pliers. Shut off the power Turn off the circuit breaker that supplies power to the fluorescent light fixture. If you have an older fixture with multiple ballasts, turn off all of them. Use a voltage tester to verify that there is no current present at the end of each ballast wire. Remove cover Use a screwdriver to remove screws from the cover plate and pull it away from the ceiling. You may need to use pliers to remove stubborn screws or if they are missing altogether. Disconnect any wires connected to the top of each ballast by pulling them out of their sockets.
Take off the cover plate Pull out any remaining tubes by hand until they pop out of their sockets on each side of the fixture. If you have trouble getting them out, try using pliers or long-nose pliers instead of your hands, so you don't get burned or shocked by touching both sides at once while they're hot! Check for voltage Before you begin any work on your fluorescent light fixtures, you should check for voltage at the socket by turning off the breaker and removing one wire from each side of the socket. If there is still power going through this circuit, you should call a nearby electrician in Marietta immediately before continuing with your project.
Take a picture Before you start taking things apart or working with wires, take pictures of how everything looks so that you can put it back together later if necessary. This will save time and prevent mistakes when putting things back together later on after replacing a ballast. Disconnect the ballast wires After taking pictures of how everything looks connected, disconnect all wires attached to both ends of the ballast being replaced. Remove the ballast Turn off the power to the light fixture at the circuit breaker panel by flipping off a switch or removing a fuse from its slot. Remove any covers from the fixture so you can access all components. Loosen screws holding the ballast in place and pull it out with your hands, pulling straight up on it if possible.
Purchase a replacement ballast Go online to find replacement ballasts for your specific make and model of fluorescent lights. Purchase one with nearly identical specifications as your old one, including voltage (120 volts or 240 volts), wattage, and amperage draw (60 watts max). Prepare wires for new ballast Before installing new ballast, inspect the wiring of your old one to ensure that you can reuse it with your new ballast. Cut away any damaged insulation on each wire and check that all wires are securely fastened in their proper terminals. Double-check that each wire is connected correctly before proceeding further.Mr. Electric in the Atlanta area is available for all your electrical needs, including replacing ballasts. Contact us today for all electrical needs. Source: https://www.mrelectricatlanta.com