Download
1 / 12
130 likes | 158 Vues
A training presentation on food colors chromatography for Vanderbilt Student Volunteers for Science Spring 2007. Learn techniques and concepts related to separating colors in foods using chromatography experiments.

E N D
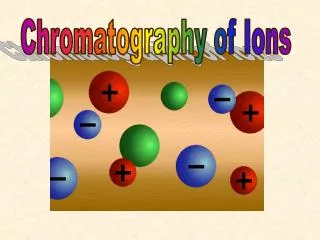
Chromatography of Food Colors Vanderbilt Student Volunteers for Science Spring, 2007 Training Presentation
Important!!! • Please use this resource to reinforce your understanding of the lesson! Make sure you have read and understand the entire lesson prior to picking up the kit! • We recommend that you work through the kit with your team prior to going into the classroom. • This presentation does not contain the entire lesson—only selected experiments that may be difficult to visualize and/or understand.
Pre-lab • Use the scissors to cut the top off one Kool-Aid package of each color. • Add one scoop of blue to the blue cups, one scoop of grape to the grape cups, and two scoops of orange to the orange cups. • After you finish, roll the top of the package up and fasten with a piece of scotch tape. • Take the brown food color from the #2 bag and add 2 to 4 drops to the 1-oz cup labeled brown.
I. Introduction (p.2) • Ask: What is a mixture? a compound? How do you tell the difference? • Both a mixture and a compound are combinations of substances. • The difference between them is that a mixture can be separated by physical means and a compound can’t. • In a mixture each substance keeps its own properties. • Write the formula for water on the board. (H2O) Explain that water is the combination of two elements: hydrogen and oxygen. • Does water have the properties of oxygen and hydrogen? (no) • Can you separate water into hydrogen and oxygen? • Not easily. It takes special equipment to separate water. Water is a compound, not a mixture. • Ask: What substances make up a salad? How would you separate the mixture? • Salads are mixtures that are easy to separate. You simply take out the lettuce, tomatoes, and carrots. You can physically separate the different substances.
II. Check: Identifying mixtures and compounds (p.2) SubstanceMixture or compound?How to separate physically • raisin bread mixture pick out the raisins and nuts with your hand • sugar compound can’t separate (C12H22O11) • salt water mixture filter the salt out of the water or evaporate the water • salt compound can’t separate - NaCl • hamburger mixture buns, lettuce, tomatoes, scrape off catsup, remove meat • rubbing alcohol compound can’t separate (C3H7OH)
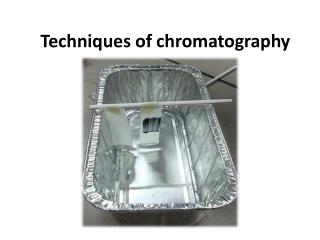
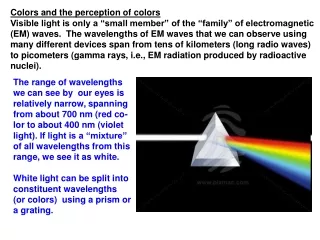
III. Demo: Separating colors (p.3) • Ask: Is green a pure color or a mixture of colors? If so, how can we physically separate it? • Record their ideas. • Use a 16 oz. plastic cup, chromatography paper strip and a green marker. • Pour a small amount of water in the bottom of the cup. • Place a wooden stick across the top of the cup. • Draw a line with the green marker just above the pencil mark on the chromatography strip. • Fold the paper and hang it from the wooden stick as shown on the next page. Be sure the color line is above the water. • In about 2-5 minutes the green should be separated into blue and yellow. • Take the chromatography paper out of the water as soon as the separate colors can be seen.
Explanation (p.3) • As the water travels to the top of the paper, it dissolves the dyes in the pen. • Each dye travels at a different speed depending on how strongly it is absorbed on the paper and how soluble it is in water. • In this case the blue travels faster than the yellow. • The retention factor (RF) of the dye is defined as the distance the dye moves divided by the distance traveled by the water. • The retention factor of any dye is characteristic for a given combination of paper and solvent. • For the same type of paper and solvent, and in the same time allowed, the blue and yellow dyes will always travel to the same position on the paper. • We can use retention factors in experiments to help us identify unknown dyes. RF = distance dye moved /distance water moved
IV. Chromatography of food colors--demo (p.4) • Demonstrate the procedure first! • Show each student where to place the well plates on the worksheet so they can tell what materials will be going into the wells. • Add one scoop of each Kool Aid flavor to its own well and then add 2-4 drops of water to each well containing the Kool Aid. • Use the dropper bottles of food colors to add 2 to 4 drops of food color to the appropriate well. • Pick up the chromatography sheet they will be using and explain that they will be using a different toothpick to draw a line of each food color on one chromatography sheet and Kool-aid colors and brown food color on another chromatography sheet following the color and Kool-aid notations at the top of the two sheets. • Using a different half toothpick each time, draw a line for each of the food colors on the one sheet by using a different toothpick for each color and drawing a line on the pencil line, following the color notation at the top of the chromatography sheet.
IV. Chromatography of food colors (cont.) • Gently wave the chromatography sheet to allow the colors to dry. • Show the laminated chromatography sheet for both food colors and Kool-aid colors already drawn on the lines as an example • Refold the chromatography sheet like an accordion so it stands in the cup. • Remove the chromatography sheet and add the contents from the small bottle of water. • Then place the chromatography sheet back in the cup, making sure the water is below the color lines.
IV. Chromatography of food colors (cont.) • Distribute the 24-well plates to the students and have each student add one scoop of Kool Aid to the appropriate well. • Take the dropper bottles of food colors around to the student in each pair that has the food colors worksheet, and add 2 to 4 drops of food colors to the appropriate well in the well plate (blue, green, red, yellow for one student and brown for the other student.) • While this is being done, tell students working with the Kool-Aid to add a few drops of water to each well containing Kool-Aid, using their water dropping bottle and stir with the toothpick. • Use the toothpicks to draw a line of color on the pencil line on the student chromatography sheet. • Use a different toothpick for each Kool-Aid solution. • Dip the toothpick in the solution, then draw a line of that color on the pencil line on the chromatography sheet.
IV. Chromatography of food colors (cont.) • Gently wave the chromatography sheet to allow the colors to dry. • Refold the chromatography sheet like an accordion so it stands in the cup. Remove the sheets from the cups. • Take out the 2 small bottles of water and add one bottle to each of the 16-oz cups. • Put each chromatography sheet in a cup. It doesn’t matter if it rests against the edge. • Make sure the water in the cup is below all the color lines. • The chromatography sheets should be left to develop (about 20 minutes). • While colors are separating, do the chromatography skit and discuss retention factors and the different food dyes. • After the solvent front reaches the line drawn on the chromatography sheet, remove the chromatography sheet from the cup and place each one on a sheet of paper towel to dry.
Look at their food color chromatography sheet and identify which of the food colors listed to the right are present. Refer to the Kool-aid ingredient sheets and show how to check for what food colors are present. Ask students to determine what colors are present in each of the Kool-aid chromatograms. These should be compared to the Kool-aid ingredient sheet. Finally, students should determine what food colors are present in the brown food color. Question: If you are allergic to yellow food colors, which of the Kool-aid flavors you’ve studied today might cause you to have an allergic reaction? Answer: Orange Each student gets to keep their chromatography sheet. Food Dyes. The seven food colors approved by the Food and Drug Administration are: Red #3 Red #40 Yellow #5 Yellow #6 Blue # 1 Blue #2 Green #3. Only Red #3, Red #40, Yellow #5, Blue #1, and Green #3 are available in food color sets in grocery stores. Green #3, Yellow #6, and Blue #2 are not used very much in coloring food. Since Yellow #5 causes allergic reactions in some people, the FDA now requires that it be listed on food labels when it is used. IV. Chromatography of food colors (cont.)