Lotus Notes 8.5.2
Lotus Notes 8.5.2. Topics Using Lotus Notes Q&A. Accessing Lotus Notes. Launch Notes from a desktop icon or via the ‘Start’ menu. Notes Launch Screen – 8.5.2. Most people see a Welcome page (or a customized Welcome page) when they launch Lotus Notes Others see the ‘Workspace’ screen

Lotus Notes 8.5.2
E N D
Presentation Transcript
Lotus Notes 8.5.2 Topics Using Lotus Notes Q&A
Accessing Lotus Notes • Launch Notes from a desktop icon or via the ‘Start’ menu
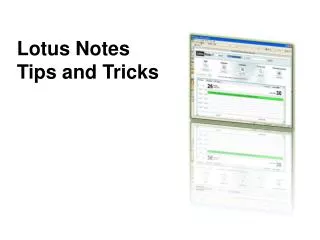
Notes Launch Screen – 8.5.2 • Most people see a Welcome page (or a customized Welcome page) when they launch Lotus Notes • Others see the ‘Workspace’ screen • Your launch screen/options should be retained after the upgrade
Notes Launch Screen – 8.5.2 Continued • The 8.5.2 Welcome/Home page is similar to the default Welcome page in Notes 8.5.1 • There are a handful of Welcome/Home screen changes you should be aware of Click to customize launch options The Open button replaces the Bookmarks bar with standard icons for mail, calendar and applications Quick Notes… use to create quick emails, reminders, contacts, etc. Notes 8.5.1 Notes 8.5.2
The ‘Open’ Button There are a number of ways you can add bookmarks… here is an option to add a bookmark from the Open Application dialog box • Similar icons and links… just a different way of getting there • Click the green Open button to see the drop-down list You can search your bookmarks Notes 8.5.1 Notes 8.5.2 Notice that most of these icons are the same (mail, calendar, etc). You access them using the Open button in 8.5.2 To see bookmarks the old way, right-click the open button
Notes Launch Page – Customizing the Home screen • Drop down the Home Page options bar to customize your launch options • There are 4 pre-built Home page options – Basics, Basics with Calendar, My Work and Basics Plus
Notes Launch Page – Customizing the Home screen • You can also click the ‘Create a new Home Page’ button • Using a wizard interface, you select the type of home page you want, the content, the number of frames and the content you want in each frame (inbox, calendar, web page, etc.)
Notes 8.5.2 – Quick Notes • Quick Notes – create memos, contacts, reminders & notes (only available on the Home screen) Click this blue triangle to toggle (open and close) the quick notes area You can personalize the image if you wish
Notes 8.5.2 – Sidebar • The Sidebar – Sametime (Instant Messaging), Feeds (not supported by UH) and Day-At-a-Glance Toggle the sidebar using the smaller triangle (not the blue one) Day-At-a-Glance shows one-day of your calendar
Notes 8.5.2 – Sidebar Continued • The Sidebar – Sametime (Instant Messaging), Feeds (not supported by UH) and Day-At-a-Glance RSS Feeds (news and blog subscriptions) Buttons to manage your feeds… Example of creating a new feed
Notes 8.5.2 – Sidebar Continued • The Sidebar – Sametime (Instant Messaging), Feeds (not supported by UH) and Day-At-a-Glance Sametime Instant Messaging (only UH personnel) Manage Sametime contacts and groups and settings Sametime login screen… the password is the same password that you use for iNotes (webmail)
Working with Mail Create New mail, calendar entries, contacts and more. • Familiar buttons, folders and tools Can toggle between mail, calendar and to-do list Self-explanatory folders and views… Inbox, Drafts, Sent and user created Folders. The All Documents View contains just that, ALL Documents... all emails and calendar entries sent or received. They show up in this view regardless of what other views or folders your documents are located in. The folders you have now will be carried over into 8.5.2. Rules allow you to process mail automatically (put mail in folders, forward emails, etc) Set a follow-up flag on an email and it shows up here
Working with Mail – Opening & Closing Windows • Double click an email to open it • Click the ‘X’ to close the email tab or just hit the Esc key on the keyboard
Working with Mail – Email buttons and menus Toggle for mail, calendar, to-do list, contacts Toolbar buttons, print, navigate, search, refresh and more Just unread emails What other folders contain this email Copy Into New… is a great feature you should use
Working with Mail – Right Click on a Document • You can also right-click on a message to see many of the same options…
Working with Mail – Message Recall • You can only recall messages from the Sent view…
Working with Mail – Mail Preview • You can preview mail at the bottom of the screen or on the right side of the screen
Working with Mail – Web Images • You may not automatically see web images in your email… click the Show Images link to view them
Working with Mail - Addressing • Address emails by simply typing the person’s name or clicking on the To: field label • You can select names from the Domino directory or from your personal contacts directory
Working with Mail - Rules • Create Rules to process mail – can enable or disable • Notice conditions – can have multiple – also can have multiple actions
Working with the Calendar • Fully functional calendar with multiple views (daily, weekly and monthly). • Small Navigation calendar • Double-click to open calendar entries • The Today button jumps to today • Other Calendars opens other users’ calendars
Working with the Calendar – Buttons and Menus Toggle to mail, to-do list, etc. Similar right-click options
Working with the Calendar – New Meeting • Similar to the appointment entry but this one has invitees • Notice date, start time, end time, alarm, subject, mark private, rooms & resources
Working with the Calendar – New Meeting • Click Required to add invitees (similar to the To: label in email) • Click Room and Resource buttons to add rooms and resources • Online Meetings are currently disabled
Working with the Calendar – Adding Invitees • Look at the Find Available Times tab to see if people are available • In this example I can see that Dewayne and Wesley are both available from 3:15 PM to 4:00 PM
Working with the Calendar – Repeating Entries • Click the Repeat label to set up a repeating meeting • Select the repeat interval (daily, weekly, monthly) and set the duration
Working with the Calendar • Meeting invitation with invitees, rooms and resources • Click ‘Save & Send Invitations’ when finished
Working with the Calendar – Summary View • Calendar Summary View – Shows a list of all calendar entries
Working with the Calendar – Viewing Others’ Calendars • Click Open Another Person’s Calendar… • Select the employees calendar you wish to view (note: they have to grant you permission to view it)
Working with the Calendar – Viewing Others’ Calendars • Notice that I’m now viewing Dewayne Winston’s calendar
Working with the Calendar – Other Calendar Entries • Appointments – almost identical to meetings except there are no invitees • Reminders – similar to appointments but they have no duration… just a start time • Anniversaries – repeating, yearly reminders with no start time or duration • All day events – similar to appointments but they block your entire day (duration is all day)
Working with Contacts • Launch your personal address book (contacts) from the Open button • Make sure you enter their email address so you can email them from Lotus Notes
Working with Contacts • You can synchronize your personal contacts (those stored in Notes on your local PC) with your iNotes contacts… this allows you to use these contacts in iNotes • First open your contacts and then select More - Preferences... • Then make sure ‘Enable “Synchronize Contacts” on the Replicator’ is checked
Working with Contacts • Now, click on the Replication link under the Open button • Make sure you enable (check) the Synchronize Contacts entry • Now, to synchronize contacts, just click on the “Start Now” button
Working with Contacts • Here are my contact in Lotus Notes and iNotes
Working with Contacts • Would you rather synchronize your contacts automatically (instead of having to click the ‘Start Now’ button on the replicator page)? • To do that, you need to enable replication… first go back to the replication page and then click Enable Scheduled Replication • Then click Set Replication/Sync Schedule… • Select options as you see fit – here it what we recommend
Working with To-Do Lists • To-Do lists are fairly straight forward and will not be covered in depth
Working with To-Do Lists • To-Dos show up on your calendar
Working with Mail Preferences • From your inbox select More - Preferences
Working with Preferences • Here are a handful of useful settings
Working with Preferences • You can set up colors to quickly see email from certain individuals • Establish your default free/busy schedule
Working with Preferences • Establish who can read your calendar and email… be VERY careful when granting users’ access to your email • Create links to other users’ mail files