Audio-Video-Technology Systems Integration Specialists
250 likes | 452 Vues
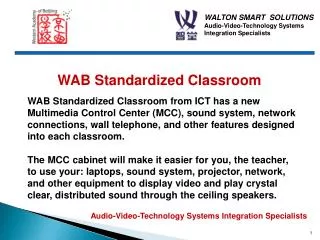
WAB Standardized Classroom. WAB Standardized Classroom from ICT has a new Multimedia Control Center (MCC), sound system, network connections, wall telephone, and other features designed into each classroom.

Audio-Video-Technology Systems Integration Specialists
E N D
Presentation Transcript
WAB Standardized Classroom WAB Standardized Classroom from ICT has a new Multimedia Control Center (MCC), sound system, network connections, wall telephone, and other features designed into each classroom. The MCC cabinet will make it easier for you, the teacher, to use your: laptops, sound system, projector, network, and other equipment to display video and play crystal clear, distributed sound through the ceiling speakers. Audio-Video-Technology Systems Integration Specialists
MCCCENTER Control panel side Faceplate side
Face Plate Detail • Top section: 220V Power Receptacle. • 2nd from top: One video input, L/R audio inputs (Line 2), and one audio output. • 3rd from top: VGA input and audio input (Line 1) from laptop. • Bottom section: Two network inputs.
TOPSECTION: Provide 220V power for teacher’s desk
2ndFROMTOP: 1.Video in for DVD or other devices 2. RCA audio line2 input. Volume can be adjusted on 20W amplifier line 2 button. 3. Audio out is for teacher do class and lecture recording through the microphone.
3rd FROM TOP: • 1.Line 1 in is 20W amplifier line 1 input to play laptop music. • 2. Computer for VGA input to display images through the projector.
. BOTTOM SECTION: Network 1 and Network 2 are two network data point connections
CONTROLPANELDETAIL • AUDIO ADJUSTMENTS: • Push the power button to turn on. The green light will be on.
LINE 1: Adjusts the volume from the laptop. Be careful not to play the sound too loud or other classes will be disturbed! • LINE 2:Adjusts the volume from any audio source connected to Line 2. • Speaker Output: The volume from each pair of speakers can be • independently adjusted, if necessary. Normally adjusted fully clockwise. • Base-Treble: Adjust for personal preference and room acoustics.
WAB - “CATS” Latest Version Learning Begins withHearing! (optional) Teacher Student
THE SOUNDS WE HEAR SOMETIMES HAVE GAPS…. Walk Walks Walked Walking Walk Walk - s Walk - ed Walk - ing
PANASONIC A+ ASSURES EVENLY DISTRIBUTED SOUND TO ALL STUDENTS!
Panasonic, receiver, mixer, and 20W amplifier. WX-LA20/CH Panasonic Ceiling Speakers
AMPLIFIER INSTRUCTIONS • MICROPHONE SECTION:: • Turn on by pressing the power button. • Set MIC. 1 Signal control to 4 (Teacher’s microphone) • Set MIC. 2 Signal control to 4 (Student’s microphone) • Adjust bass and treble as desired, mid settings works well. • Set Volume as desired level. Never too loud for the students or adjacent classrooms!
AMPLIFIER INSTRUCTIONS • AUDIO INPUT SECTION: • Line 1: Laptop. Set between 3-5 • Line 2: Other device like an Mp3 player. Set between 2-4. • Speaker Output Levels: full clockwise position.
TEACHER MICROPHONE INSTRUCTIONS • Disconnect microphone from charger. • Place over neck about 15cm (6”) below chin. • Press [PWR/MUTE] button for over 1 sec. • The power indicator (BATT) on the microphone will light. • - Green: Power is on. • - Orange: Power is on, but low-battery • - Red: Very low battery and will stop working • soon. Charge battery or use fresh battery. • - No Light: Power off. • - Flashing Light: No matter what color, the channel is • wrong or there is a problem. • 5. Talk to the class using normal voice.
TEACHER MICROPHONE INSTRUCTIONS (Con’t) • 6. Adjust microphone volume so that the sound • is audible for all students, but not loud. • 7. To make minor volume adjustments, press [SELECT] • The following indicators will light. • [OWN] your microphone • [OTHER] other microphonethat is plugged in • [LINE] any external audio source plugged in • Press [▲/▼] buttons to adjust the volume. • To MUTE the sound press the PWR/MUTE button quickly. A • blue light) indicates mute is on. • 10. To stop MUTE, press the PWR/MUTE button. The microphone • will shut off automatically after 5 min in MUTE mode.
STUDENT MICROPHONE INSTRUCTIONS • Disconnect microphone from charger. • Turn microphone on. • GreenLight: Power is on. • OrangeLight: Low-battery • RedLight: Very low battery and will stop working soon • Charge battery or use fresh battery. • No Light: No power. • Flashing Light: No matter what the color, the channel is wrong or there is a problem. • 3. Hold closely and talk in normal voice, not too loud to disturb other students or adjacent classrooms.
USING MICROPHONES WITH OTHER AUDIO SOURCES Plug any audio source into “audio in” on microphones and enjoy wireless music.
NEW! RECORDING LECTURES USING LAPTOP! Audio out from the amplifier is now connected to Laptop. Use the laptop to record teachers’ lecture or students’ presentation. 6. Audio files can be emailed to students who missed class or want to review a lesson. Files can copied to USB memory sticks and given to students. 8. Files can be played back through the ceiling speakers.
CHARGING THE BATTERIES • Turn off microphone. • Plug charger into mic. • Careful: DO NOT FORCE! • Hint: Look for on the charging plug and line this side up with the “3.3V In” printed on the microphone. • “CHG” LIGHT: • RED - Charging • OFF - Full or no battery • FLASHING – Bad battery or • other problem
SUMMARY Classroom amplification is important for student learning. The CATS system is now integrated with the standardized classroom. All audio will play evenly through the four ceiling speakers. Recordings of lectures is now possible. Please contact the ICT Help Desk if you have any problems or questions. Smart Solutions company will always be available to help with any problems. PLEASE REMEMBER, DO NOTADJUST AUDIO TO LOUD! It is not good for the students and it is very distracting to students and teachers in adjacent classrooms! If the teacher can hear his/her voice, then probably it is too loud!
Thank You! 谢 谢 聆 听!